20 December, 2010

Have Yourself a Very Grumpy Christmas!

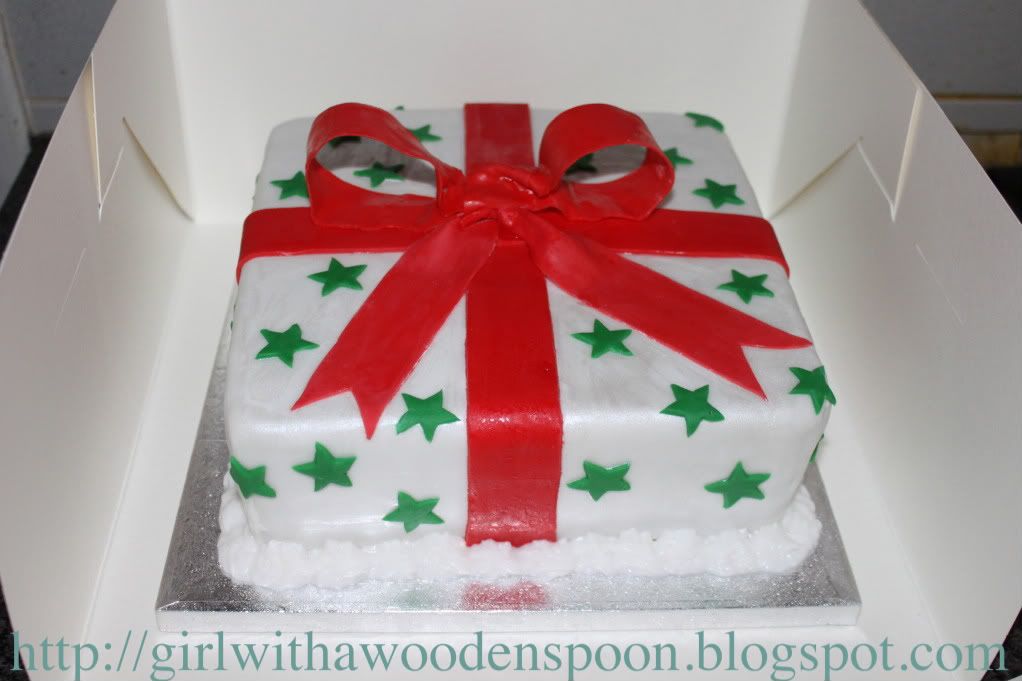
My christmas cake is finally finished! I say finally, because I started making it back in November. That's the beauty of fruit cakes. I'm sure you already know this, but, like wine, they keep better the longer you have them. That's why the top tier of a wedding cake is traditionally fruit so the newlyweds can keep it and re-ice it for their first child's christening.
Anyway, I'm rather skint this festive period. So what better present than a home-made christmas cake?! The lucky recipient is my boyfriend's Grandad, who they lovingly call "Grumpy." He was supposed to visit relatives in Ipswich this christmas, but due to all the snow and whatnot, he's staying in Plymouth. Shame really, seeing as he could've shared the cake with everyone up there!

Would you like to know how to make it? Okay, you'll need:
- 12oz Self-Raising Flour
- 1/2 tsp Salt
- 1 dsp (dessert spoon) mixed spice (I used Christmas Spice, available from all supermarkets)
- 1 tsp cinnamon
- 1 tsp nutmeg
- A lot of fruit. I didn't measure my quantities. I'm quite bad for that. But the recipe I followed recommends 1lb per fruit i.e. ground almonds, currants, glace cherries, mixed peel (lemon and orange), raisins and sultanas.
- Rind and juice of 1 lemon
- 12oz Butter
- 10oz Dark Brown Sugar
- 8 Eggs
- 8 tbsp Brandy

1) Butter a deep cake pan. I used a square 10in pan. Line with greaseproof paper. Brush the paper with melted butter.
2) Tie a double layer of brown wrapping paper around the OUTSIDE of the cake tin, and make sure it's high enough to protrude above the rim. I don't know how, but it prevents the fruit cake from burning.
3) Sift all dry ingredients together. Stir in your fruits.
4) In a separate bowl, cream the butter, sugar and lemon rind.
5) Beat in the eggs, one at a time.
5) Stir in the flour and the lemon juice, and 4 tbsps of brandy to this mixture.
6) Add this to the dry mixture and stir thoroghly. Transfer to cake tin and level out.
7) Bake on 150'C for an hour and a half.
8) Reduce the heat to 130'C and bake for a further 3-3 and a half hours. Cover the cake with brown paper and fasten with string in the last few hours to prevent burning.
9) Remove from the oven and cool on a wire rack. Turn the cake upsidedown and skewer holes in the cake. Pour in the remaining brandy and seal in an air-tight container until needed for icing.

To Decorate:

- Marzipan
- White Sugarpaste
- Green Sugarpaste
- Red Sugarpaste
- Neutral-coloured Flower Paste
- White Shimmer Powder (Only available from cake decorating stockists i.e. Lawson Shop.
- Trex vegetable fat
- Marmalade
Okay, Trex is AMAZING for cake decoration. If you haven't already discovered it, it's a great, greasy alternative to a tonne of icing sugar when rolling icing and marzipan. It doesn't dry them out, and it's so malleable. All you have to do is rub a bit between your (washed) hands, on your rolling pin and the work surface. Roll away! (I know, I discovered it once I had actually got as far as the green stars, div.)
1) Melt a few tablespoons of marmalade in a pan with some boiled water until you have a runny consistency.
2) Paint this over your cake using a cook's brush. Cover the cake with rolled marzipan.
3) Use cool, boiled water to paint onto your marzipan before transferring your icing onto the cake. Leave to set for a day or two.
4) Mix red icing and flower paste together to create your bow. Flower paste helps icing harden, so it's ideal for decoration. Roll very thinly, and cut strips long enough to cover the lengths of your cake. Create a cross for the ribbon on your cake.
5) Take a strip of icing/paste mix the same width as your "ribbon." Pinch in the centre, and fold both ends together. Take another short strip of "ribbon" icing and wrap around the centre of the bow to hide the folds.
6) I used two plastic cylinders to keep the shape of the bow overnight, then gently remove them once you know they're hard.
7) Affix to your cake using vodka.
8) Paint your cake in a mixture of a tsp of vodka and a touch of white edible shimmer powder. This creates a nice pearly effect, and also a glue for your stars.
9) Cut lots of green star shapes using a small cutter and stick to the cake straight away.
10) Finish with royal icing piped around the edges.

Happy Baking and Happy Christmas! x

15 December, 2010

50th Birthday Cake

I was naughty with this one. I cheated :O
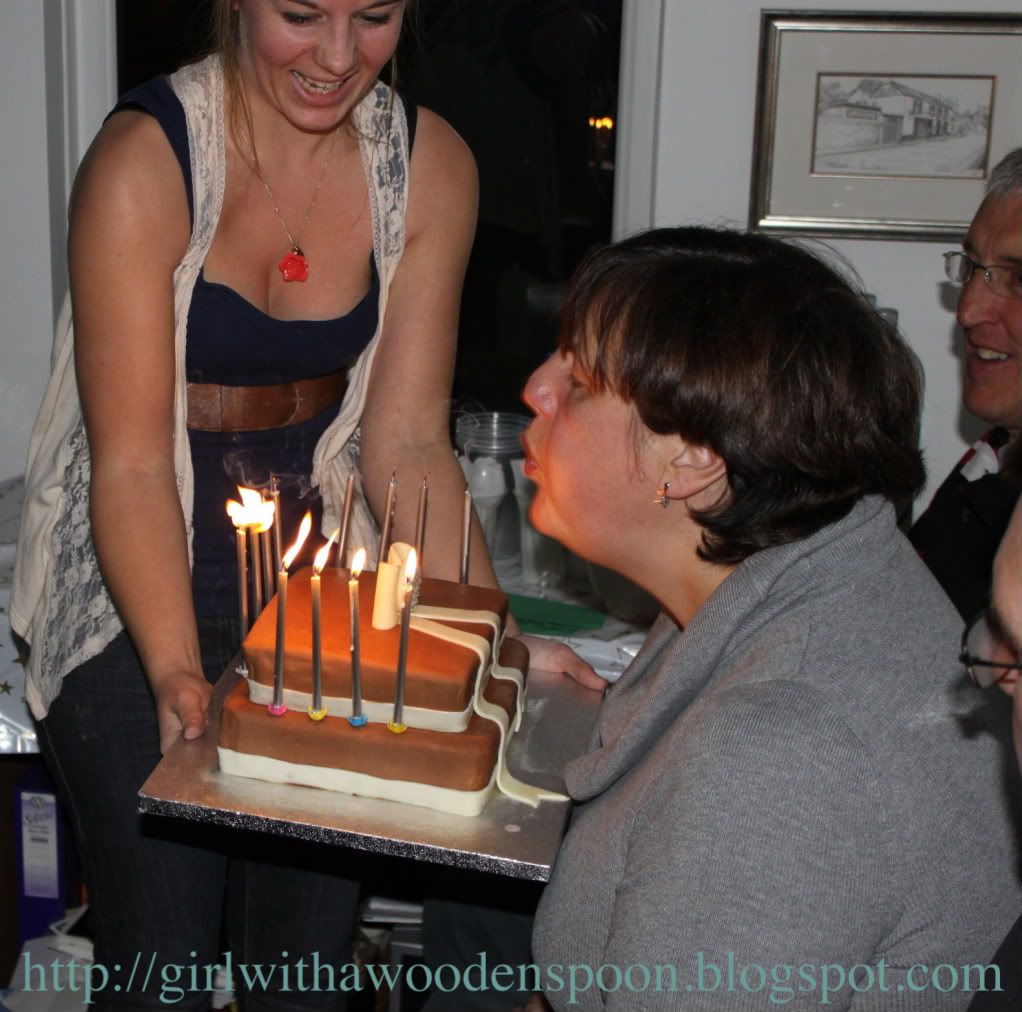
This post is not about the specific ingredients of the sponge, but rather about how I got on with the modelling chocolate which I used to cover and decorate my mum's two-tier birthday cake. I bought a dry Devil Food Cake mix from my local cake supply shop - I know it's naughty of me to cheat, but the lady who owns the shop adds preservatives into the mix so the cake has a longer shelf life. This cake took me aaaaaages to finish, so it was a good thing that it lasted so long. Using that mixture, you can bake up to 12 days before whatever celebration you need the cake for - it's ideal, and totally delicious!!!

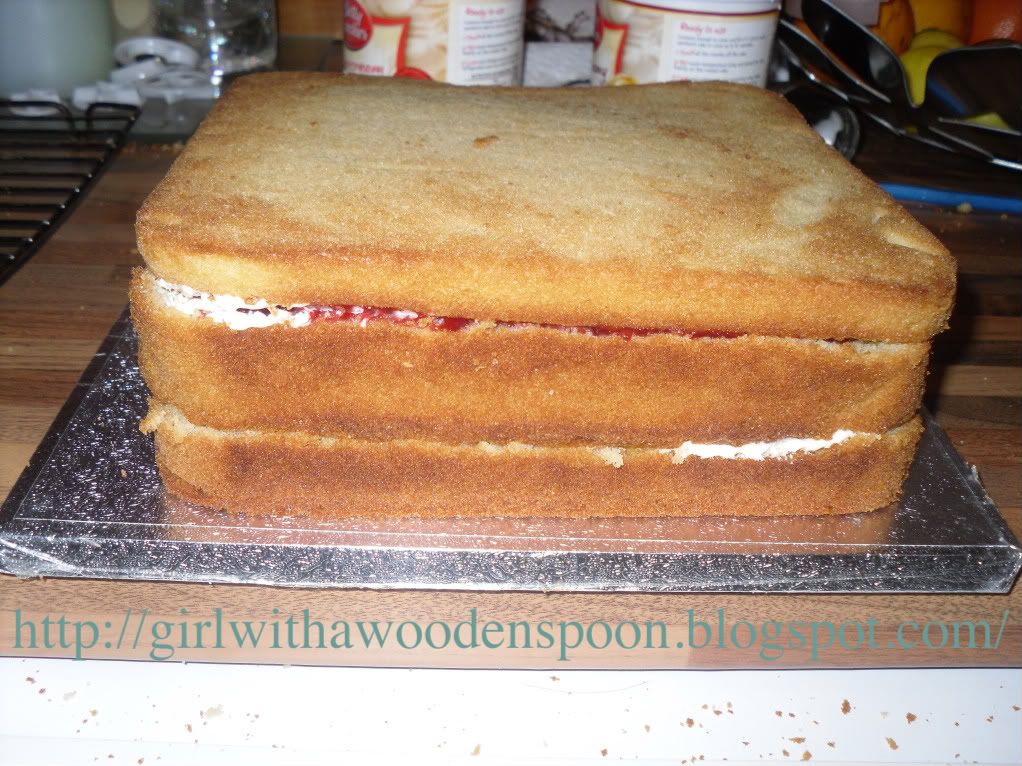
This is what the cakes turned out like before covering, and I measured my only square cake tin wrong and went out and bought another tin exactly the same size, so had to cut down the second tier veeeery carefully to add on top:
To cover the cakes, again I cheated. I bought chocolate frosting from the same cake shop - again because of the preservative qualities it has. I covered both cakes in the frosting, and then covered in rolled white modelling chocolate. To make this, you will need:
- Squire's Belgian White AND Milk Chocolate Coverture - 2 x 300g packs for each flavour
- Any good quality rolled white icing - 600g

You need to knead (haha) both icing and chocolate together until they have merged completely. This will take some time, and because of the bulkiness of the two together I broke them into smaller pieces, then merged into larger blobs once mixed well enough. The cocoa butter in the cocoform will make the mixture greasy, but in a good way, so you get the rhythym going soon enough.
Roll out like you would normal icing, with a little icing sugar for dusting. Cover each of the cakes in white chocolate first (remember, if you ice a normal cake you always do two layers, or one layer of marzipan and one of icing - this is the same principle: use two layers of chocolate) and then repeat the same steps with Milk Chocolate Coverture to cover. A little water is enough to make the milk chocolate stick to the first layer of white, do not layer with more frosting else it's too sickly!

To layer the cakes, you will need two 30cm wooden or plastic cake dowels. Cut these down to size so that they are the depth of the first layer, just slightly higher - about 1mm will do. Roughly add some more frosting onto the underside of the second tier, but not completely to the edges - the frosting will spread out too much else. Insert the cake dowels at four points in the first tier, where you know the second tier will cover them perfectly. Where you place the dowels will depend on where you want the second tier, so make sure you do this very carefully. Then simply place the second tier on top of the first, and voila!
To make the white chocolate ribbon, I used some more cocoform mixture that was left over from covering the cakes. If you need to make more as necessary, repeat the earlier steps. Roll out to a thickness of about 2mm, and cut long strips for your ribbon tails. Cut a 'V' at each end to make them pretty. For the actual bow, I used a circular cutter and cut a brooch shape out. Using piped royal icing in small peaks, I attatched silver edible balls to give it that blingy look. Again with extra white cocoform, form a rough oval circle with your hand and a rolling pin. Join the two pointy edges together and pinch to stick. Repeat with a second oval, and these are the two parts of your bow. Again using royal icing, attatch the brooch into the middle of the bow and attatch with water to the ribbon tails on your cake. Hey presto!

I can't remember if I already mentioned this, but the final outcome of the cake changed considerably since the first time I mentioned it on here. I said I'd be using chocolate cigerellos, however they couldn't be ordered in time for my mum's birthday, so this is what we did instead!

Happy Baking x
What I've been up to...

Hi y'all!
So as my mother just asked me why I wasn't at Uni today, I forgot to mention to her we've already broken up for the christmas holidays so that means I'm baaaaack for now :) At least just to tell you what's been happening :P

I still have a ton of work to do over the break, including a fashion wedding photography shoot and starting my dissertation (eek!!) oh yeah... And christmas! Normally I'm the most organised person you'll meet. I carry my diary with me everywhere, and am constantly making lists of what I need to do/buy/save for. Yet the Big Day is upon us next week and I'm barely there with christmas presents. I'ma be a busy bee over the next few weeks!

But because it's christmas, I decided I needed to come back fairly quickly - I've got another cake to show you soon. A christmas cake! I'm also thinking of making mince pies as home-made presents for people who buy for me but I just can't afford to buy back for, so although they're very simple I'm attempting to make pastry from scratch for those - and you know how I feel about pastry. Hmm. We shall see!

So in October this is what I did...
And then in November I celebrated a special friend's 21st...
And also rocked out to one of my favourite bands, Avenged Sevenfold...
And of course, as mentioned beforehand, it was Mummy's 50th. Read about that later though :)
Anyways so that's what's been happening, flick over to my newest post to find out how the 50th Birthday cake went...
Happy Baking x

19 October, 2010

"We were on a break!"

I know I don't blog often, and as stated before, you guys understand that it's due to financial issues that very often occur with baking and big culinary projects. I always like to include posts on things I'm really proud of creating, so of course I'm not going to blog about my daily dinner routines - I want you to see lovely cakes and cookies all over my page :) Obviously I can't bake six times a week or whatever, and with work and Uni it's very hard to make time for it all.
This added with the mounting academic work I have to accomplish in a couple very short months has meant that I have to come to a desicion about my blog. I'm taking a break. I'm sure you won't miss me, seeing as I only have a very small following, but I do appreciate your interest in it nontheless. I'll still record my commissions and stuff over the next few weeks and blog about it when I come back,  but I definitely think that I need to get my head down and sort out my other work first. Blogging is a choice, not a necessity.

So with that said, ciao for now guys, be back soon :)
Happy Baking x

15 October, 2010

TV Reminder: Couture Cakes!

One of the author's of my recently reviewed cake design book, Mich Turner (Couture Wedding Cakes) has her own cake show on Wedding TV every Sunday night at 6:30pm. I've recently errr... stumbled... across this channel and one of the adverts featured Mich and I was like :O have to watch that!
It looks like it's going to be a really good programme for anyone who needs video tutorials on cake craft, and she emphasises the point of accessorising your cake with everything else in a wedding e.g. your tiara, your flowers, your colour theme. Definitely be watching this come Sunday night, might even do a little follow up on it. Anyways, just thought I'd let the cake lovers of the blogworld know about this :)
Happy Baking x

Disclaimer: I take no credit for the above image, sourced from Google.

13 October, 2010

Red Velvet Cupcakes: Not feeling the craze?

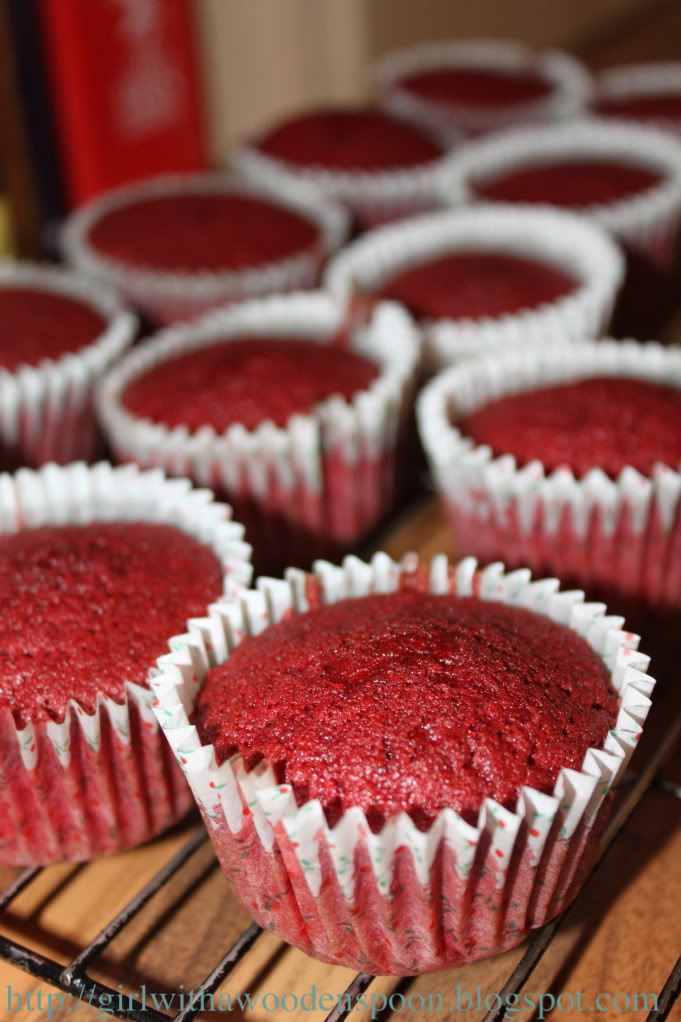
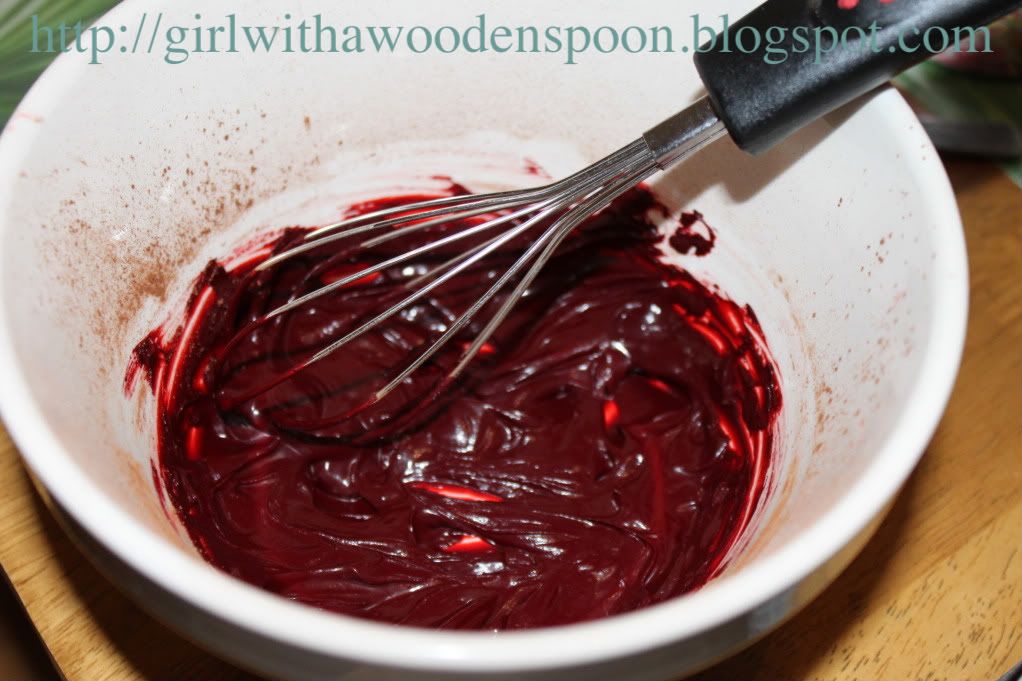
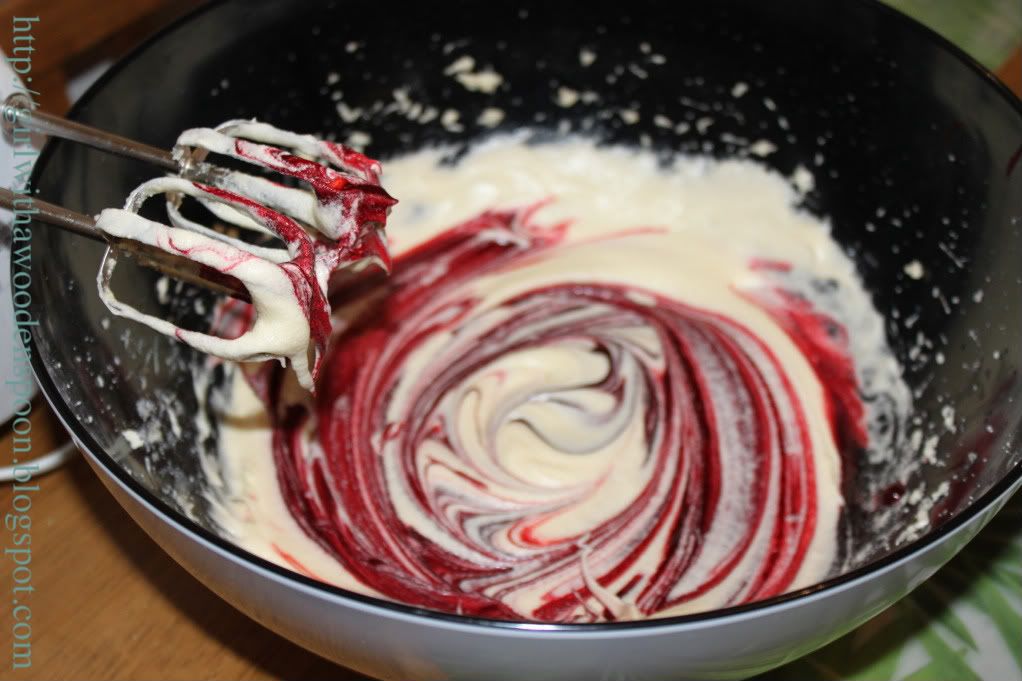
So in light of starting my dissy year at Uni I have succesfully procrastinated for another evening by baking some new flavour cupcakes - Red Velvet. All the cupcake blogs I follow have been raving about these, and even Brooke from One Tree Hill wanted them as part of her wedding cake (ahh I love it :P). Simply put, they are the usual recipe for vanilla cupcakes, but with cocoa powder and red food colouring. I'm not feeling it. I was expecting some mind blowing taste explosion to happen but my parents and I were left feeling disappointed after a taste-testing sesh. Maybe it was the recipe I used. Maybe it was my oven. I don't mean to toot my own horn but I'm one of the best cooks in my family, so I don't like to blame myself :P
Cocoa Powder and Red Food Colouring "Paste," this was added to the cake batter.
Anyway, I won't tell you the recipe. I think it was a ridiculous take on the basic vanilla sponge method. It even told me to add a mixture of bicarb of soda and white vinegar (and we all know what happens with that, we all used them in some sort of volcano project at school). Anyways, they do look good, I'll give myself that. But I won't be trying them again until I taste an amazingly good Red Velvet cupcake, possibly from a shop. I'm sure it won't take long for the UK to cotton on to this American craze.
The pretty pattern the cocoa paste made once swirled with the cake batter.
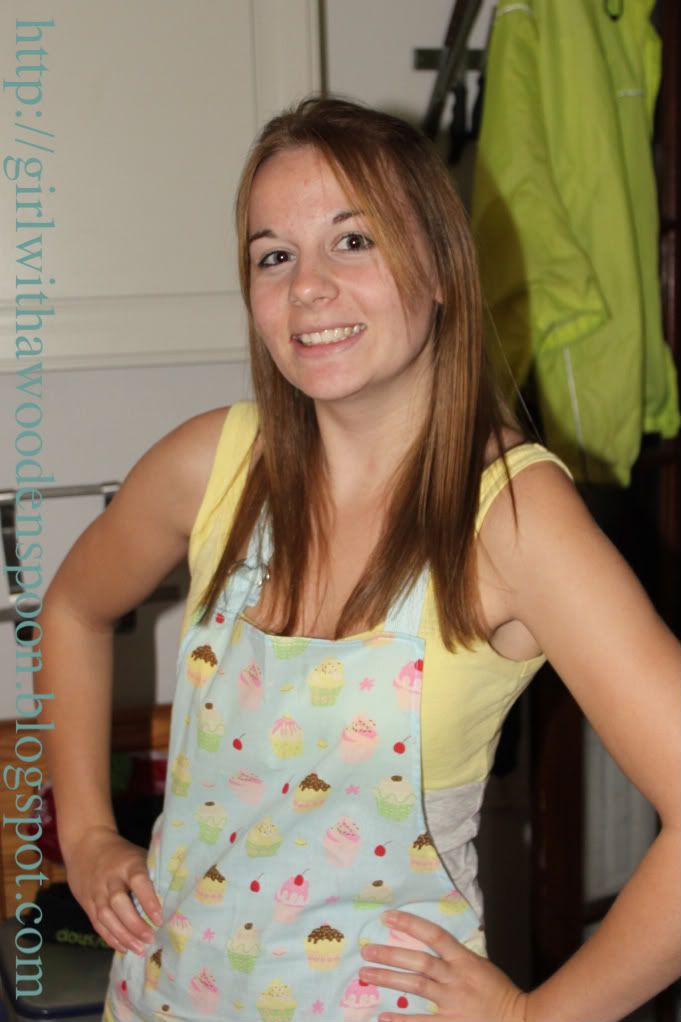
Oh and one of my best friend's, Nikki, bought me a little present the other day - my new apron! How cute is that?!
Anyone else tasted some great/not so great Red Velvet Cupcakes? Let me know!
Happy Baking x

11 October, 2010

Couture and Romantic: Book Review

Ahh so sorry for lack of posts, I've been out of money for a while and anyone who knows anything about baking and cakes knows that a lot of money goes into all those little details. So for now I thought I'd do a quick review of two books I've recently acquired for my cookbook collection. They are exactly the sort of cakes I'd love to delve into and get proper stuck in but for the time being all I can do is commissions :( (Don't worry, I have a fabulous chocolate cigerello tiered cake coming for my mother's 50th in a month! Oh and I'll probably do some sort of Halloween themed something-or-other come payday!)
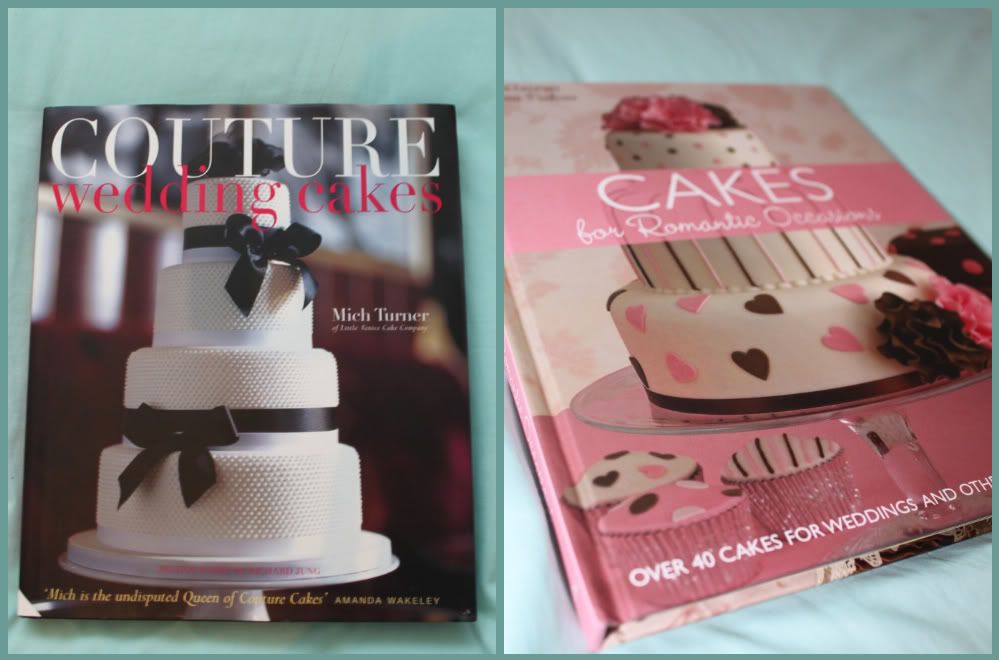
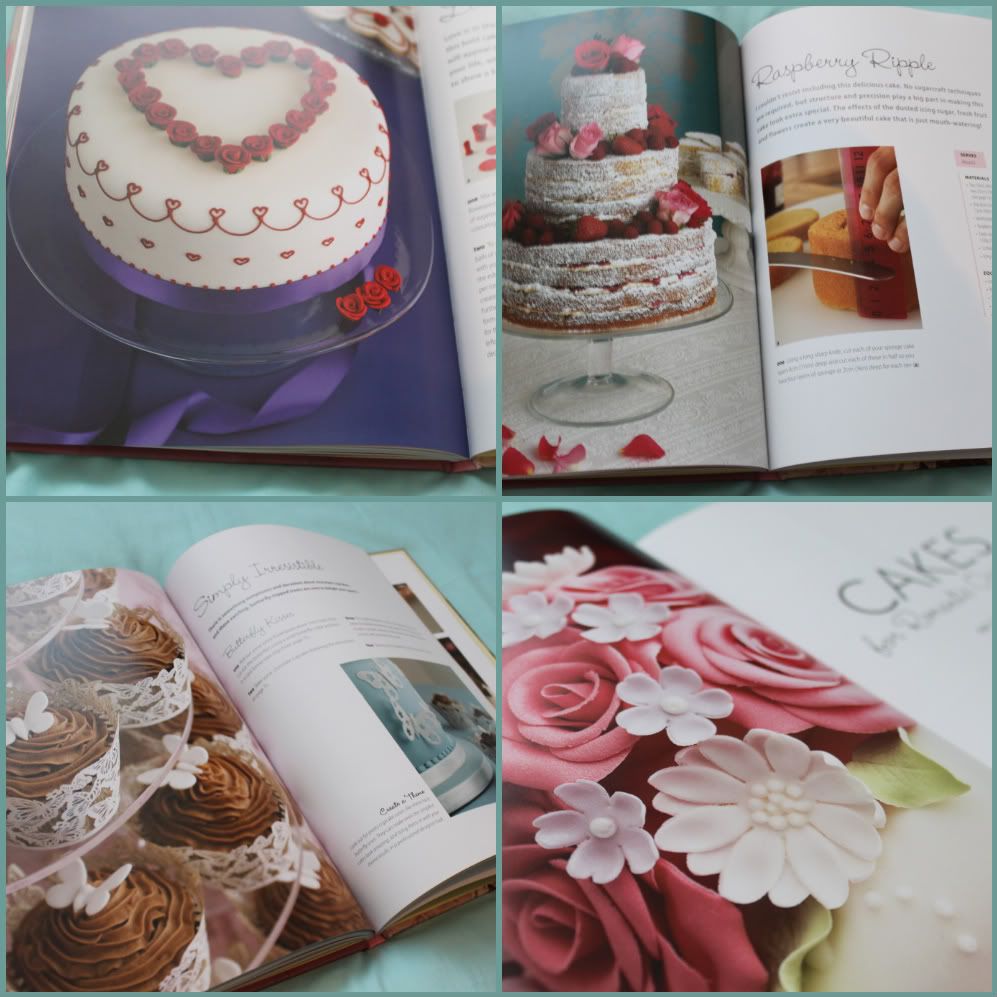
So my new books are "Cakes for Romantic Occasions" by May Clee-Cadman and "Couture Wedding Cakes" by Mich Turner. Both authors are reknowned cake designers and they have a fabulous array of cakes inside.
Couture Wedding Cakes:
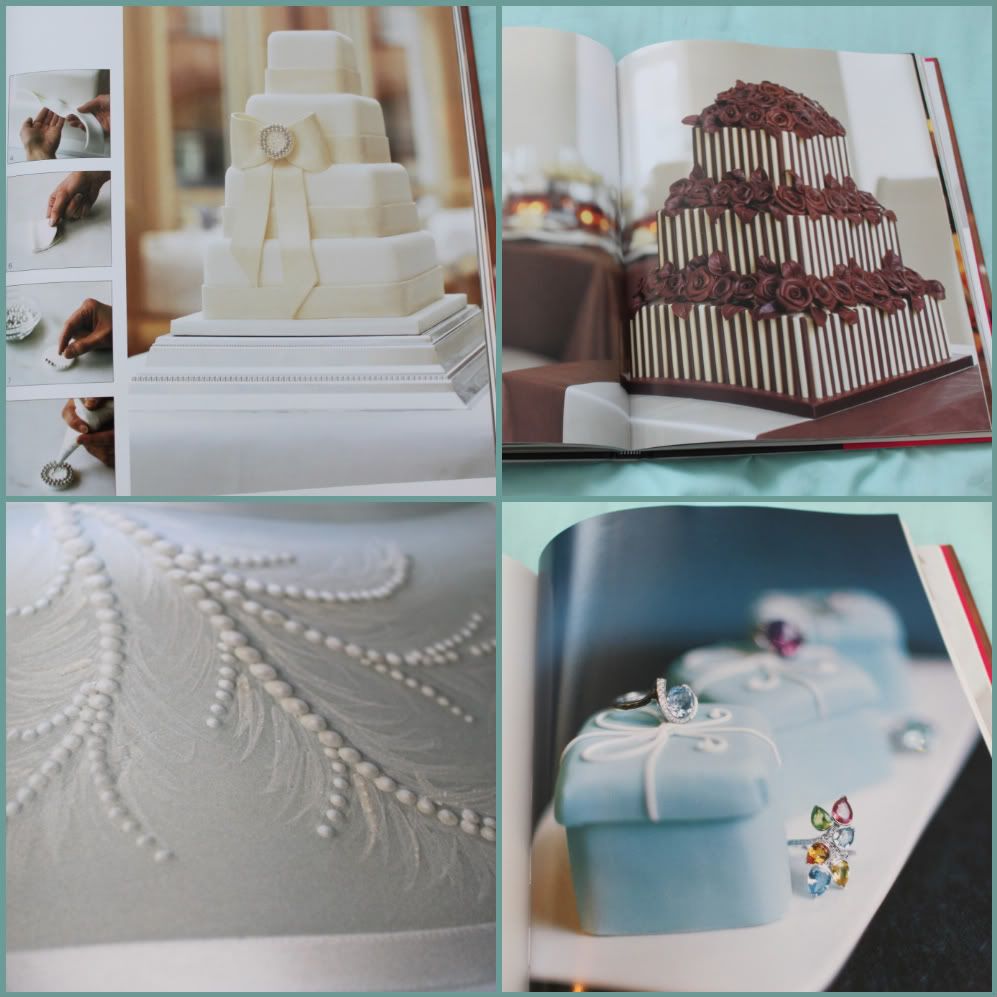
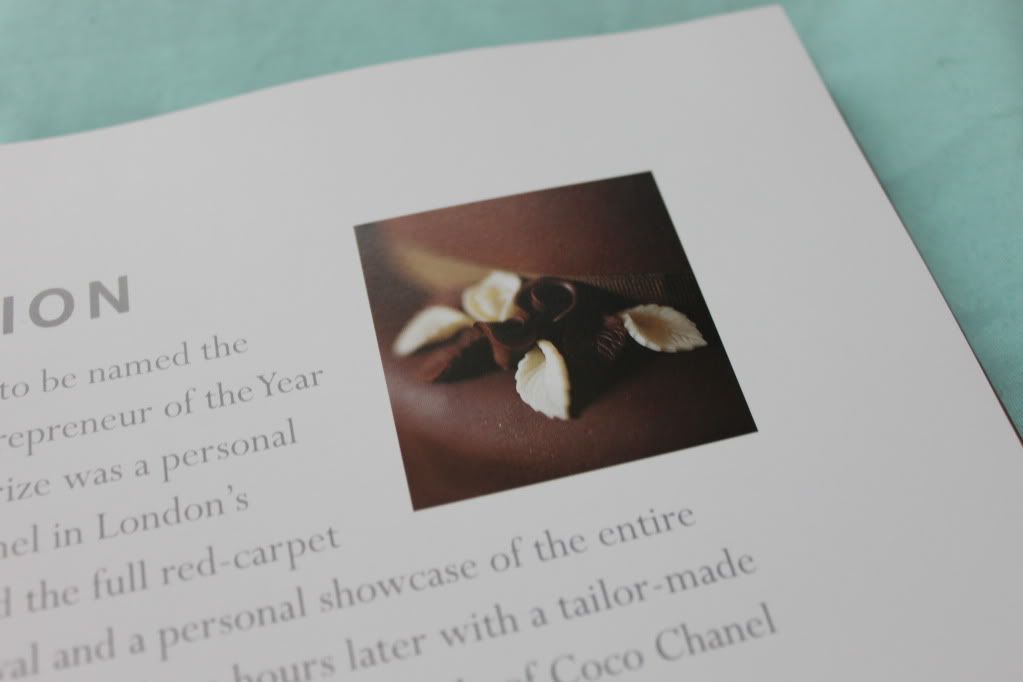
Mich Turner has designed some of the most intricate and amazing cakes I have ever seen, gaining inspiration from top notch designers such as Amanda Wakely, Tiffany's, Boodles (sigh!) and Chanel. She founded the Little Venice Cake Company in 1999, which stocks both M&S and Harrods.
The chocolate monochrome cake in the top right is what I will be attempting to make for Mummy's birthday - ahhh!! And I love the detail on the bottom left cake, that's actually painted on to give a feather effect - gorgeous!
Cakes for Romantic Occasions:
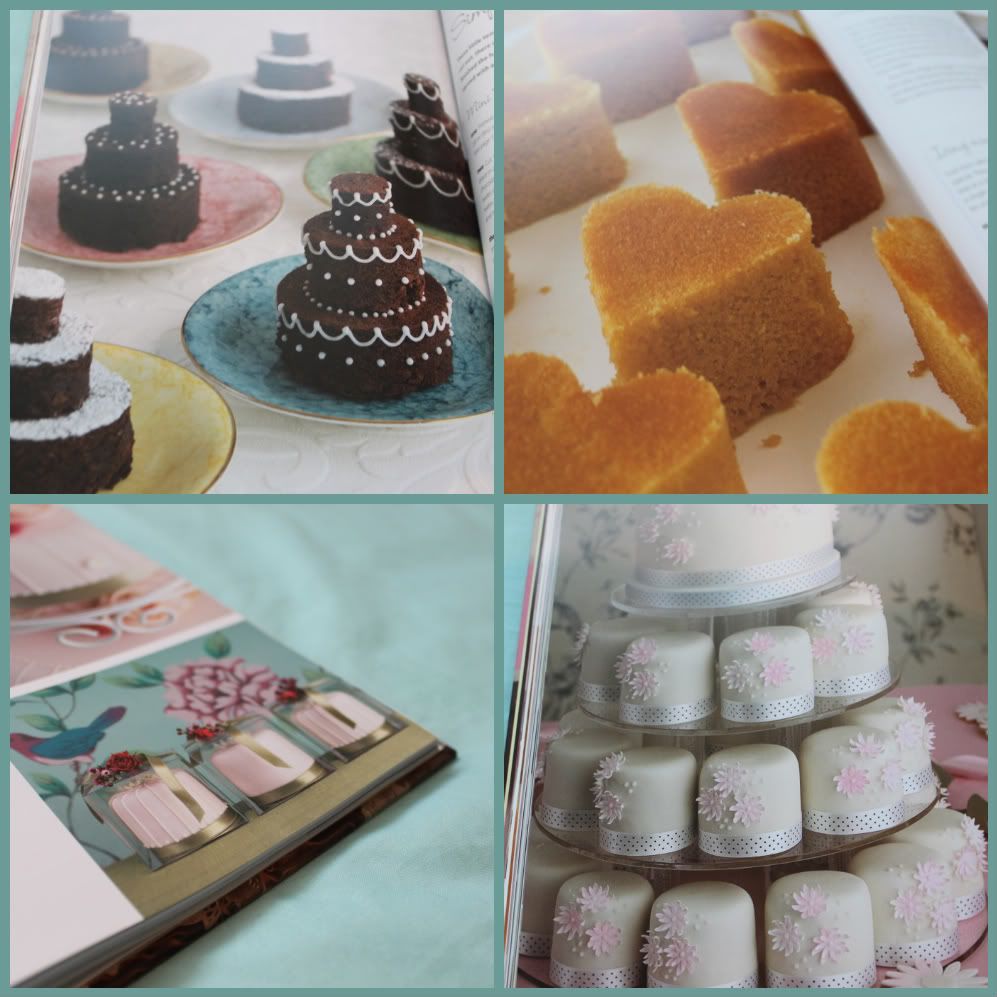
This book has really hit the nail on the head for a new craze in wedding cake design - mini cakes! I absolutely love them and they are so versatile, it's you wedding cake, dessert, and a party favour all rolled into one! Couture Cakes touched on them, but I really think Ms. Clee-Cadman is on to something here. I'm being commissioned to recreate one of her cakes for one of my best friend's wedding, and it's so easy to just adjust the colours to match in with her wedding theme. Get a load of these beauts:
Even my boyfriend, Jim, thinks that chocolate brownie mini triple-tiered wedding cakes would be adorable for our own special day :P And below that, you can see how amazingly little detailing can create such a perfect wedding favour. A small clear box, ribbon and a dried posy makes it look just that extra bit special.
The top right Raspberry Ripple cake looks to diiiiie for, and look - my cupcake wrappers have hit the trend in this book!


Here's a sneak peek of what's to come soon - modelling chocolate: ever seen a beautiful sugar flowered arrangement on a cake? Try that, but chooooocolate! I'll be trying my hand at this baby to practice for the 50th birthday cake.
That's all for now folks.
Happy Baking x

Disclaimer: All photographs in this post are re-taken images from the books previously mentioned. I take no credit for any of the images in this post, they are simply there to help advertise the books I have reviewed.

16 September, 2010

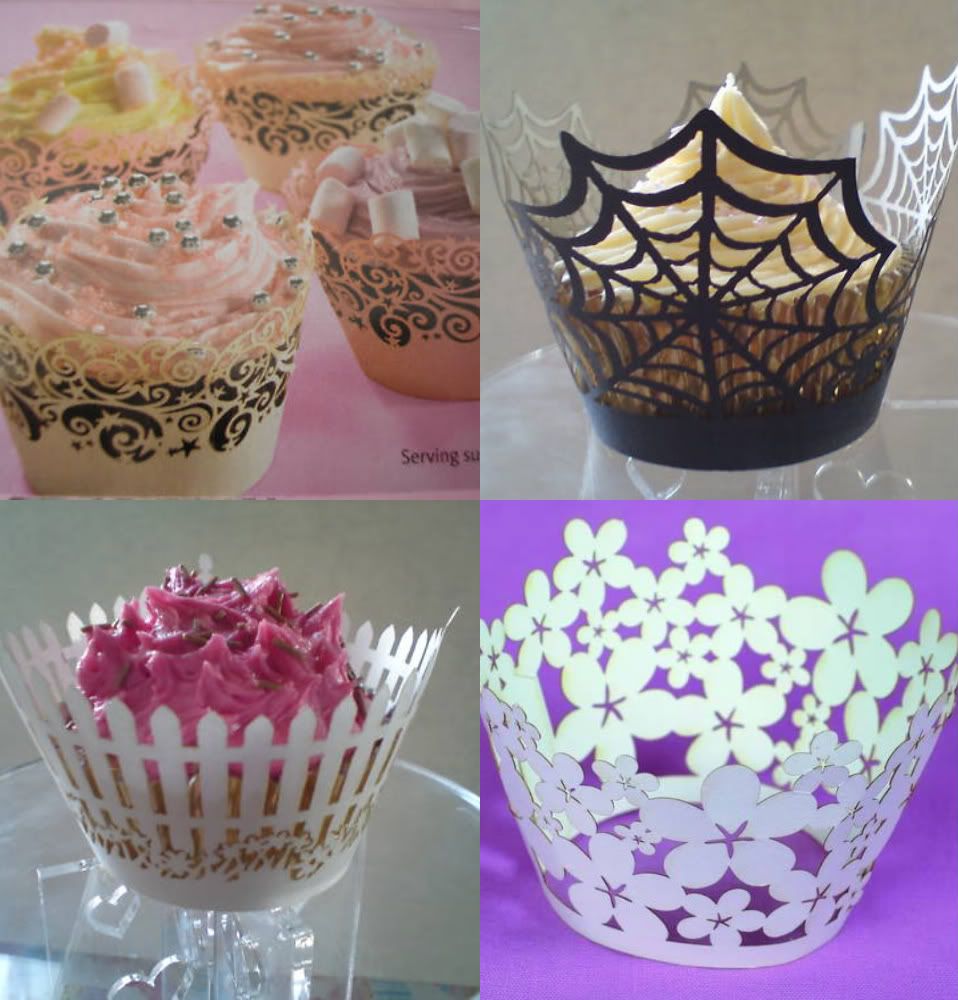
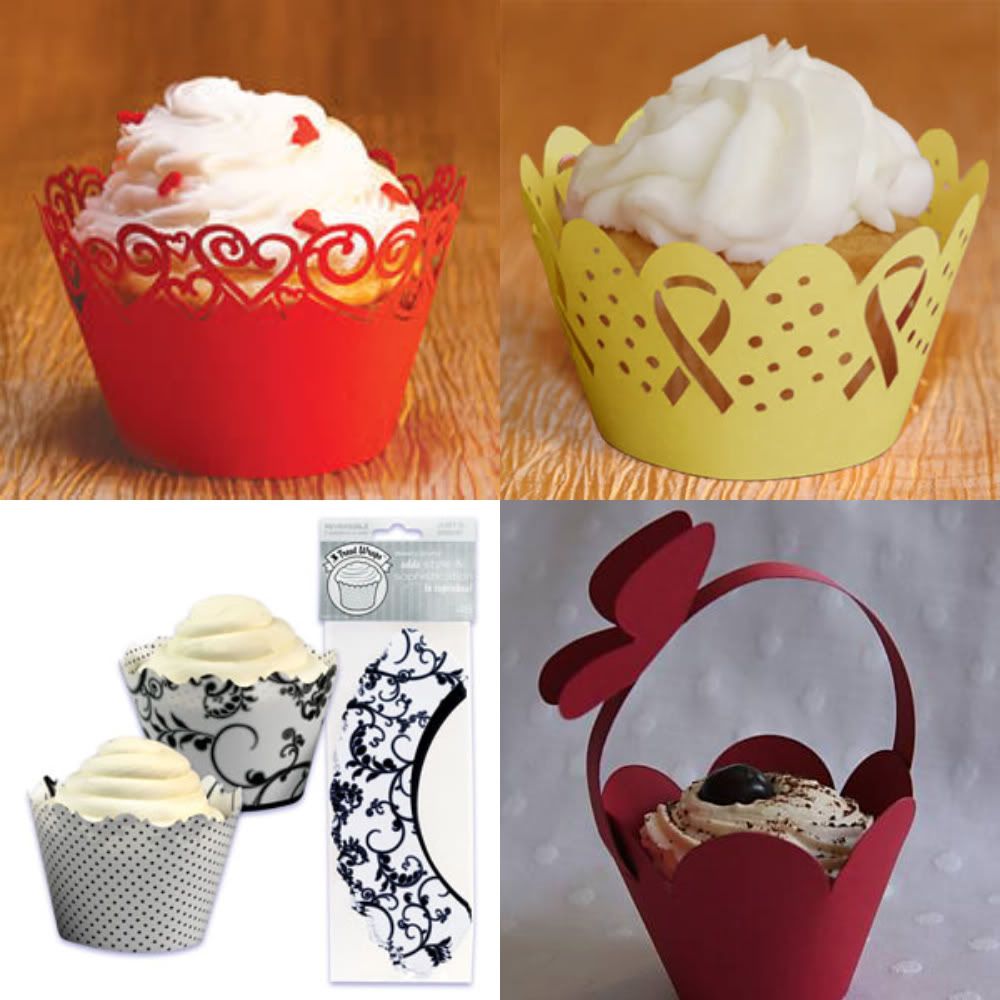
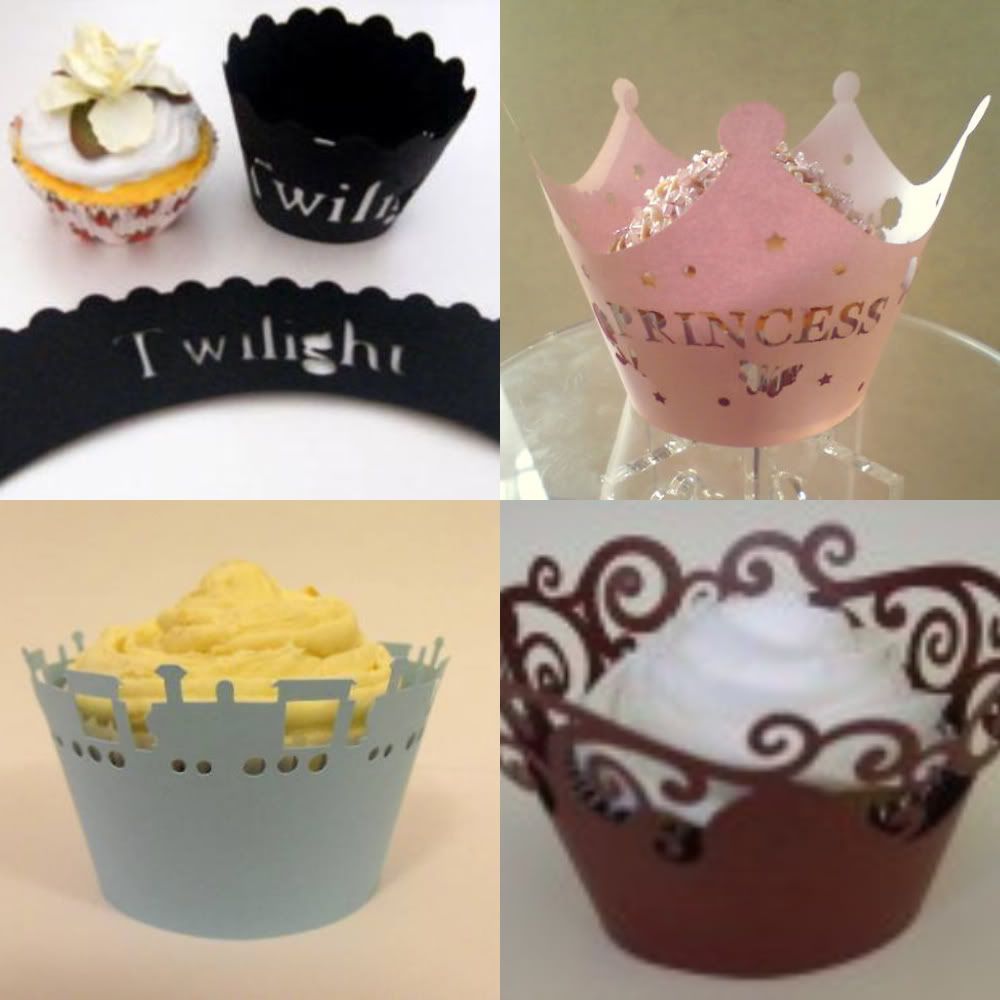
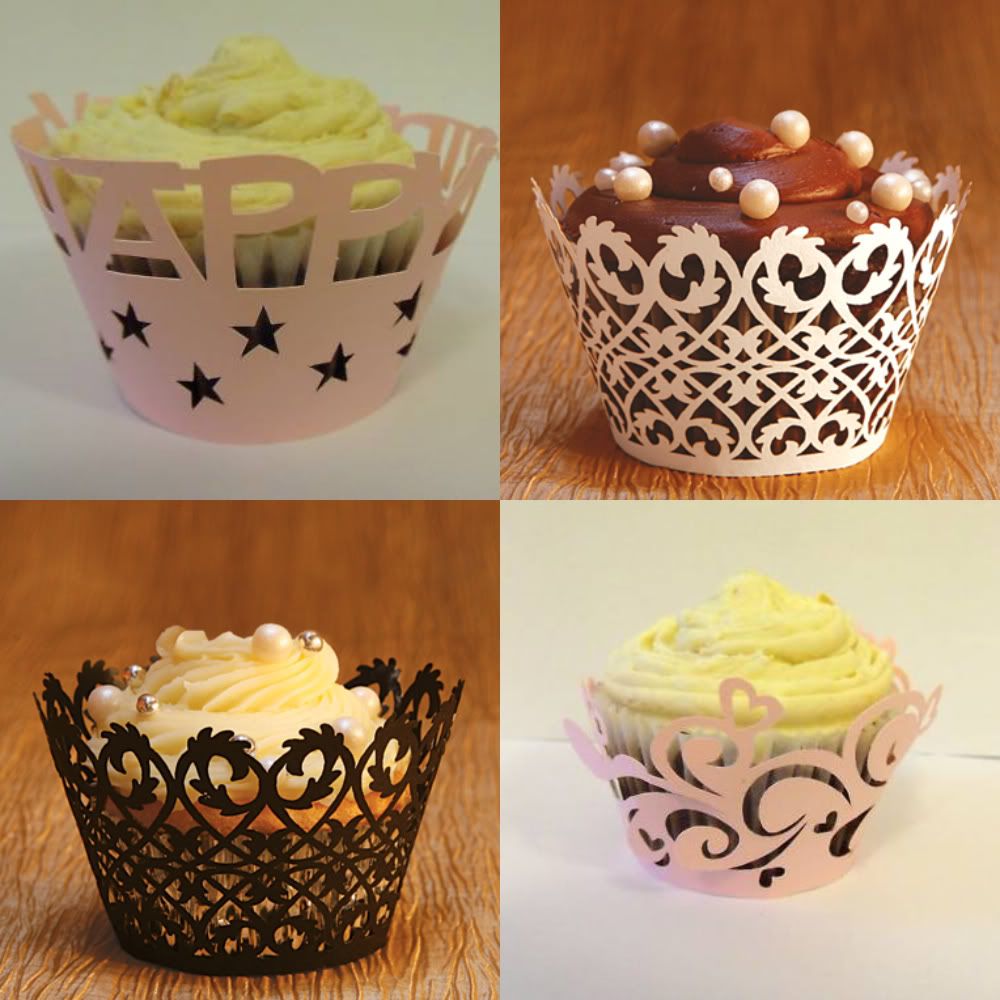
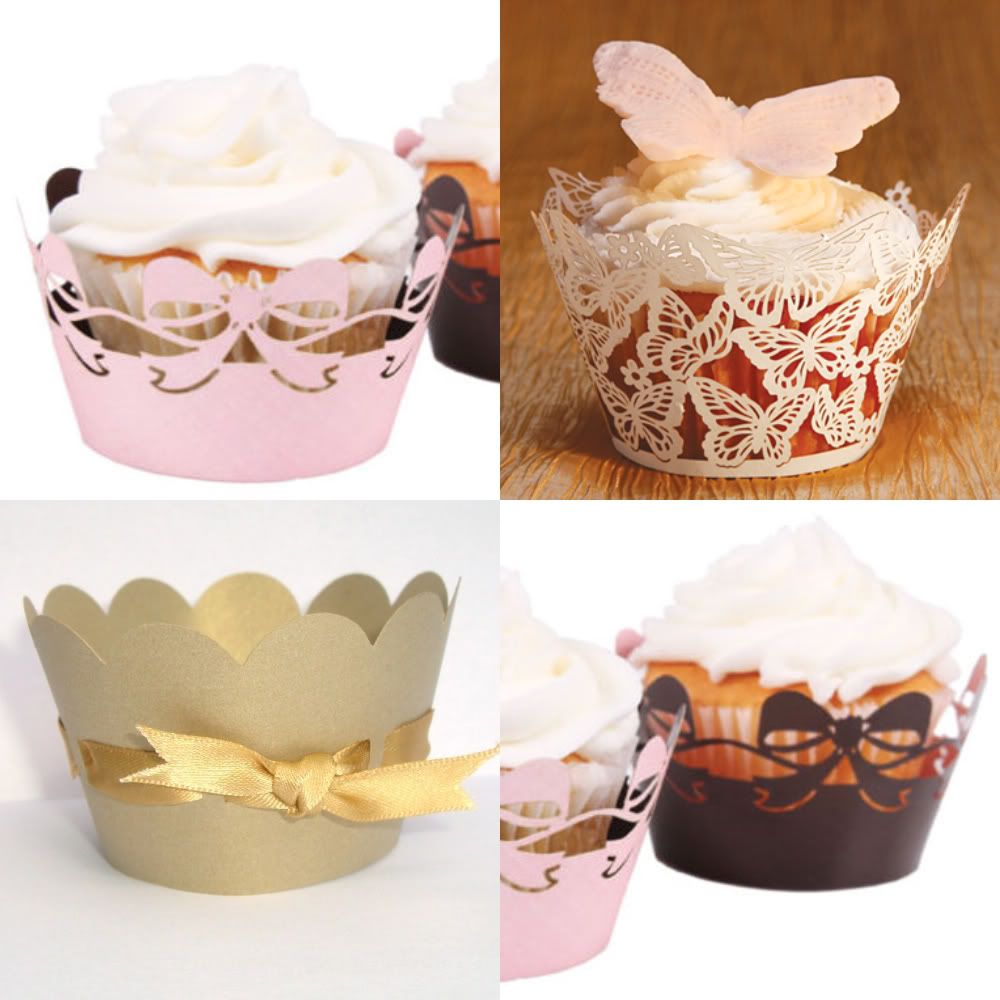
Introducing.. The Cupcake Wrapper

I've just come across these bad boys whilst searching for new wedding cake material, and I have to say, they are absolutely adorable! A little expensive, these Cupcake Wrappers can transform any shoddy looking cupcake into a work of art with a flick of a wrapper. They look set to be a hit with weddings and other special events, take a look at my favourites - there's at least one to suit all... Including baby-boom theme, christmas, Valentine's Day and even Twilight.. I especially love the Picket Fence style - reminds me of being on Desperate Housewives :P
All pictures are courtesy of eBay, where you can find the wrappers sold in multiple packs. Check out Amazon, too, for their range.

Happy Baking x

25 August, 2010

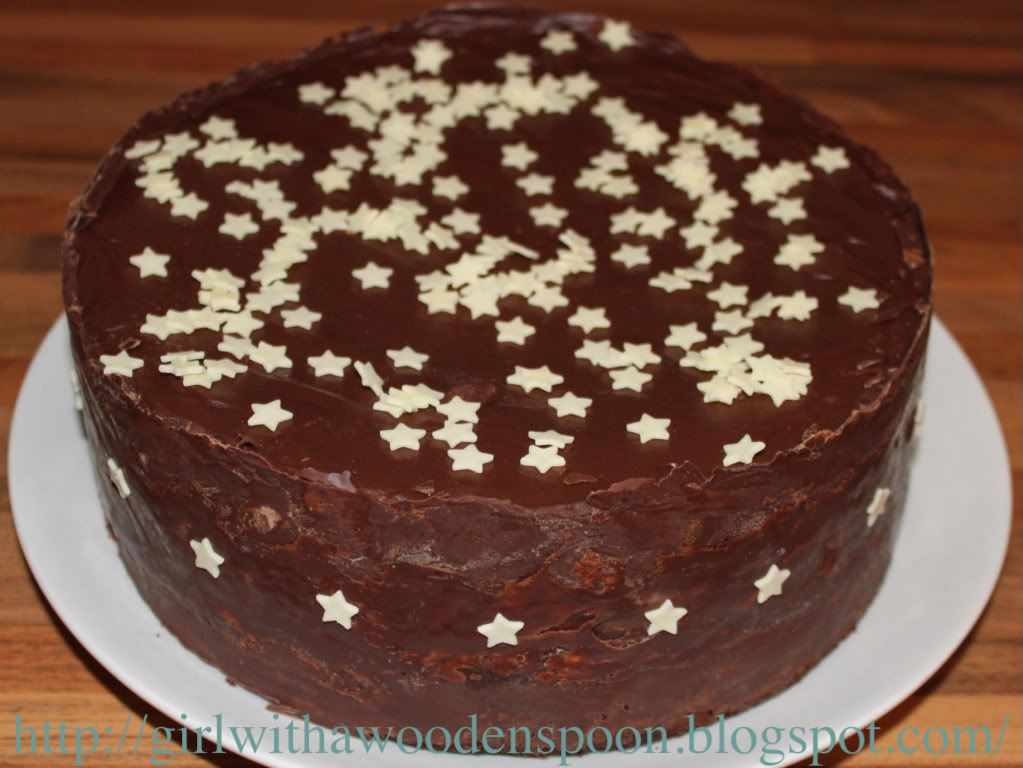
Chocolate Mud Cake

Chocolate. Mmmmm. Can't go wrong with it. I've had a few days off work lately and was really bored so I decided to test out a new recipe from a book I've got: The Home Guide to Cake Decorating - £12.99 from Waterstone's which is extremely reasonable given the amount of information and recipes it gives you on cake design.
There are two chocolate cake recipes; one is just a general cocoa-flavoured one, and the other is the one I've made - Chocolate Mud. I preferred this one, as it actually has melted chocolate in the recipe which makes the sponge a lot more moist - it was like a brownie cake! The other one will give you a drier sponge that you can buy off the shelves.
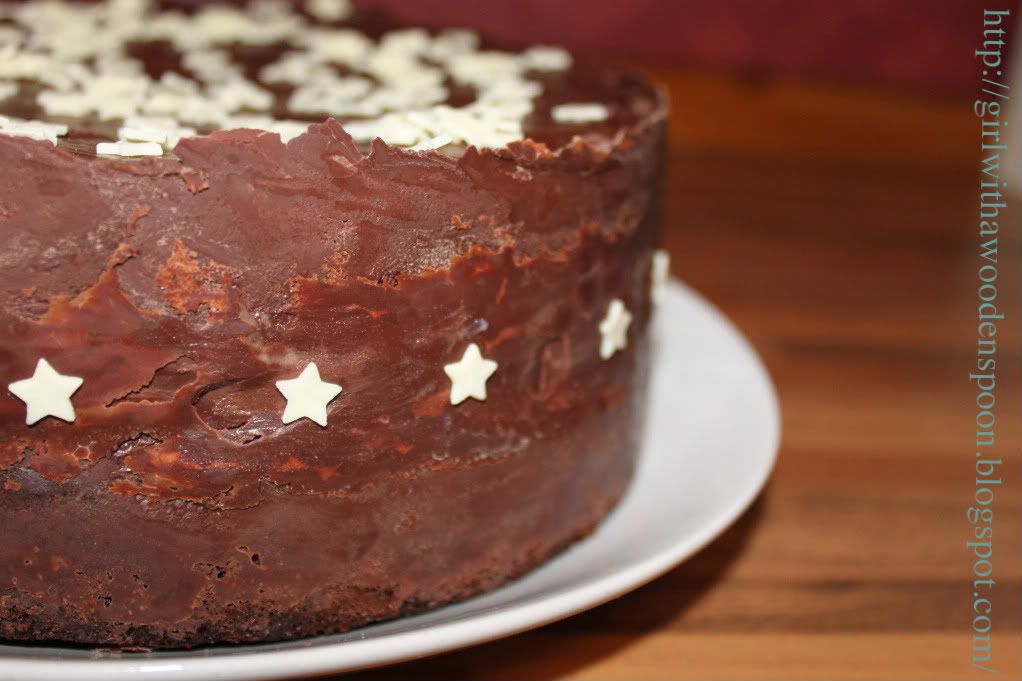
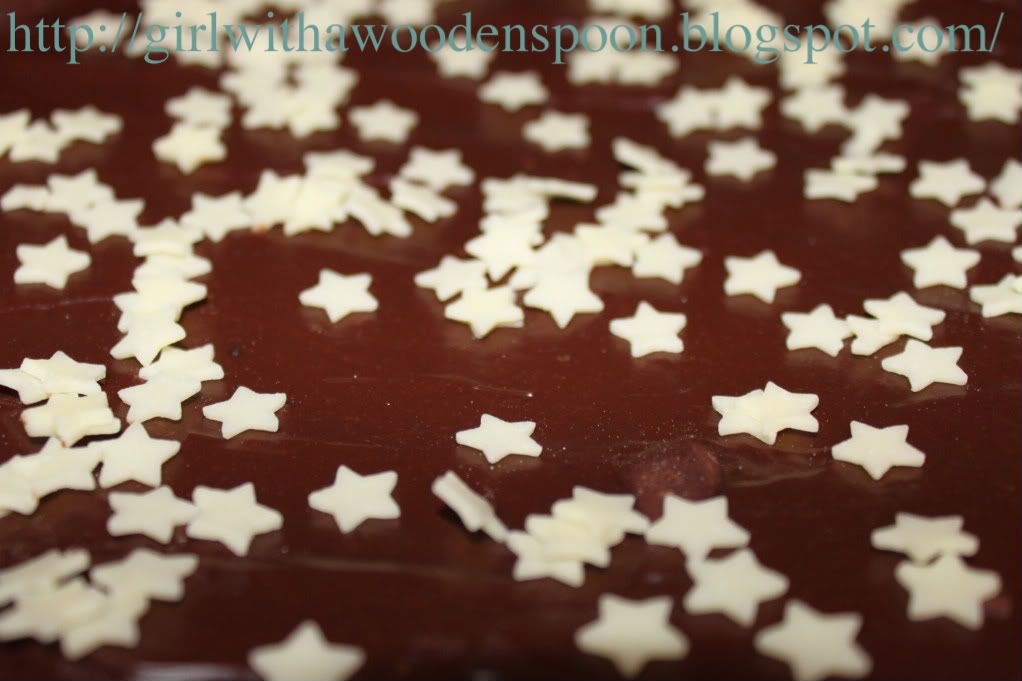
Anyway, it's not a masterpiece, I know. I was just experimenting and thought I'd share with you my ideas and tips. I simply decorated the cake with chocolate ganache, white chocolate stars, and a dark chocolate collar. This is the first time I've attempted a chocolate collar, hence the crappyness of it. But hey, practice makes perfect.

Ingredients for a 9 inch circular tin - I used two 1 inch deep sandwich dishes so that I could add a layer of chocolate ganache in between. Alternatively, use a deeper dish and just cut the cake in half:
- 7 oz Butter
- 7 oz Dark Chocolate
- 6 tsp Instant Coffee
- 160 ml Water
- 4 oz Self-Raising Flour
- 4 oz Plain Flour
- 1.5 oz Cocoa Powder
- 0.5 tsp Baking Powder
- 15 oz Caster Sugar
- 4 Eggs
- 7 tsp Vegetable Oil
- 110 ml Milk

For the Ganache:
- 5 oz Dark Chocolate
- 155 ml Double Cream

For the Chocolate Collar:
- 1 x strip of flexible plastic - I used the plastic found on the inside of Silver Spoon Ready Rolled Icing Sheets, however the picture showed the plastic you use to cover your old textbooks with - laminating stuff. Make sure it is at least a few centimetres taller than your actual cake, and enough to wrap around the whole thing, too - with a bit to spare for fastening.
- 120g Chocolate - your choice of flavour.

- White Chocolate Stars for decoration and colour.

Method:

Preheat your oven to 160'C and greaseproof paper your baking tin(s). Melt together the butter, chocolate, water and coffee in a pan on your hob. Keep stirring to prevent setting. Once completely melted, set to one side.
Sift your dry ingredients together and mix together. Make a well in the centre of your dry ingredients, and add the combined eggs, milk and oil. Add in your chocolate mixture and completely stir the whole lot together.
Transfer your mixture into your tins, and bake for 1 hour and 45 minutes. Cool for 10 minutes in their tins, then transfer onto a wire cooling rack. Remove your baking paper and level the cakes.
To make the ganache, melt the chocolate in a microwave for 30 seconds, stir, then for another 30. If there are a few small lumps, melt for 10 more seconds and stir. Mix in the cream until you have a thick consistency. This can cover the entire cake if you wish. I didn't use all of it, just enough to sandwich the two small cakes together, and to cover just the top of the cake.
Okay, for the chocolate collar: Melt your remaining chocolate using the same microwave method. Carefully spread your chocolate over your entire strip of plastic, and leave to set just VERY SLIGHTLY. You don't want to transfer your strip to the cake and find the chocolate already cracking. It needs to still be slightly warm to stick to the cake.
Carefully wrap the plastic around the cake, with the chocolate on the inside. Fasten with the remaining extra plastic, which will have chocolate on and will set like a glue.
Leave to set for an hour or so. Depending on how thick you spread the chocolate, it will take longer to set. You can check if it's set or not by carefully unravelling the strip - if it hasn't yet set, just replace again.
Finally, decorate your cake with white chocolate stars, or similar edible decorations - just for a bit of colour.
I'm quite pleased with how it turned out, but might just use a little extra chocolate on the collar next time. I think if it's thicker it will set more smoothly, instead of the rough finish I ended up with. You can also add white chocolate buttons in the strip to add interest if you want, or even the little stars. Add these to the strip first, then cover in chocolate and transfer to your cake. You'll end up with a polka-dot collar!

Let me know if you try anything better to help with the collar :)
Happy Baking!
Kirsten x

15 August, 2010

Wedding Fever Part 2

The wedding fever continues as the week draws to a close. One of my best friend's is getting married next year - I'm doing her cake, of course! - and she just bought her wedding dress - ahhh exciting times! If that isn't enough to make me smile, a local wedding hangout in Plymouth are desperate for more cake makers to flaunt their stuff for their clients, so asked my friend (who was enquiring about a Reception there) to pass on the message to me, and to get some business cards up there! Woohoo!
The Silver Wedding Anniversary was a huge success, they were so pleased with their suprise party and knew instantly I made their cake :D They loved it, thankfully! I followed the same recipe as the previous Engagement Cake, and FIIIIINALLY managed to figure out how to make an icing and wire spray decoration. FINALLY!!!
To decorate, I cut out some writing from White Rolled Icing, and using a Lustre Silver Edible Spray, gave the letters a metallic sheen. Hence the Silver anniversary theme. I left them to dry, which is a pain because since the font is so intricate, the feet of the font came off some of the letters after drying. Unfortunately, the silver spray takes aaaaaaages to dry, so I just had to suck it up and stick the letter feet back on later. Doesn't really make a whole difference though, does it?
I bought two sets of ribbon, since it was a white iced cake. Most silver ribbon is really tacky and untasteful - very glittery etc. So I bought a simple thick grey organza ribbon, and a thin white ribbon with silver edging. I then placed the thick ribbon around the cake first, and then the thin ribbon around the middle of the thicker ribbon. I used Royal Icing at a thick consistency to pipe around the edge of the cake, too. This is handy if you have a rough edge to the cake, which I usually do. Hey, I am still learning... To finish I dusted White Edible Shimmer Powder onto the entire cake to give a pearly sheen. Perfecto!

Okay, so how did I finally make the icing decoration? You will need:
- A pack of silver wire strands
- A pot of coloured Flower Paste - I used 'Silver Celebration' and dusted with more shimmer powder
- Cornflour
- A little water and pasting brush
- Jewels and gems for decoration
- Plastic pointed cone
*All available from a good cake stockist or craft shops*

It was so simple. I have always tried making this with simple rolled icing. I tried cutting out shapes, letting them dry in the fridge and then inserting the wire. Fail. I cut out shapes, let them dry at room temperature, and inserted wires. Fail. I cut out some more shapes, inserted the wire, and then let them dry. Fail. I tried all of these methods with different thicknesses for each cut out shape. FAIL. All of these times, the icing broke apart, or the wire wouldn't set flat and poked through.
So I asked my local cake shop owner. I took the two-year old, dusty decoration I had from my 18th Birthday Cake, and flat out just asked how the hell I did it. Her reply..."It's icing, dear..." YES I KNOW IT'S ICING!!! WHAT ICING?!?!
Well, I didn't really say that back to her. She is an old lady, after all. She told me to use Flower Paste, which is what people use to make icing flowers, too. It's very pliable and sets hard as a rock in no time at all.
She told me to roll out the icing very thinly, so thinly that you could read a book through it. Then, use a little cornflour for dusting. Cut out one shape, and use a little water brushed over it before placing a wire with the top folded down in the centre of the shape. Then cut out the same shape, and sandwich the wire between the two shapes. Voila, one icing on a stick.
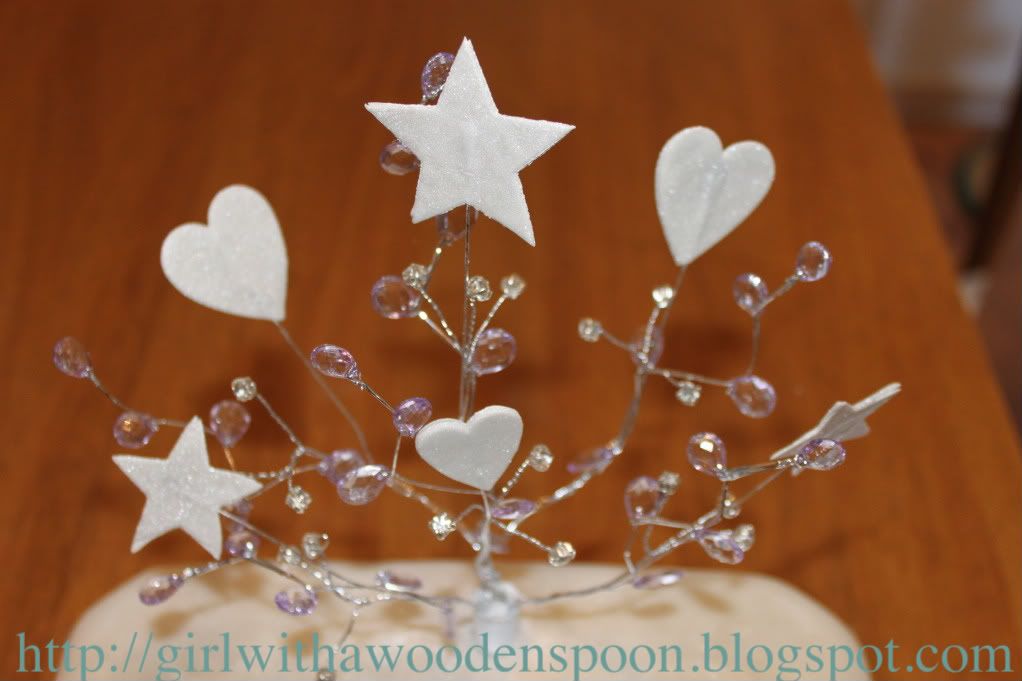
I did this numerous times with different size hearts and stars, and let them to dry overnight - juuuust in case. The next morning, I arranged each stick with one lilac jewelled wire, and one silver gemmed wire, and repeated this until I had six trios of icing, gems and jewels. I then twisted them altogether, tweaked them a bit to look nice, and superglued the decoration into a plastic pointed cone - specifically for this decoration. This was then inserted into the cake, and with a bit of remaining ribbon I fastened this around the base of the decoration to hide the cone and wires.

Happy Baking x

10 August, 2010

Wedding Fever Part 1

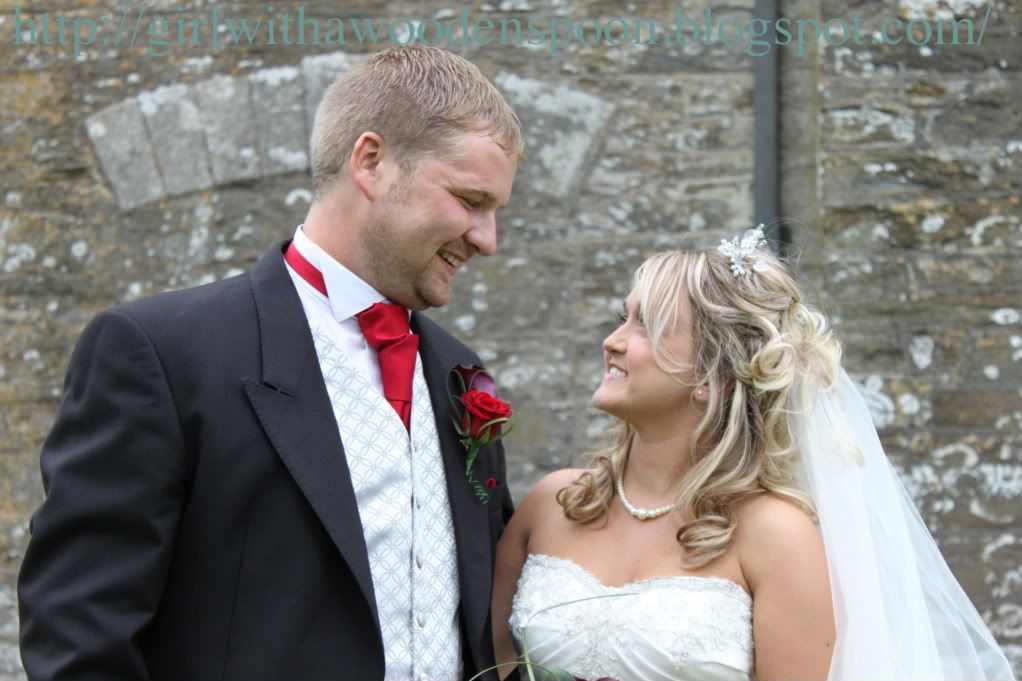
Hi folks! I can practically still hear wedding bells with all my latest antics! Two great people I know got married after being together for 10 years! Here's my favourite photograph of them on their happy day, don't they look beautiful?!
As mentioned in the previous post, I recently made an engagement cake for the other's half's cousin. I had a few ups and downs with this one, but they seemed pleased enough with it, and so did the whole family :D So much so, I got another order! This time for a Silver Wedding Anniversary cake, which I'm actually baking right now. Thought I'd get round to posting the other cake while it rises...
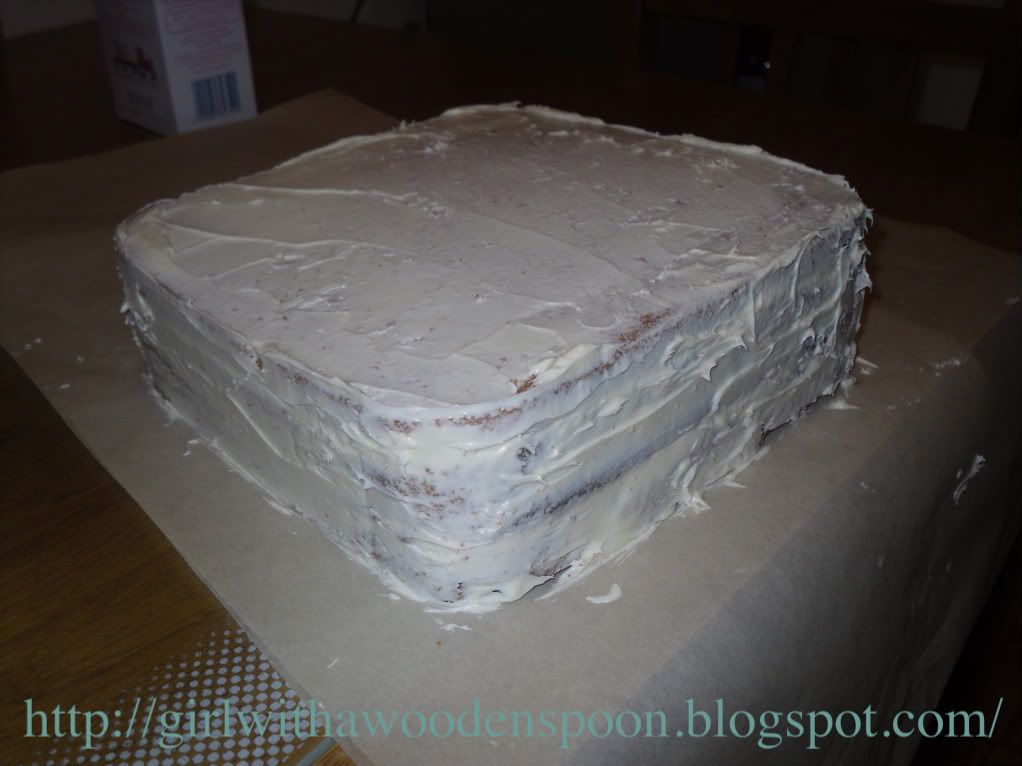
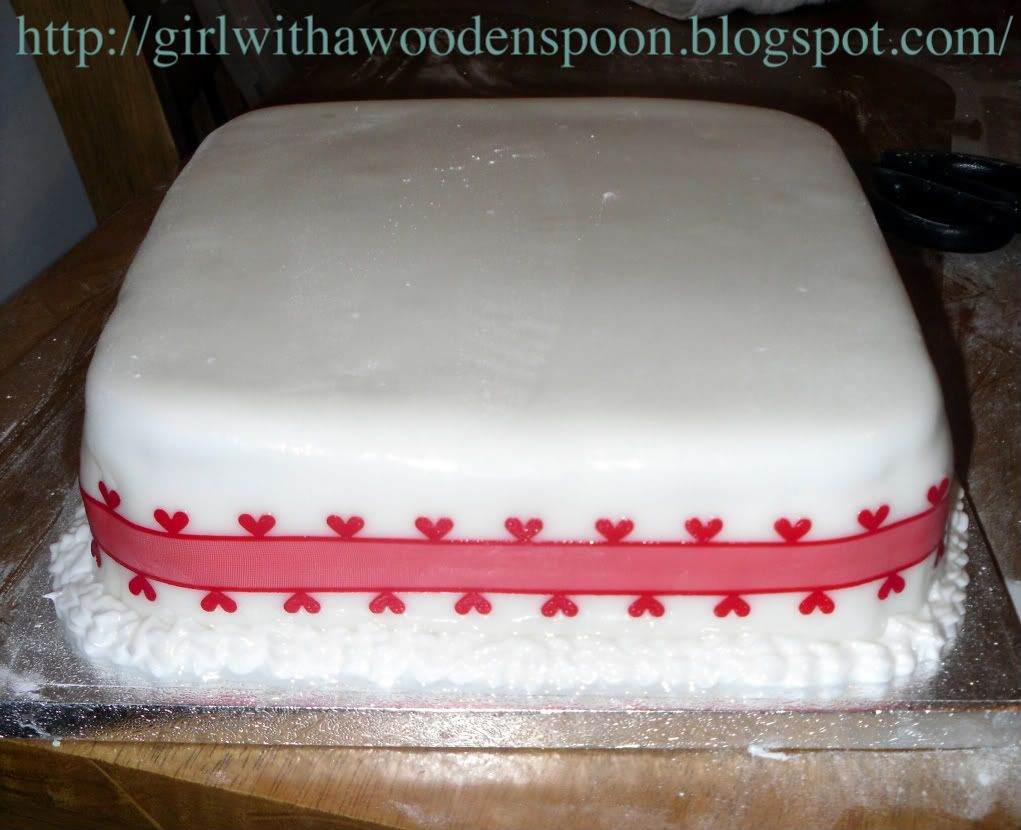
I made a simple square vanilla madeira cake, covered it in rolled icing and then decorated with icing letters, ribbon and a bow. I'll tell you where I went wrong further down the post...
N.B. If you intend to make madeira sandwich cake like I did for this cake, you'll want to cut off the top of the cake to level it. This ultimately leaves you with half the cake left, so make two if you are sandwiching it :) Also, you can see in this picture that there are a few air bubbles in the icing. Use one of the pins to pop the bubbles and just smooth it over again with your hand. Use icing sugar to fill in the little hole.
Ingredients (for an 8 inch size square cake tin):
- 11 oz Butter
- 11 oz Sugar
- 6 Eggs
- 7 oz Plain Flour
- 2.5 oz Self-Raising Flour
- 6 teaspoons milk
*Optional* Buttercream and Strawberry Jam for the filling.
Decoration:
- 2 x Silver Spoon Ready Rolled Icing Sheets
- Red Rolled Icing
- Ribbons and bows (from all good decorating shops)
- 2 x Glass-Headed Pins
- Royal Icing (You can buy this ready made. RECOMMENDED. I made some from a recipe in my book and it gave me enough to cover a cake. I only needed a bit to pipe around the edges.
Method:
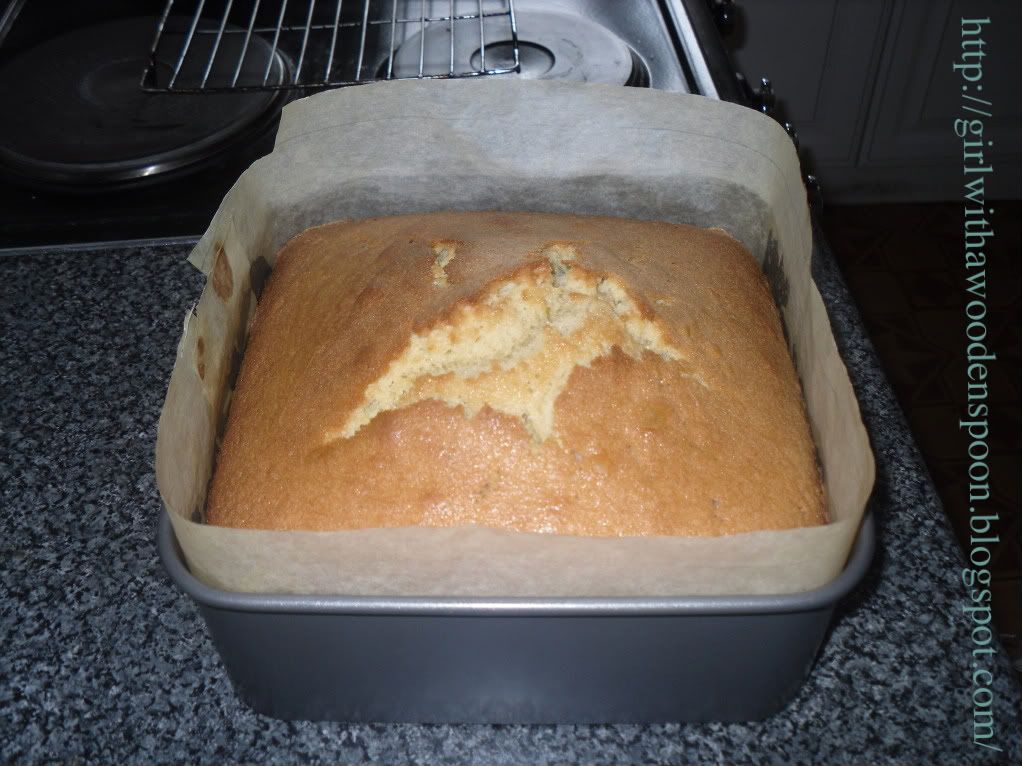
I bought a cheapy whisk from Sainsbury's to get my bottom drawer started. So go buy one for £4.18, chuck all the ingredients in a bowl and whiiiiiisk :P Haha, cheat. Bake for 1 hour and 35 minutes on 160'C.
When covering the cake, use a very thin layer of buttercream to make a glue for your first layer of icing. Remember to either ice your cake twice, or cover it in marzipan and then icing - depending on your tastebuds. Use a rolling pin to carefully pick up the icing and place over the cake. Use your hands to smooth down the lumps and bumps and chop off any excess icing with scissors. On the corners, pinch the excess icing together and chop it off. Brush a little boiled water over the first layer, then add your second layer. If you only use one layer of icing you will get a bumpy finish.
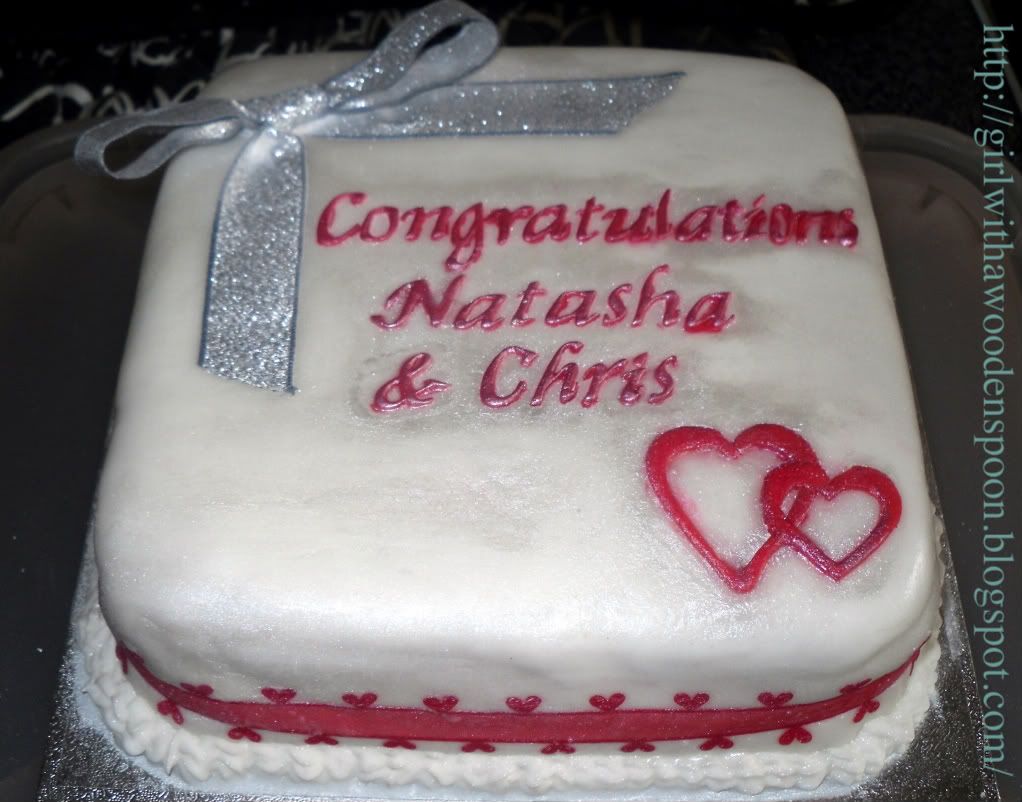
   I used alphabet letter cutters to spell out "Congratulations Natasha and Chris" onto the cake in red rolled icing, and then cut out a big and medium sized heart in red rolled icing to finish it. When fastening bows and ribbons, use a glass-headed pin to secure them in place. Just remember to tell your recipient there are sharp objects in the cake!
Okay, so where did it go wrong? For my 18th birthday cake, the ladies who made it managed to give the whole cake a glittery finish over the icing. I thought I'd try this. Remember the silver edible spray I used for the Caravan Cake? I sprayed some of this into a small pot then used a brush to brush some of the glitter spray onto the cake. This doesn't work. At least, if it's a silver colour. You can get other shades, including a pearl sheen for special cakes, so don't let my mistakes put you off. Anyways, I ended up with silver streaks on my white icing, effectively giving it a dirty finish. I just had to grit my teeth and try to blot it off with damp kitchen towels, and when that didn't work completely, went to the cake shop to pick up some white dusting powder. Well, here are the results. Obviously, I couldn't get in between the letters very well, which is where the worst of it is:
Happy Baking x

27 July, 2010

Caravan Cake

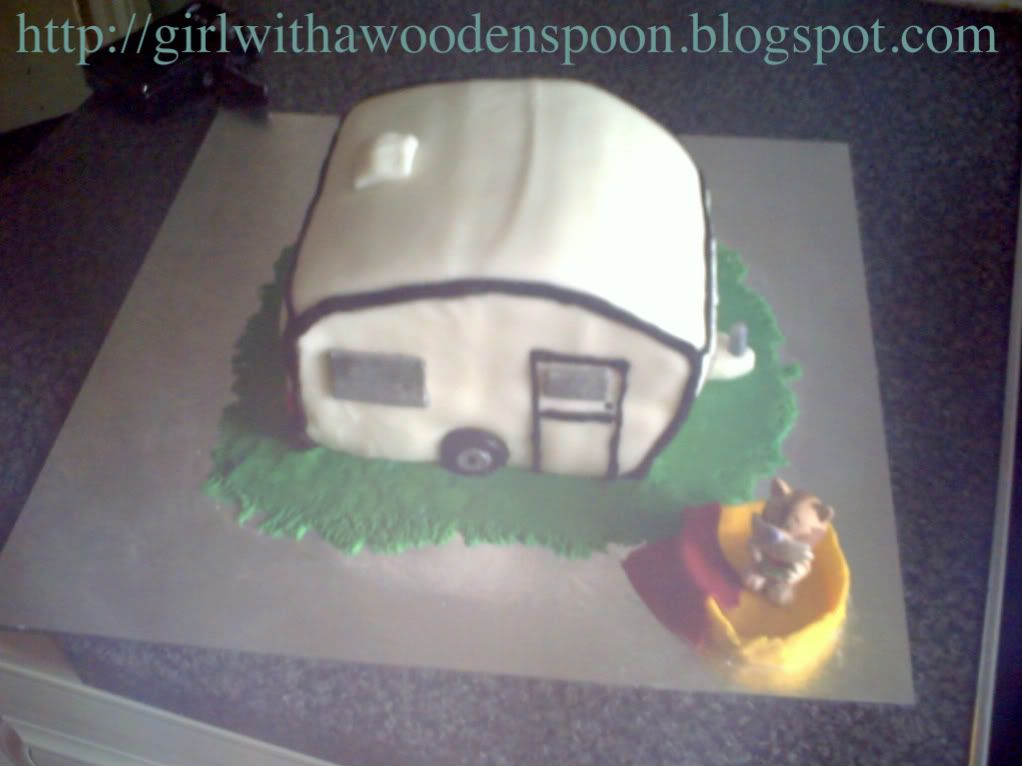
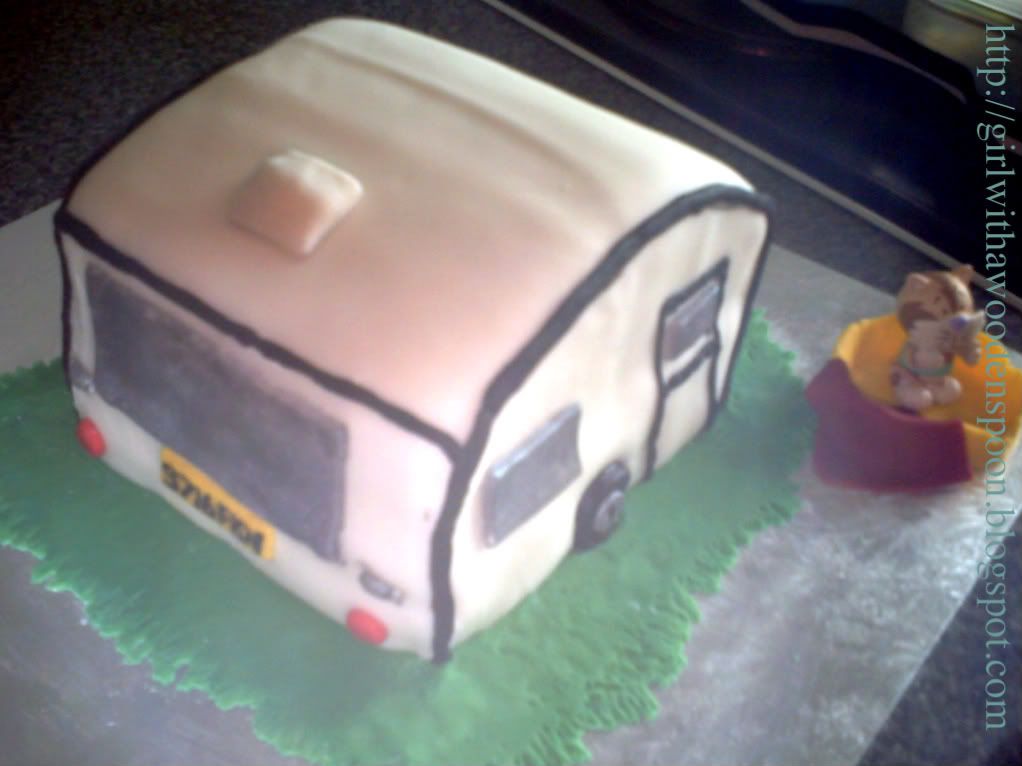
So my auntie heard about my new business venture into the world of cake-making, and asked me to make a caravan shaped cake for a work colleague who was leaving. Ironically, he hates caravans so the joke was on him, poor soul. But apparantly the cake went down a storm in the office and I thought I'd share with you how I made it :) Also, the cat in the basket was made my mum and auntie, who thought it would be funny to add on to the design - hence the shoddy workmanship of the basket and lack of scale towards the caravan. The cat is a figurine by the way, not modelled. Silly women!
(I do apologise for the quality of the photos - my SLR is at my in-law's house, and my battery ran out on my compact digi cam, so it was up to the ol' mobile phone snapper to help me document this post.)
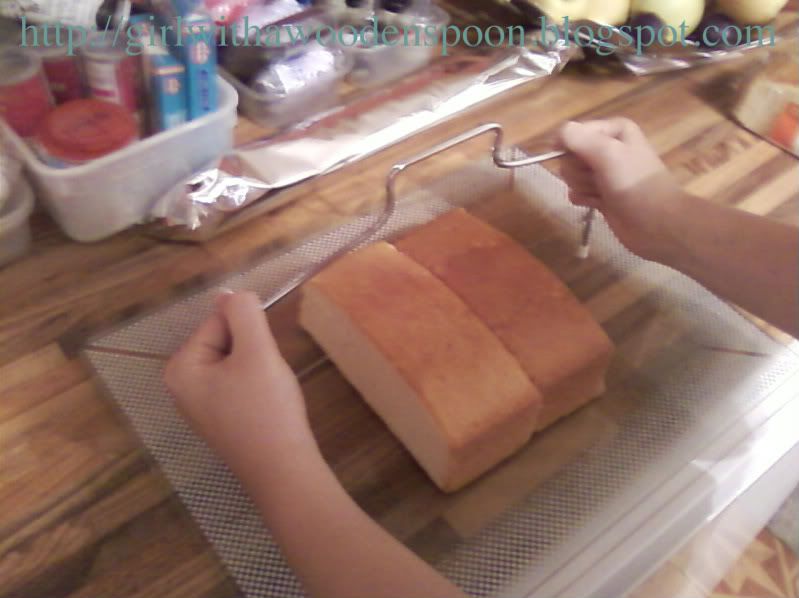
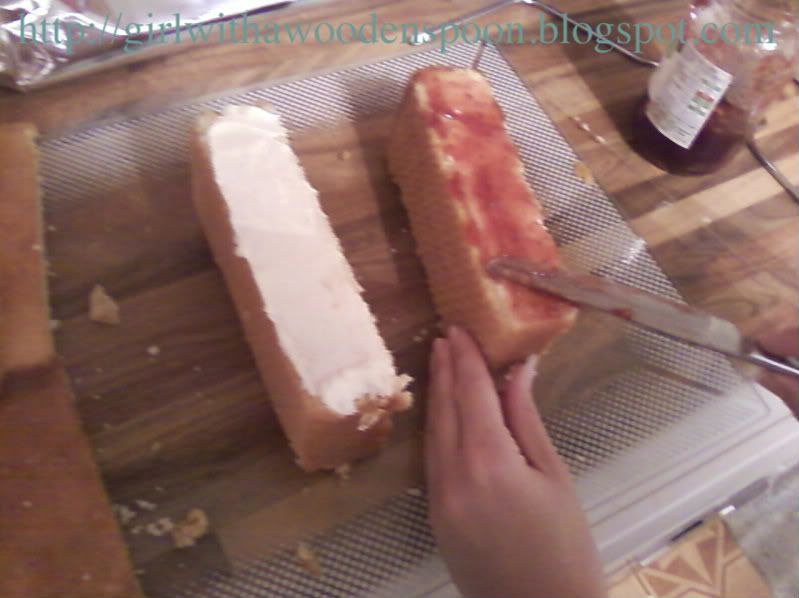
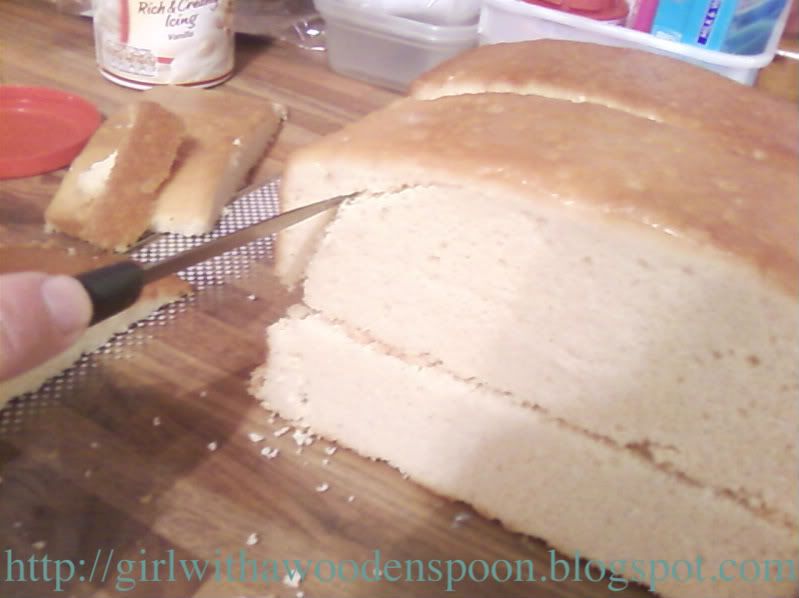
Firstly, I made four madeira cakes in loaf tins. I'll post the recipe for this type of cake soon, as I've also made another recently. After they set, I  used my brand new Lawson's cake leveller so get rid of the lumpy bumpy bit on top of two of the cakes, giving a nice smooth top surface. I kept the other two loaves the same as when they came out of the oven, to give the curved feature of the caravan's roof.
Next, I used Betty Crocker's Vanilla Buttercream and Sainsbury's Strawberry seedless jam to create a filling and also a glue to stick the pieces together. I arranged the cakes so that they resembled a cuboid shape, and continued to fill it.
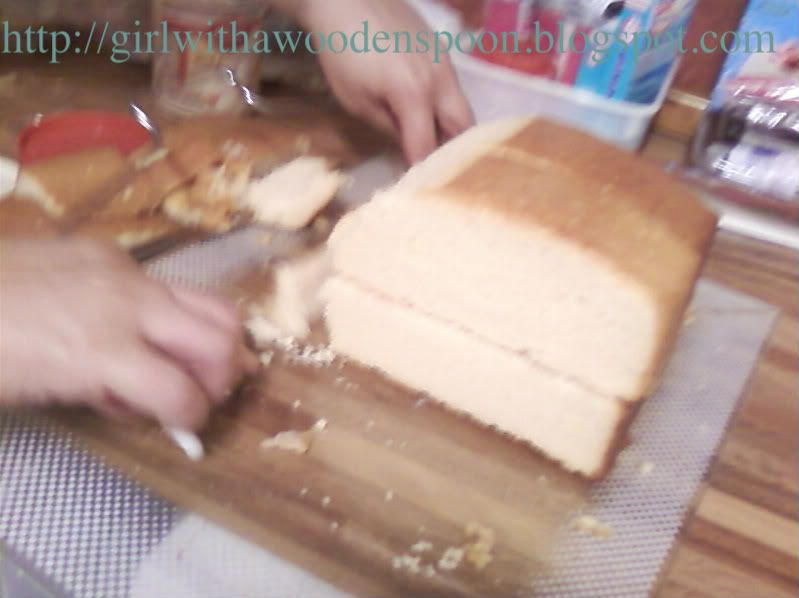
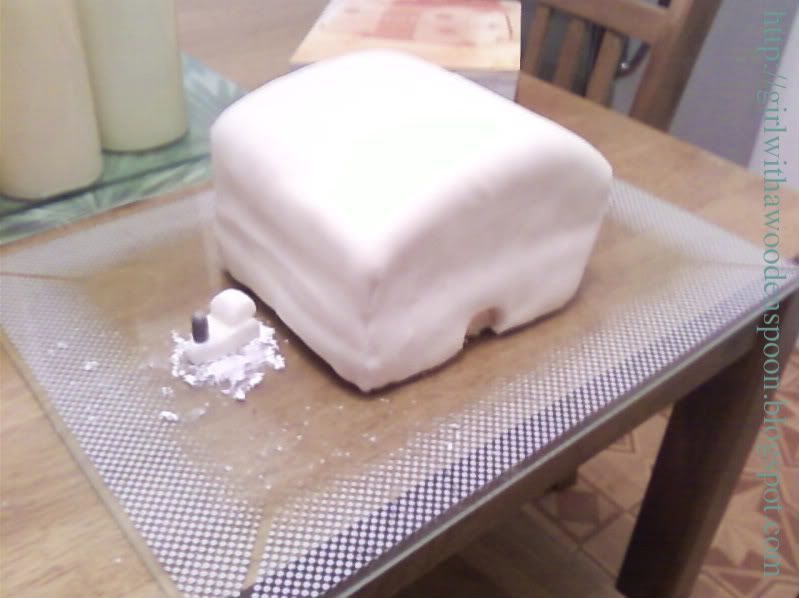
Then, I used a sharp knife to cut down one side of the cake to give the curved edging of a caravan, however I only grooved into the cake as a guideline, I used my cake leveller, and brought it down the side of the cake to give an even finish.
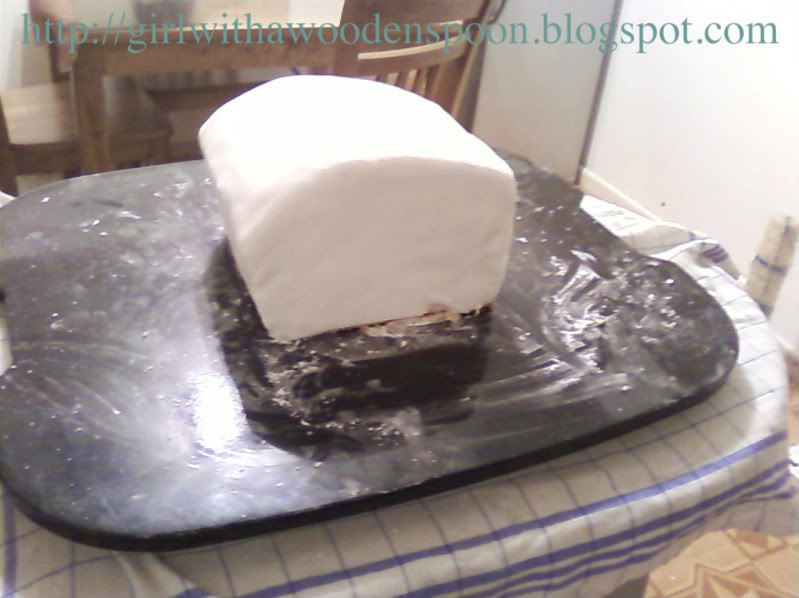
After this, I finished the cake off with one thin layer of buttercream, ready to stick the rolled icing onto. *Tip* When covering cakes, use either marzipan then icing, or two layers of icing if you don't like marzipan. I don't, so I used the two layers of icing, albeit very thin - it would be too sickly. To stick the two layers together, I used a cooking brush and boiled water. Boiled apricot glaze also works, or even a clear alcohol like vodka for all you alcys :P When covering a square shaped cake, pinch the corners together and cut them off, then use a sharp knife to get rid of the excess edges at the bottom of the cake. Remember to keep your hands well dusted with icing sugar whilst handling icing.
I let the cake set for about 3 days before decorating, so that the icing could dry out and make it easier to assemble objects on to. The little blob of icing on the side of the cake is the towing bar you see on caravans - I used an edible silver spray to get the metallic look on the hook, and inserted into the tow with a small bit of a cocktail stick, so it stayed upright.
Use your imagination when it comes to modelling, use paint brushes, cutlery items, modelling tools - anything you can get your hands on to give different effects. For example, if you were making a sugarpaste person, put a blob of sugarpaste through a garlic press to make their hair! The numberplate is also writen in a liquorice edible writing pen, and also happens to be the guy's own numberplate for his car. Add personality to your projects!
Anyways, that's all on the caravan cake stuff. Sorry it's been so long (again), I've been in Barcelona for a week and such like :D But on the plus side, I got my results back for my 2nd year of uni, and am happy to report that the highest marks I got were for my blog (yes this actually did start out as a uni project!). A lovely 2:1 overall for the year, and only one more to go!

Happy baking munchkins.
Kirsten x