13 June, 2011

Cooking up a Cookson

A book cake? Yeeeeahhh, sounds easy enough! I assumed when I was asked to do this that it would be something simple, like the Twilight books, or a bible (ha!). Nooope! It was "The Dwelling Place," by Catherine Cookson. Now I've never heard of this book, so after some googling I was petrified about the cover. All the editions bar one had photographs on the front, and I'm really bad at recreating people (see Princess Tiana :p), so I went ahead with the edition that had a painting on the front.
I covered the victoria sponge cake in the usual way, then attacked the image on the front cover by doing it in sections. I started with the foreground, the rocks; then the river; then the hills; and finally the clouds. I used a marbelling technique of rolling different coloured icings together to get this effect, which was really frustrating because if you over-knead the icing it just becomes one colour - so you have to work very quickly with it!

I again used my sugarpaste gun (my favourite piece of equipments by FAR! THANKYOU in-law's!!!) for the lettering. The thinner letters you see for the title really took a toll on my hands though: I used a very small hole stencil to get the thin snake-like icing, and my god, you really have to pump the gun to push it out the other end. My poor hand is now blistered :(

Above: What I was trying to recreate!

After delivery, I received a really lovely testimonial from the lady who ordered it, so I thought I'd share it with you: "hi kirsten thanks for the cake everyone loved it and mum was over the moon with it she was nearly crying ,she said it was beautiful and you were very talented you made an old woman very very happy thank you so much hun."

AWW. Happy Baking amigos x

08 June, 2011

Kaci's Christening Cake

This is my favourite cake I've ever made. 

And also, it's the first I've made for someone I've never met! They found me on my Cakes by Kirsten facebook page, and requested this modern girly christening for her daughter - no frills, no cutesey additions, just girly and pretty.

So I asked her what she'd like - bows? Booties? Butterflies? Blossoms? Check to all the above! And then she saw the Anniversary cake I'd done last year with the wire and icing decoration, and added that, too! She asked for it to be baby pink on the bottom layer, and white on top. I suggested we cover the cake board in a gorgeous fuschia colour, so the colour graduated down the entire piece, which she was happy with.


I hand-made these baby booties out of flower paste, which is a strong version of sugarpaste. After attempting to use the latter first, the booties just fell in on themselves and held no shape at all. Flower paste is a little more pricey - about £4 a pot - but it was worth it when I shaped the booties and they actually stayed up! I did mess up a bit though, the stencil I copied off I used the wrong way round, and the bootie strap fastened in on itself, instead of sitting pretty on the outside. To rectify this, I added stamped-out mini blossoms and affixed them to the side of the booties to look like buttons :)

The blossom cascade down the sides of the cake worked extremely well, in my opinion. I think they're really effective and are useful if you need to cover up any mistakes (mistakes? What mistakes?!) The teddy bear took no time at all, and was made out of sugarpaste. I think if you're keen on cake decorating, it's really worth investing in the equipment that's available to you. I bought a trio set of blossom and butterfly stampers, and it just takes so much time off your hands. Don't be ashamed to say you used them, all the best cake makers do!

Kaci-Ann's mum was really pleased with the cake, and told me later that all the guests agreed with her. I left some business cards with her, too, so hopefully I'll get a bit more business!

Anywho, I'm going to try some Red Velvet Cupcakes now - watch this space :)

Happy Baking! x

Can You Make a Corset? 'Course I can!

I'm heading ever-nearer to the June cake overload I have in 2 weeks, and I'm petrified!

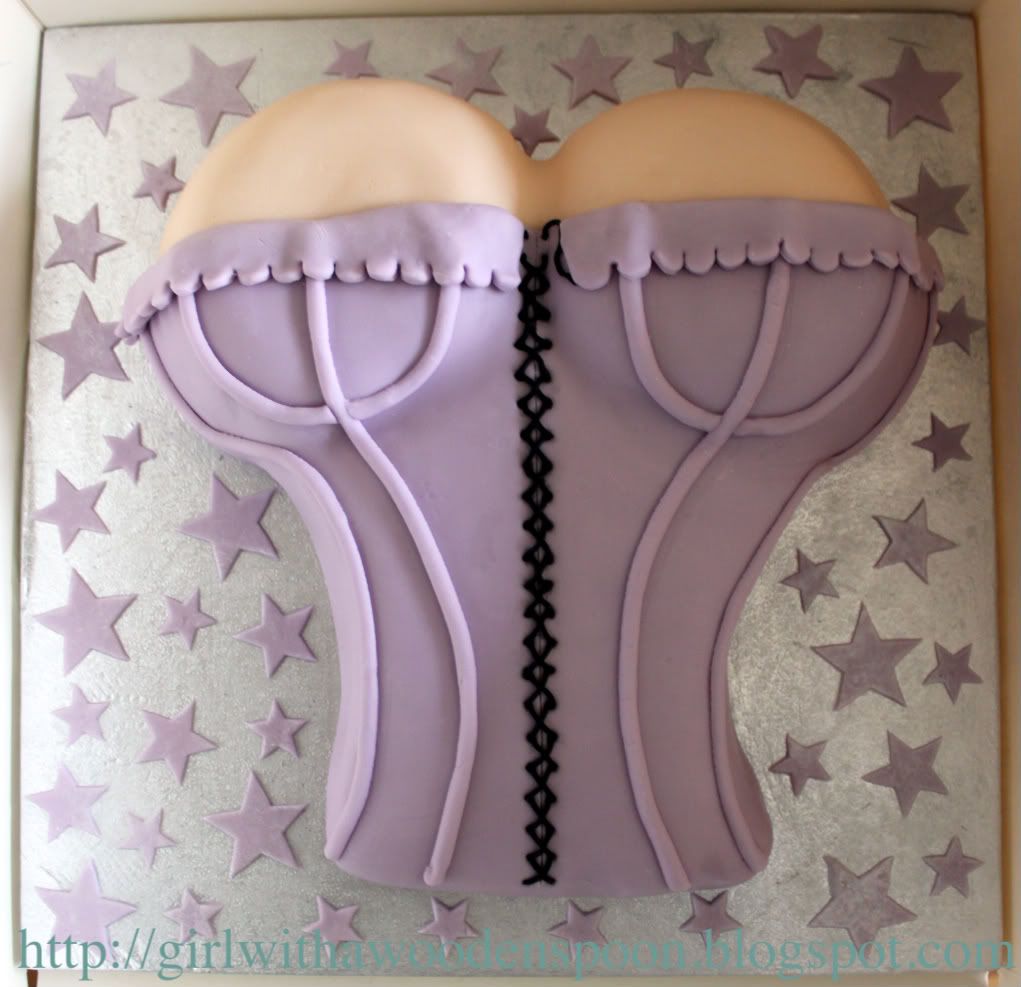
So I had an easy one last week - the boyfriend's 22nd birthday! Jim didn't know what he was getting, and a few months ago all he suggested was "boobs." Hey ho, let's go! I've got the design to this cake in a book I got for christmas, and I thought it was a saucy (and err.. Classy?) version of the general tongue-in-cheek kind of naughty cakes you get.
I had a really big problem though - the boobs. How in the world do I make a boob out of cake? I know you can carve cakes to the shape, but I'm not very good at that. If I bugger up, that's it - back to square one. In the book all it said was to use "bowl-shaped cakes." Hmm. My local cake shop actually stock spherical tins (a ball of cake, what what?!?) so I thought yeah I could use them and just half the ball, but they were out for hire at the time I needed them. Crap! So I suggested to the shop owner that I had a (very) small Pyrex glass bowl - would that work? "Yes! It's oven-proof, just like when you make a casserole in a glass dish and bake it," she said. Duhhhh, what an idiot :P

So I painted the inside of the bowl in butter using a pastry brush, and added in the mixture. Baked for about half an hour, as of course the bowl is a lot deeper than a general sandwich tin. When the skewer came out clean, I carefully used a knife to ease the edges of the cake from the bowl, and it turned out a peferct boob shape!

The chest is just a usual 10in square cake, double-layered. I made a boob of it (de-dum-dum!) though, as when I had adjusted the shelves in my oven to let the cakes rise nicely, I accidently re-inserted them at an angle, and I couldn't understand why when I took the square cakes out, they had only risen on one side, and then gently sloped down the other. Oh god! What a blessing in disguise this was!! The instructions in the book had suggested that to make the chest of the corset, to carve it down to her waist, so it was higher near her boobs. Because of my error, no carving was necessary - the cakes sloped naturally down - hahaha!

I covered the cakes in the usual way, just separating the colours as I did so: the flesh icing covered the boobs, the lilac on the chest. I scored a line down the centre of the corset for the join, and then used the end of a thin paintbrush (one I only use for baking!) to make small holes either side of the line. Using my sugarcraft gun, I used a tiny circle stencil in the end of it to push out lengths of thin black sugarpaste, which were then cut to size and attached to the holes with edible glue in a criss-cross pattern. Using a slightly thicker circle stencil, I pushed out lengths of lilac sugarpaste for the corset bones. For the frilly edge at the top, I used a garrett frill stencil (it's like a circular cutter, with a frilly edge) to cut out a length of frill.

Jim was very happy with his boobs :)

Remember: Cakes by Kirsten can be found on Facebook!

Happy Baking! x