Showing posts with label Ribbon Cutter Tool. Show all posts

20 June, 2012

Peace and Love


Remember a while back when I talked about my friend Tash? Her lovely mum was true to her word and contacted me again for another commission for the school!

This time, they were having a very special visit from someone called "The Scary Guy." He's scary because he looks like this:

He's a motivational speaker, and a big deal in America. He goes to schools all over the country to talk about prejudice, racism, respect and having love for others. I think he's great! Now on an international tour of UK schools, too, Tash's mum wanted to provide him and the kids with some delicious treats for his Scary day at her school. This time the order was even bigger - TWO HUNDRED AND FIFTY cupcakes!!! I won't put pictures up of them, as they look exactly like the ones before, and plus I forgot to take pictures of them :D The only difference this time was that I was asked to provide about 25 undecorated cupcakes plus a load of goodies so that the kids could decorate them themselves. Sounds like a fun day of school to me...

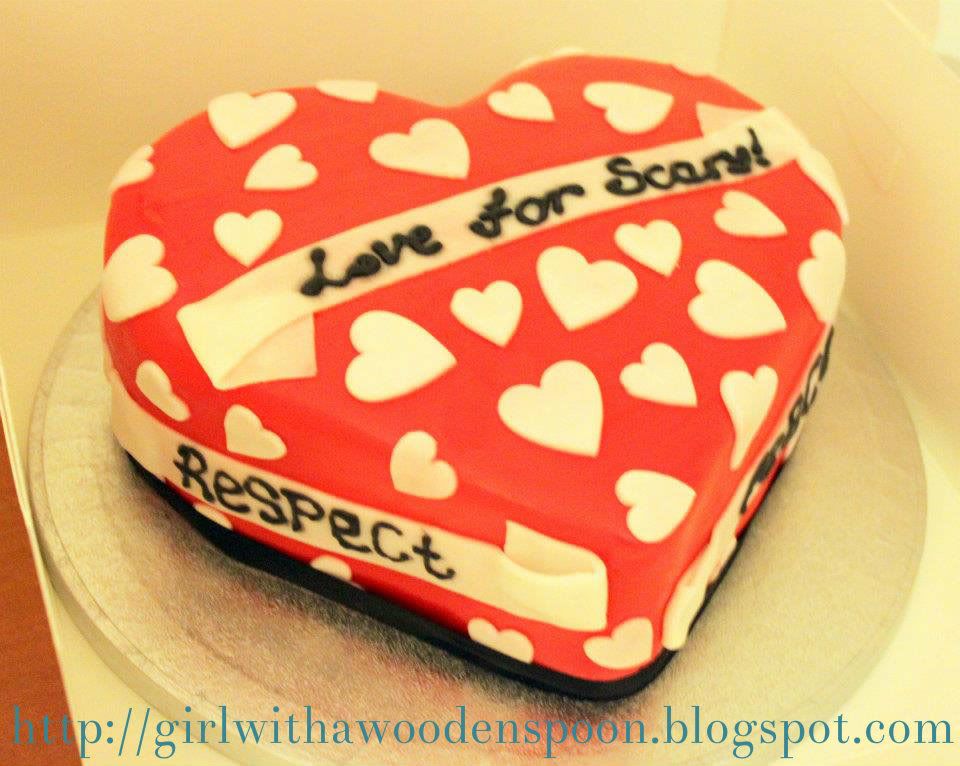
She also asked me to come up with a cake for Scary Guy, something to say thankyou for him being there. As you can see, the guy is covered in tats, so I went with a heart-shaped (love) cake and used my ribbon roller cutter to cut strips of icing into 'scrolls' like you'd get in tattoos. The difference being, my scrolls had words of encouragement, like "peace" and "respect." Not "mum" like you'd expect on a biker dude.  

Icing on the Top:
  • He's famous in America - and he ate MY cakes!!
  • It's for a good cause!
  • Everything was super yummy, and I even got a hug from the school advisor that came to pick it all up! :P
Burnt Bits:
  • I still couldn't master the art of royal icing at this point, and my writing was too runny. It spread slightly, which you can see. It's not just a blurry picture.
  • The "scrolls" I made were too thin, which is a problem because I used white icing on top of red and the red shows through :(
  • I couldn't make the original delivery slot due to my old job not telling me about a shift I had that particular day. It was really unprofessional of me to have to cancel, and the order ended up getting picked up at 7am the day of the talk. I know Tash is a friend, so I really don't want it to seem like I was taking the piss. But seriously, I felt awful. Jim's mum, best friend and daughter-in-law all rallied around to help me ice the 250 cupcakes in record time, but thanks to Tash's mum being really lovely and understanding, I didn't need to rush. Thankyou to everyone for just being so amazing to me!
I later found out that the guy devoured most of the cake to himself, and really enjoyed it, so I got a bit of an ego boost there! :D Love for Scary!!

Happy Baking x

09 June, 2012

For an Old Wrench


So you saw in my last post that I was under a bit of pressure as I had that cake PLUS this one to do all in a day - my head was a bit fried by the end of the weekend as I ended up going to both parties, too!

I love this cake, it was such a talking point at the party! I delivered it to Jim's mum before we headed out to an engagement party, but the cake box was sellotaped down so I could give the cake the big reveal to her when we came out later in the evening.

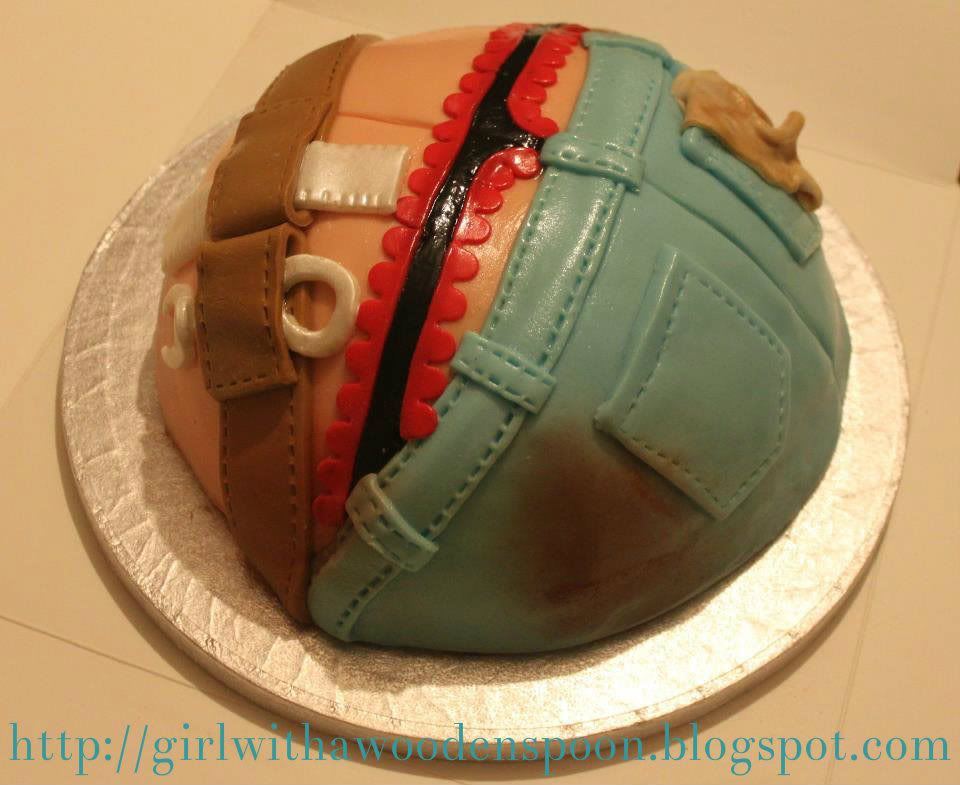
For christmas my darling bestie, Abby, gave me a rude cake book. One of the cakes is a builder's bum, and I showed the book to Jim's mum later - she loved the builder's bum and made a joke about having a plumber's bum cake for her birthday and then left it. Of course, I took note on what she said and when it came to her birthday I made sure I was the one to be making her cake as I had a suprise for her. You see, she's training to be a plumber, and she's bloody brilliant at it!

So I made the necessary changes to this cake to make sure everyone knew it was a female bum by adding in the frilly thong and sparkly (although you can't see it) plumber's tools. I used my ribbon cutter tool with the serrated edge to give the stitching effect on the jeans and plumber's belt, and dabbed edible lustre dust in Terracotta on the bum to give the "dirty" effect. I marbled brown and white icing to give the effect of a dirty rag and tucked it into the jeans pocket, too.

Icing on the Top:
  •  Jim's mum, Tanya, was over the moon with her cake, and couldn't stop showing her guests. Always a good point :)
  • I'm really pleased with how much detail I gave the bum. Having a rather nice one myself, I pride myself on the detail in that area. Haha!
  • Another successful Pyrex bowl cake!
Burnt Bits:
  • I made this chocolate cake about a week in advance because I knew how busy I'd be with the engagement cake, too. I then froze the cake, which I've read a lot about. It didn't taste bad - it was nice - but fresher is always better.
Still to this day, Tanya raves about her cake :)

Happy Baking x


06 June, 2012

Cake Baby


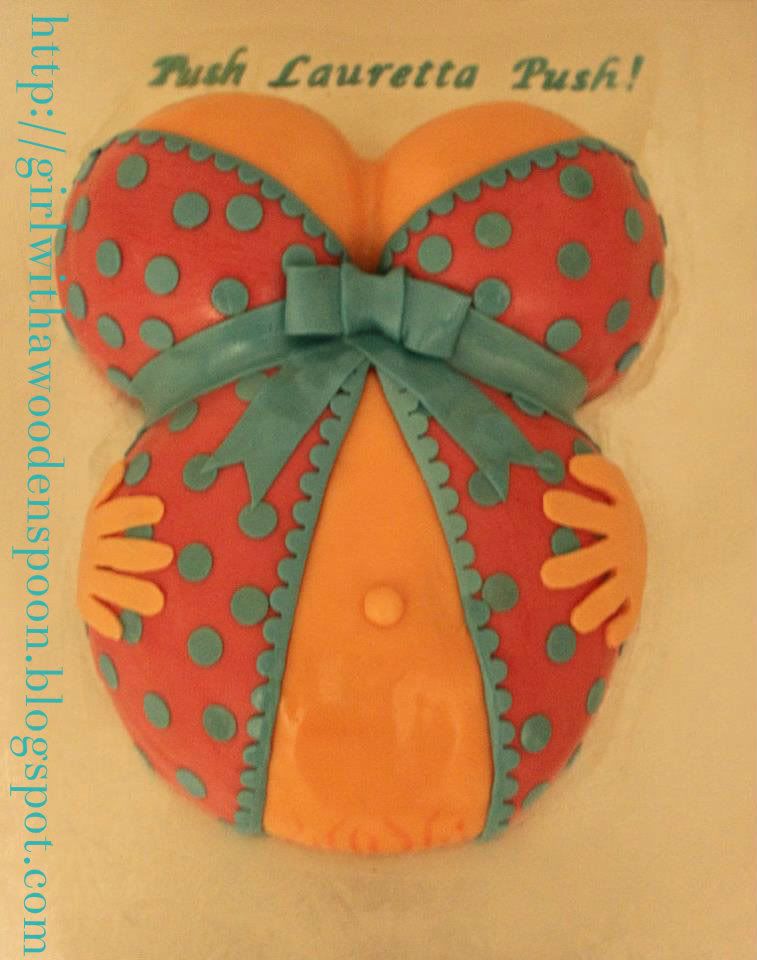
I had a lot of fun on this baby! (Haha, pun intended!)

Now my dear friend, Jodie, had a most unusual request for this cake. It was for her best friend's baby shower, and she wanted something... A little unusual. She had seen pictures of "funny" baby shower cakes, and wanted one like that as you always see the same baby pink/baby blue teddy-bear infested pile of vom. However, these weren't "funny" cakes - they were downright horrid! (Picture this cake, with a hand sticking out of the belly holding a sign saying "Nearly there!" Um, no. Just no.)

I managed to convince her to go a little more conservative, and at most I allowed the inclusion of painted-on stretch marks at the bottom of her tummy. I did add some on her boobs, too - but they just looked like stink marks you put on a cartoon. So I promptly removed them with the aid of vodka and a cotton bud :)

Icing on the Cake:
  • The shape of the cake was created by baking the boobs and tummy separately in glass Pyrex bowls. I know you can get dome-shaped cake tins, but when I went to hire them from my usual place, someone already had them. It was the cake shop owner's idea to bake the cakes in bowls - and when I asked if that was safe to do she reminded me that we bake everyday in glass (casseroles, lasagnes etc. Duh!). I greased the bowls first in Cake Release Spray and filled each bowl to about 2cm below the rim to allow for the cakes to rise. I always bake any cake for 15 minutes uncovered first, to get a lovely golden glow across the top. Then I cover the cakes in tin foil and I baked for another 40ish minutes (depending on the size of your bowl this will vary cooking times. Remember your bowls are DEEP and you want them cooked right through!!!
  • I got loads of compliments just on the basis of the babydoll design. Obviously a hit! I love creating sugarpaste bows so I had to include one on there somewhere!
  • This was lemon drizzle cake. 'Nuff said. Mmmmmm.
Burnt Bits:
  • As previously stated, the bowls I baked these in are very deep, which is annoying as you don't want to keep removing the cakes from the oven too many times to check if they're done. Always check them with a skewer. When you come to half the cakes to spread a filling inside you'll soon find out if you took them out too early (which I've done!).
  • I don't like the quality of the picture. I used the PME Clear Finishing Spray again on this one but it just looks wet.
  • This cake was huge. I used a 14" x 16" cake board just to give you an idea of the size. It was only meant to feed about 20 ladies so I'm assuming there was lots left over. No biggie though - better to be bigger than too small.
  • The hands. Jodie wanted them on there. I don't like them. That's all.
On a final note, I want to give a special mention to Jodie's adorable 2 year-old, Fliss. Upon Jodie turning her back on the cake, Fliss proceeded to push her toy box up against the table the cake was on, climb up on said box and promptly POKED the cake in curiosity. Needless to say I had frantic messages from Jodie asking what to do to salvage the cake, but by the time I realised what had happened she had managed to sort it out! Her daughter really is adorable though, so I'll let her off :P

Happy Baking x

08 March, 2011

If I Ever Made My Own 21st Birthday Cake...

This would be it!
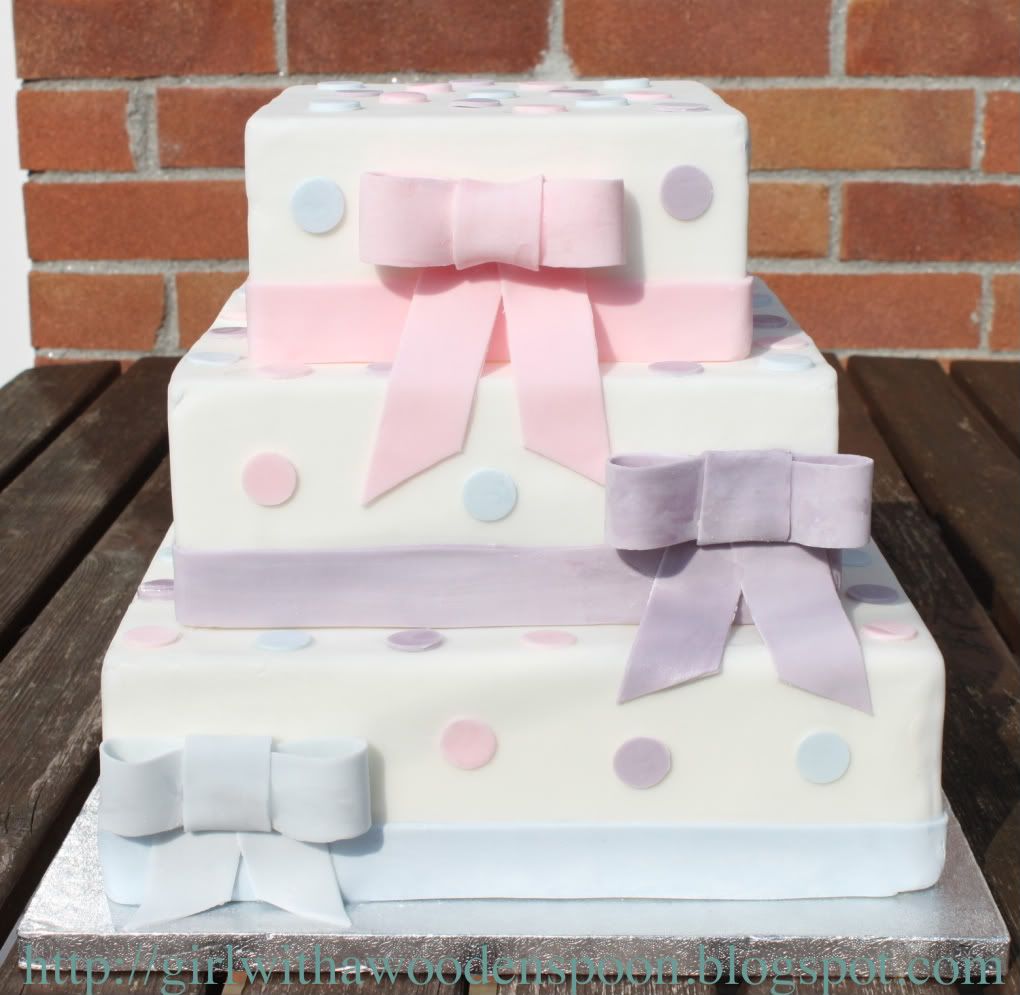
Unfortunately, it's not for me. No one will be making me a birthday cake in 3 weeks time seeing as I will be away in New York (yes, I will mention it again :D). This cake has been made for business purposes! My gorgeous best friend Abby has kindly offered to help me with the advertising side of my 'Cakes by Kirsten' business once it's up and running, and I wanted a logo that would help define the company and myself. This is me all over - pastel colours, girlie, and BOWS! (I have a bow tattoo for a tramp stamp.) So this will be plastered all over my business cards, leaflets and website when I buy a domain.
This cake is also being used as part of my degree. One of the module I'm studying requires me and other group members to create a 32-page magazine from scratch, and then it gets sent to the printers! We're doing an article on independent business women, and who else to interview but moi! So a good friend Jodie will be doing the photography of this cake with me looking spanking in heels and an apron a la Bree Van De Kamp.

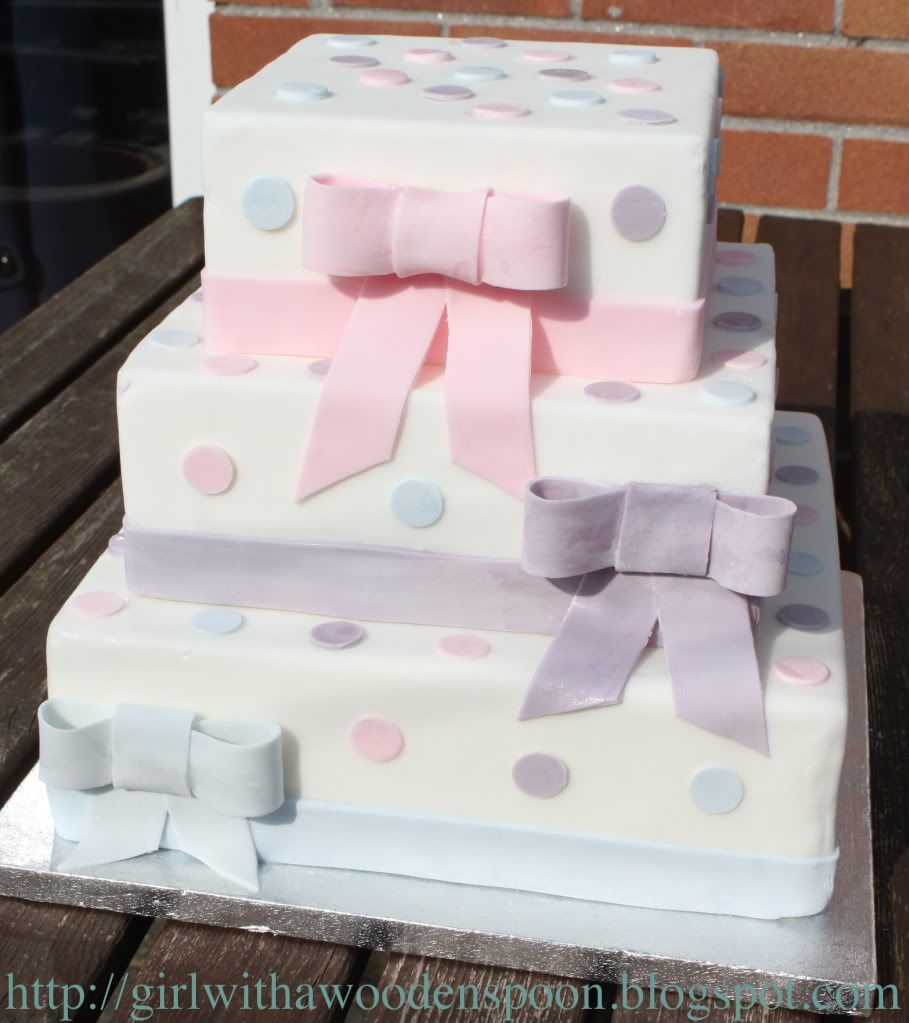
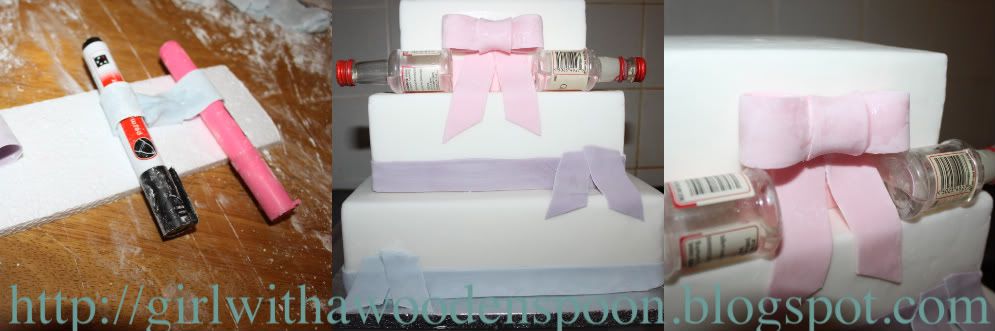
Anywho, the cake is entirely covered in white icing, using lilac, baby pink and baby blue ribbons and polka dots to finish. This is the first time I've actually been really pleased with the outcome of my bows. My mum's cake was too thick and didn't co-ordinate size-wise with the ribbon to match. The bow on Grumpy's christmas cake cracked on the knot, making it look silly :( I used the ribbon cutter tool to make everything even, and inserted a cake dowel right through the centre of the three cakes to hold them all together, aswell as the usual dowels in each layer (this prevents them from sinking into one another). The bows are made out of a combination of sugarpaste and Gum Tragacanth which helps harden icing to make it easier to mould into flowers etc. I used a few odds and ends to help keep things intact until they set properly though... Apologies for the crudeness :P
Remember back last summer when I did a few posts on Wedding-related happenings? The bride in one of the pictures, Laura is now pregnant! I wonder if she'd like this kind of cake for her Baby Shower? One can only ask.... ;)

Any questions feel free to ask!

Happy Baking x

02 February, 2011

Happy ??th Kate!

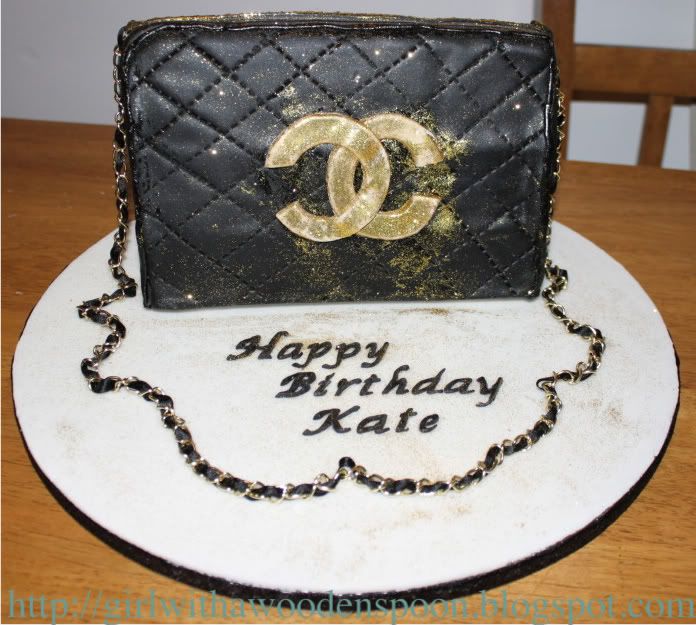
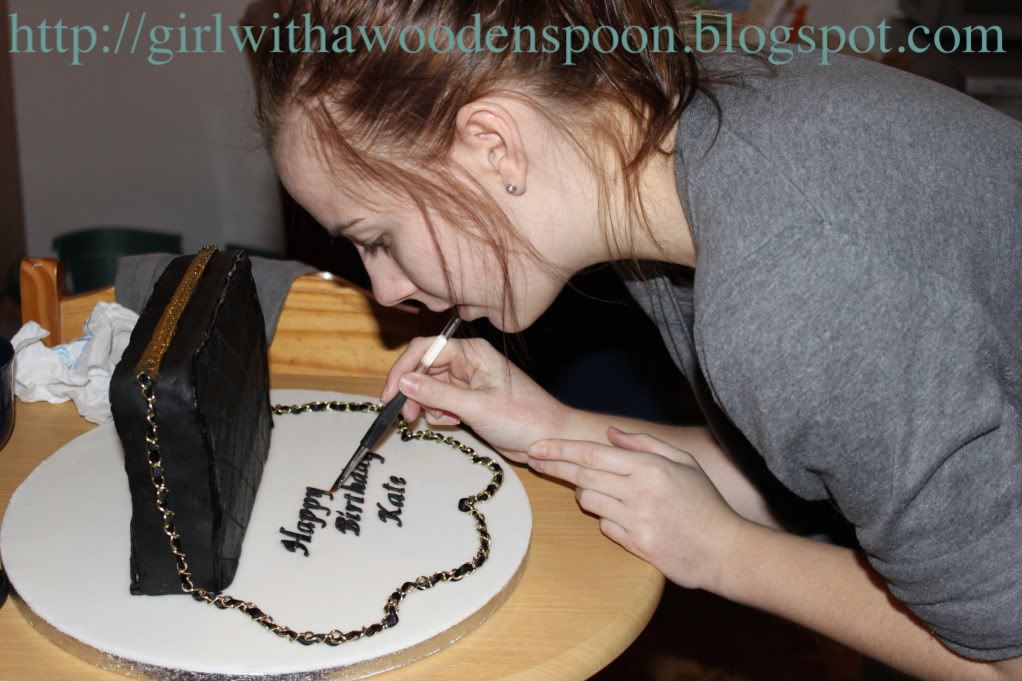
This is most definitely one for the majority of my followers. Thanks to Abby, I get a load of traffic from fashion and beauty bloggers. Hope you like this one, I'm not going to go into immense detail from now on about my big cake projects - unless I come across a really amazing recipe. The story behind this cake is that it was made for my other half's auntie. She recently hit a big milestone birthday, but she has no idea that anyone other than her own sister knows her true age... So I treated her to a nice cake, and she love love LOVES designers - this cake is very fitting for her :)
However, this particular cake was fairly hard to complete - and included a hysterical breakdown in my kitchen that my mother had to calm down because I broke my new icing syringe on the first use... Drama drama drama. I used some new techniques too, so I'll tell you about them:

- This was the first time I had covered a cake board in sugarpaste icing. Really easy to do, just roll out enough icing to cover your cake board, brush over a titchy bit of water onto the board and transfer your icing onto the board. Cut off any excess from the edge of the board and leave to set OVERNIGHT. Very important you let it set, as the next day when you assemble your cake you won't leave any fingerprint impressions in the icing.
- This was the first time I used edible glitter. The cake shop lady told me you can roll it into the sugarpaste, but I didn't find this very effective, unless you use a massive amount of glitter, which is just a waste. I used Sugarcell for the first time, too. This is effectively a cake glue, which sets like wallpapering paste and you can paint onto cake surfaces and icing - this is how I got the glitter to stick to the icing and how I got the zip and Chanel logo to stick, too.
- This was the first time I got to use my new ribbon cutter tool. At £11 it wasn't cheap for a tiny contraption with different wheels to create even ribbons. There was a serated edge wheel that I used for the stitching effect of the quilted purse. Effective!
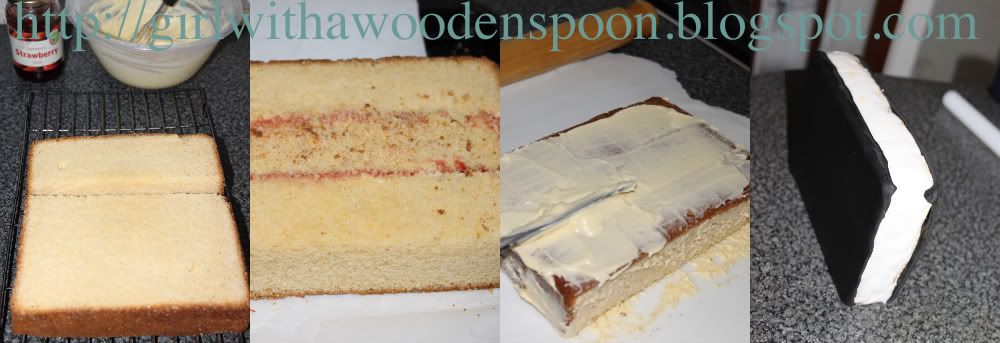
This cake isn't perfect, I know. I know it tilts, and you can see the individual layers of sponge through the icing. I think I just got pissed off with it really and just 'made do' in the end. Once I attatched the logo onto the cake, glitter got EVERYWHERE. So it was a case of sprinkling glitter all over the entire piece to make it fit in. Hmm. I think I should have used dowels in the sponge too, since it has no support in it.

I may include some videos soon. I have another Uni assignment this term to do with interactive media. Hmm, food for thought, anyways...

Happy Baking x