I was naughty with this one. I cheated :O
This post is not about the specific ingredients of the sponge, but rather about how I got on with the modelling chocolate which I used to cover and decorate my mum's two-tier birthday cake. I bought a dry Devil Food Cake mix from my local cake supply shop - I know it's naughty of me to cheat, but the lady who owns the shop adds preservatives into the mix so the cake has a longer shelf life. This cake took me aaaaaages to finish, so it was a good thing that it lasted so long. Using that mixture, you can bake up to 12 days before whatever celebration you need the cake for - it's ideal, and totally delicious!!!
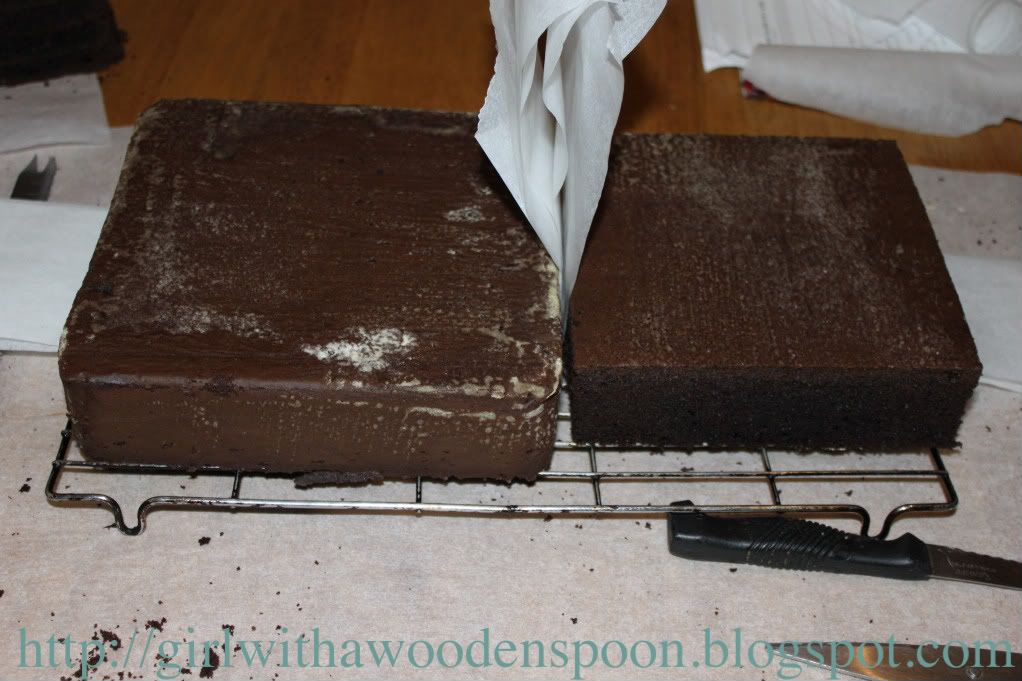
This is what the cakes turned out like before covering, and I measured my only square cake tin wrong and went out and bought another tin exactly the same size, so had to cut down the second tier veeeery carefully to add on top:
To cover the cakes, again I cheated. I bought chocolate frosting from the same cake shop - again because of the preservative qualities it has. I covered both cakes in the frosting, and then covered in rolled white modelling chocolate. To make this, you will need:
- Squire's Belgian White AND Milk Chocolate Coverture - 2 x 300g packs for each flavour
- Any good quality rolled white icing - 600g
You need to knead (haha) both icing and chocolate together until they have merged completely. This will take some time, and because of the bulkiness of the two together I broke them into smaller pieces, then merged into larger blobs once mixed well enough. The cocoa butter in the cocoform will make the mixture greasy, but in a good way, so you get the rhythym going soon enough.
Roll out like you would normal icing, with a little icing sugar for dusting. Cover each of the cakes in white chocolate first (remember, if you ice a normal cake you always do two layers, or one layer of marzipan and one of icing - this is the same principle: use two layers of chocolate) and then repeat the same steps with Milk Chocolate Coverture to cover. A little water is enough to make the milk chocolate stick to the first layer of white, do not layer with more frosting else it's too sickly!
To layer the cakes, you will need two 30cm wooden or plastic cake dowels. Cut these down to size so that they are the depth of the first layer, just slightly higher - about 1mm will do. Roughly add some more frosting onto the underside of the second tier, but not completely to the edges - the frosting will spread out too much else. Insert the cake dowels at four points in the first tier, where you know the second tier will cover them perfectly. Where you place the dowels will depend on where you want the second tier, so make sure you do this very carefully. Then simply place the second tier on top of the first, and voila!
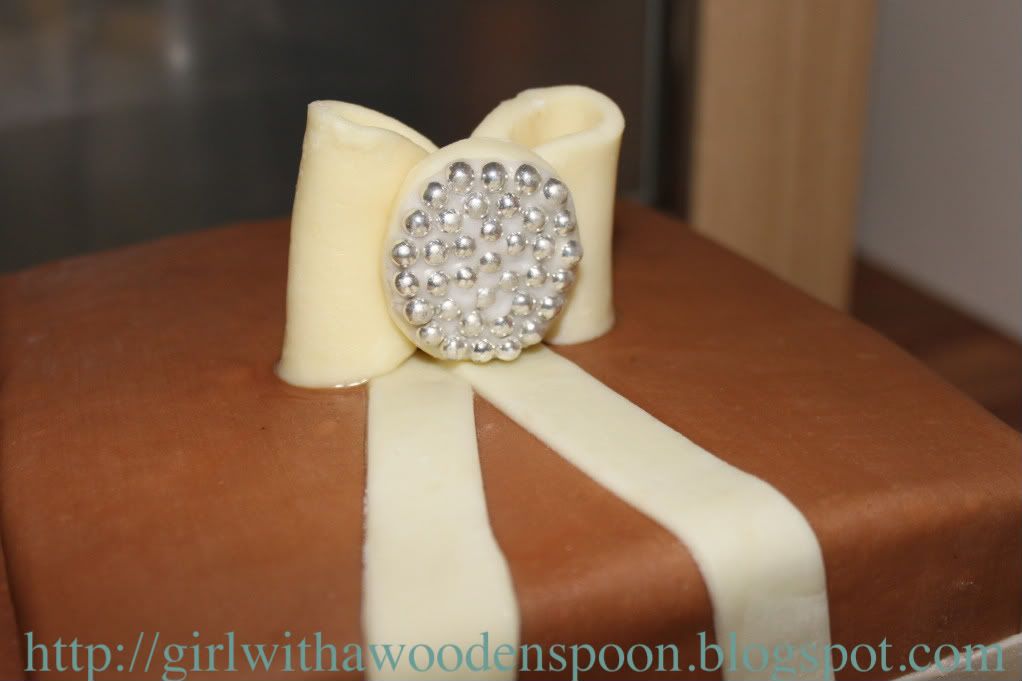
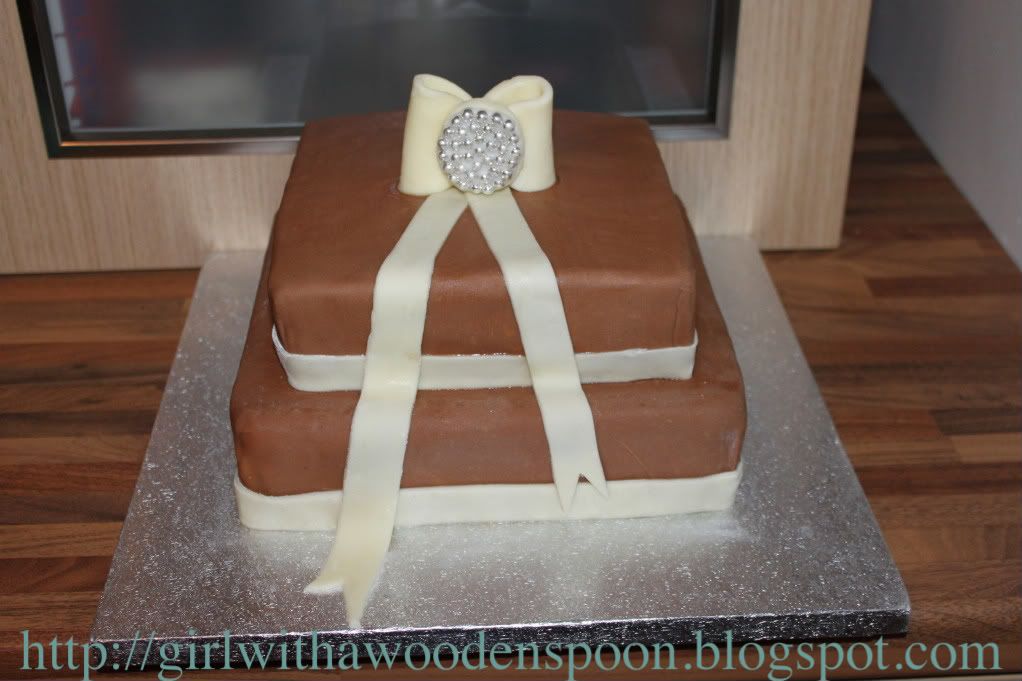
To make the white chocolate ribbon, I used some more cocoform mixture that was left over from covering the cakes. If you need to make more as necessary, repeat the earlier steps. Roll out to a thickness of about 2mm, and cut long strips for your ribbon tails. Cut a 'V' at each end to make them pretty. For the actual bow, I used a circular cutter and cut a brooch shape out. Using piped royal icing in small peaks, I attatched silver edible balls to give it that blingy look. Again with extra white cocoform, form a rough oval circle with your hand and a rolling pin. Join the two pointy edges together and pinch to stick. Repeat with a second oval, and these are the two parts of your bow. Again using royal icing, attatch the brooch into the middle of the bow and attatch with water to the ribbon tails on your cake. Hey presto!
I can't remember if I already mentioned this, but the final outcome of the cake changed considerably since the first time I mentioned it on here. I said I'd be using chocolate cigerellos, however they couldn't be ordered in time for my mum's birthday, so this is what we did instead!
Happy Baking x
Showing posts with label Chocolate Mud Cake. Show all posts
15 December, 2010
25 August, 2010
Chocolate Mud Cake
Chocolate. Mmmmm. Can't go wrong with it. I've had a few days off work lately and was really bored so I decided to test out a new recipe from a book I've got: The Home Guide to Cake Decorating - £12.99 from Waterstone's which is extremely reasonable given the amount of information and recipes it gives you on cake design.
There are two chocolate cake recipes; one is just a general cocoa-flavoured one, and the other is the one I've made - Chocolate Mud. I preferred this one, as it actually has melted chocolate in the recipe which makes the sponge a lot more moist - it was like a brownie cake! The other one will give you a drier sponge that you can buy off the shelves.
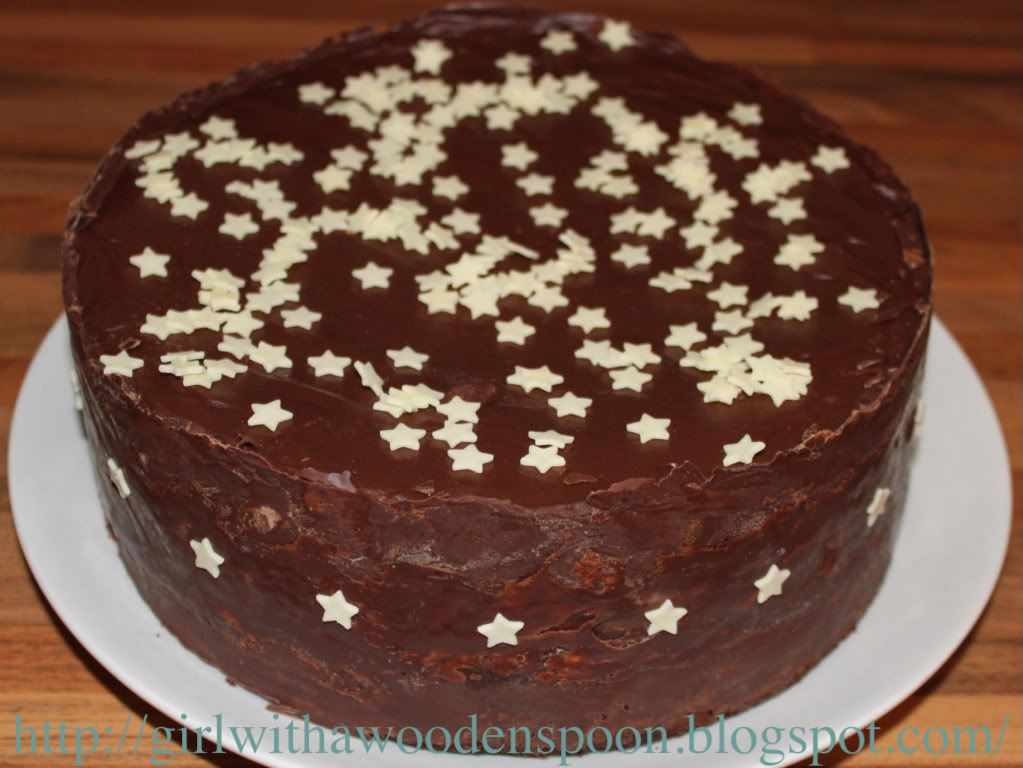
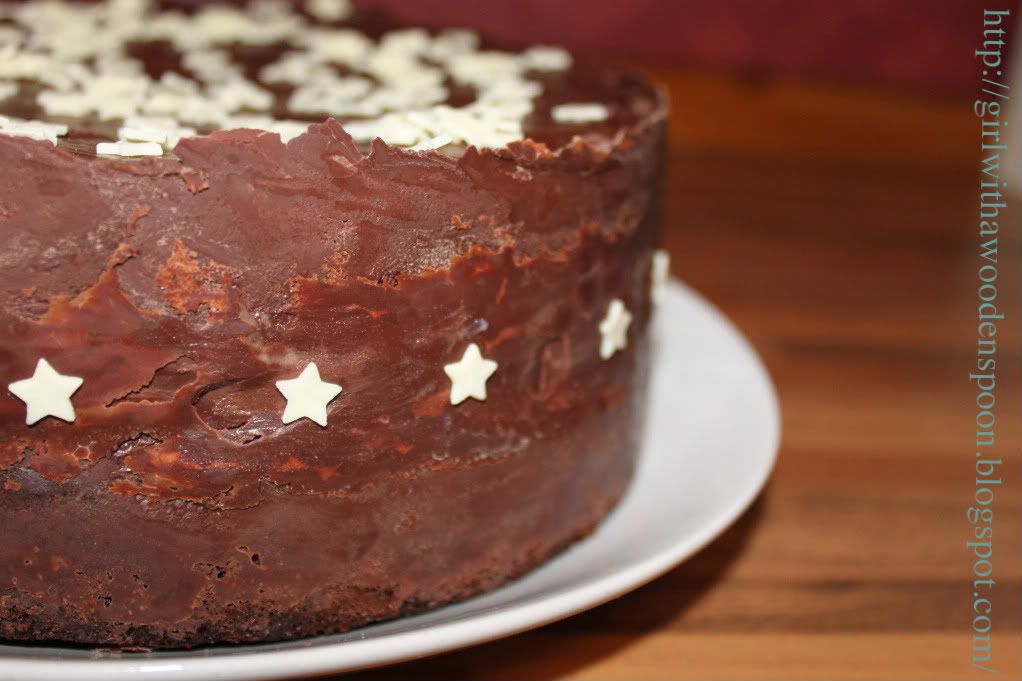
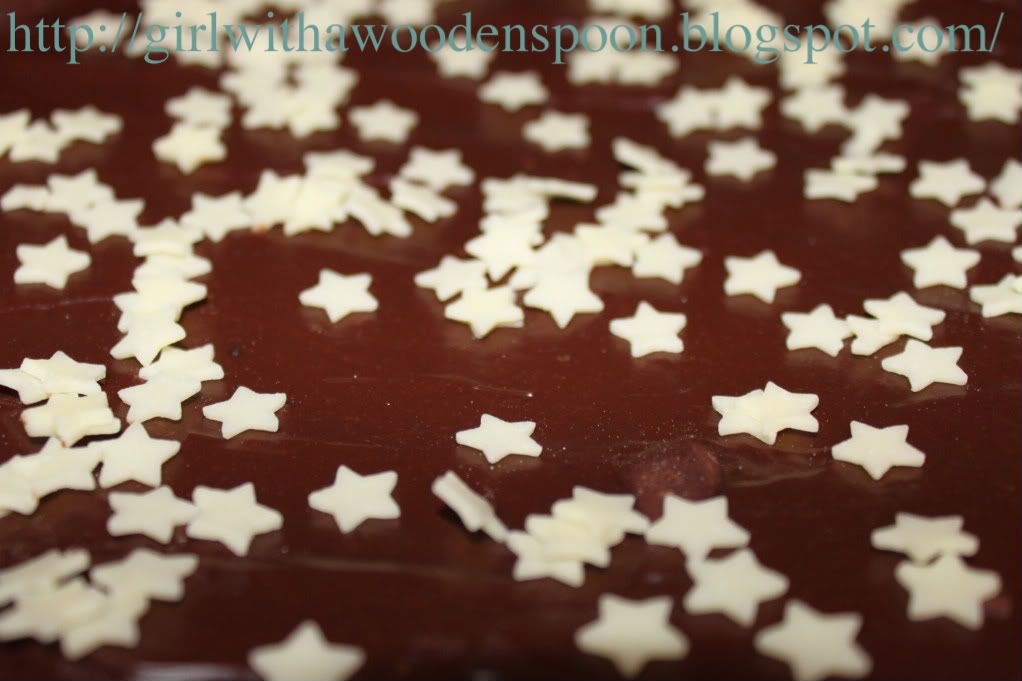
Anyway, it's not a masterpiece, I know. I was just experimenting and thought I'd share with you my ideas and tips. I simply decorated the cake with chocolate ganache, white chocolate stars, and a dark chocolate collar. This is the first time I've attempted a chocolate collar, hence the crappyness of it. But hey, practice makes perfect.
Ingredients for a 9 inch circular tin - I used two 1 inch deep sandwich dishes so that I could add a layer of chocolate ganache in between. Alternatively, use a deeper dish and just cut the cake in half:
- 7 oz Butter
- 7 oz Dark Chocolate
- 6 tsp Instant Coffee
- 160 ml Water
- 4 oz Self-Raising Flour
- 4 oz Plain Flour
- 1.5 oz Cocoa Powder
- 0.5 tsp Baking Powder
- 15 oz Caster Sugar
- 4 Eggs
- 7 tsp Vegetable Oil
- 110 ml Milk
For the Ganache:
- 5 oz Dark Chocolate
- 155 ml Double Cream
For the Chocolate Collar:
- 1 x strip of flexible plastic - I used the plastic found on the inside of Silver Spoon Ready Rolled Icing Sheets, however the picture showed the plastic you use to cover your old textbooks with - laminating stuff. Make sure it is at least a few centimetres taller than your actual cake, and enough to wrap around the whole thing, too - with a bit to spare for fastening.
- 120g Chocolate - your choice of flavour.
- White Chocolate Stars for decoration and colour.
Method:
Preheat your oven to 160'C and greaseproof paper your baking tin(s). Melt together the butter, chocolate, water and coffee in a pan on your hob. Keep stirring to prevent setting. Once completely melted, set to one side.
Sift your dry ingredients together and mix together. Make a well in the centre of your dry ingredients, and add the combined eggs, milk and oil. Add in your chocolate mixture and completely stir the whole lot together.
Transfer your mixture into your tins, and bake for 1 hour and 45 minutes. Cool for 10 minutes in their tins, then transfer onto a wire cooling rack. Remove your baking paper and level the cakes.
To make the ganache, melt the chocolate in a microwave for 30 seconds, stir, then for another 30. If there are a few small lumps, melt for 10 more seconds and stir. Mix in the cream until you have a thick consistency. This can cover the entire cake if you wish. I didn't use all of it, just enough to sandwich the two small cakes together, and to cover just the top of the cake.
Okay, for the chocolate collar: Melt your remaining chocolate using the same microwave method. Carefully spread your chocolate over your entire strip of plastic, and leave to set just VERY SLIGHTLY. You don't want to transfer your strip to the cake and find the chocolate already cracking. It needs to still be slightly warm to stick to the cake.
Carefully wrap the plastic around the cake, with the chocolate on the inside. Fasten with the remaining extra plastic, which will have chocolate on and will set like a glue.
Leave to set for an hour or so. Depending on how thick you spread the chocolate, it will take longer to set. You can check if it's set or not by carefully unravelling the strip - if it hasn't yet set, just replace again.
Finally, decorate your cake with white chocolate stars, or similar edible decorations - just for a bit of colour.
I'm quite pleased with how it turned out, but might just use a little extra chocolate on the collar next time. I think if it's thicker it will set more smoothly, instead of the rough finish I ended up with. You can also add white chocolate buttons in the strip to add interest if you want, or even the little stars. Add these to the strip first, then cover in chocolate and transfer to your cake. You'll end up with a polka-dot collar!
Let me know if you try anything better to help with the collar :)
Happy Baking!
Kirsten x
There are two chocolate cake recipes; one is just a general cocoa-flavoured one, and the other is the one I've made - Chocolate Mud. I preferred this one, as it actually has melted chocolate in the recipe which makes the sponge a lot more moist - it was like a brownie cake! The other one will give you a drier sponge that you can buy off the shelves.
Anyway, it's not a masterpiece, I know. I was just experimenting and thought I'd share with you my ideas and tips. I simply decorated the cake with chocolate ganache, white chocolate stars, and a dark chocolate collar. This is the first time I've attempted a chocolate collar, hence the crappyness of it. But hey, practice makes perfect.
Ingredients for a 9 inch circular tin - I used two 1 inch deep sandwich dishes so that I could add a layer of chocolate ganache in between. Alternatively, use a deeper dish and just cut the cake in half:
- 7 oz Butter
- 7 oz Dark Chocolate
- 6 tsp Instant Coffee
- 160 ml Water
- 4 oz Self-Raising Flour
- 4 oz Plain Flour
- 1.5 oz Cocoa Powder
- 0.5 tsp Baking Powder
- 15 oz Caster Sugar
- 4 Eggs
- 7 tsp Vegetable Oil
- 110 ml Milk
For the Ganache:
- 5 oz Dark Chocolate
- 155 ml Double Cream
For the Chocolate Collar:
- 1 x strip of flexible plastic - I used the plastic found on the inside of Silver Spoon Ready Rolled Icing Sheets, however the picture showed the plastic you use to cover your old textbooks with - laminating stuff. Make sure it is at least a few centimetres taller than your actual cake, and enough to wrap around the whole thing, too - with a bit to spare for fastening.
- 120g Chocolate - your choice of flavour.
- White Chocolate Stars for decoration and colour.
Method:
Preheat your oven to 160'C and greaseproof paper your baking tin(s). Melt together the butter, chocolate, water and coffee in a pan on your hob. Keep stirring to prevent setting. Once completely melted, set to one side.
Sift your dry ingredients together and mix together. Make a well in the centre of your dry ingredients, and add the combined eggs, milk and oil. Add in your chocolate mixture and completely stir the whole lot together.
Transfer your mixture into your tins, and bake for 1 hour and 45 minutes. Cool for 10 minutes in their tins, then transfer onto a wire cooling rack. Remove your baking paper and level the cakes.
To make the ganache, melt the chocolate in a microwave for 30 seconds, stir, then for another 30. If there are a few small lumps, melt for 10 more seconds and stir. Mix in the cream until you have a thick consistency. This can cover the entire cake if you wish. I didn't use all of it, just enough to sandwich the two small cakes together, and to cover just the top of the cake.
Okay, for the chocolate collar: Melt your remaining chocolate using the same microwave method. Carefully spread your chocolate over your entire strip of plastic, and leave to set just VERY SLIGHTLY. You don't want to transfer your strip to the cake and find the chocolate already cracking. It needs to still be slightly warm to stick to the cake.
Carefully wrap the plastic around the cake, with the chocolate on the inside. Fasten with the remaining extra plastic, which will have chocolate on and will set like a glue.
Leave to set for an hour or so. Depending on how thick you spread the chocolate, it will take longer to set. You can check if it's set or not by carefully unravelling the strip - if it hasn't yet set, just replace again.
Finally, decorate your cake with white chocolate stars, or similar edible decorations - just for a bit of colour.
I'm quite pleased with how it turned out, but might just use a little extra chocolate on the collar next time. I think if it's thicker it will set more smoothly, instead of the rough finish I ended up with. You can also add white chocolate buttons in the strip to add interest if you want, or even the little stars. Add these to the strip first, then cover in chocolate and transfer to your cake. You'll end up with a polka-dot collar!
Let me know if you try anything better to help with the collar :)
Happy Baking!
Kirsten x
Subscribe to:
Posts (Atom)