Showing posts with label Vodka. Show all posts

28 May, 2012

"I'm legit, bitch!"


I apologise for my rude title, family members :D I've recently got into Michael Patrick King's HILARIOUS new comedy '2 Broke Girl$' (in which, coincidently, the main characters are trying to build a cupcake business. Huh, go figure.) and Max receives her first cheque for a legitimate cupcake gig and screams this out to her diner patrons. Well this was my first legit gig!


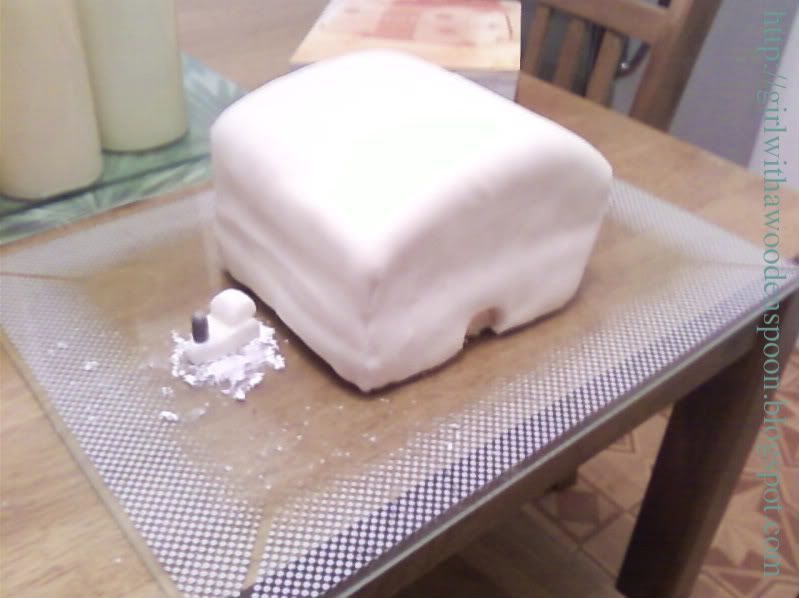
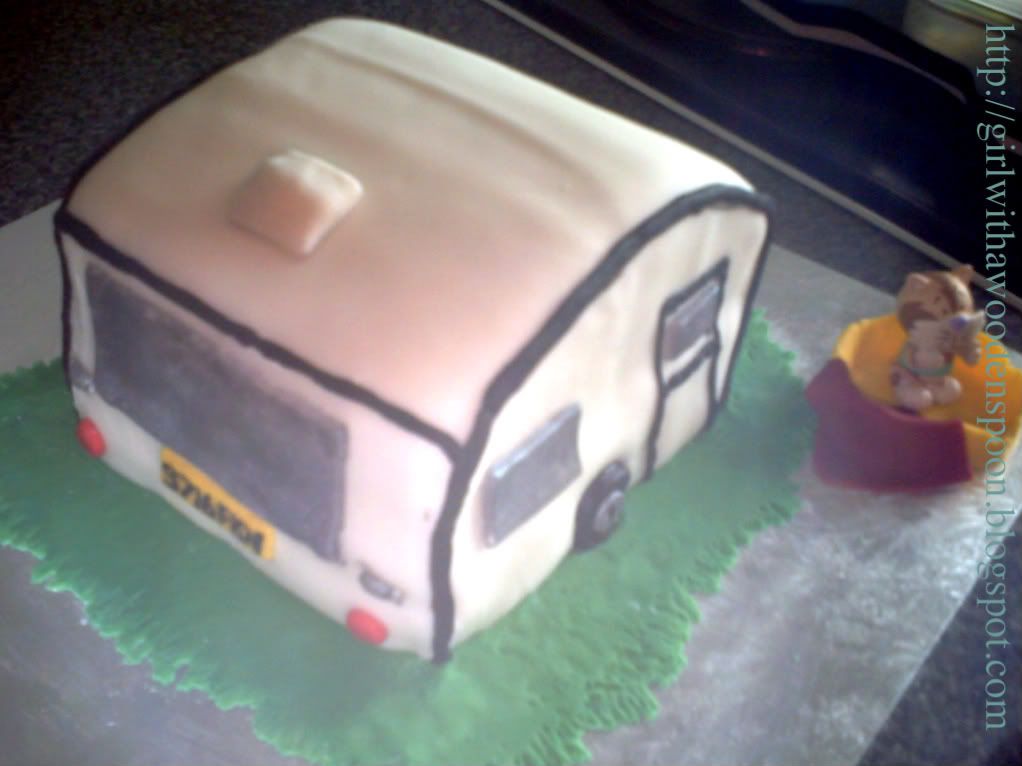
One of my brilliant friends, Tash, recommended me to her mum (the headmistress of one of Plymouth's secondary schools) when she needed someone to make a cake and cupcakes for a staff event at the school. A cupcake shop in town - which will remain anonymous, but if you live in the Muff then there's only one - charge £1.50 for theirs, and my going rate is two-thirds of that. So Tash's mum came to me and asked to create a sandwich cake to raffle off (I think, it was a long time ago now) and the cupcakes were for the staff. She just told me to decorate them colourful and sparkly!

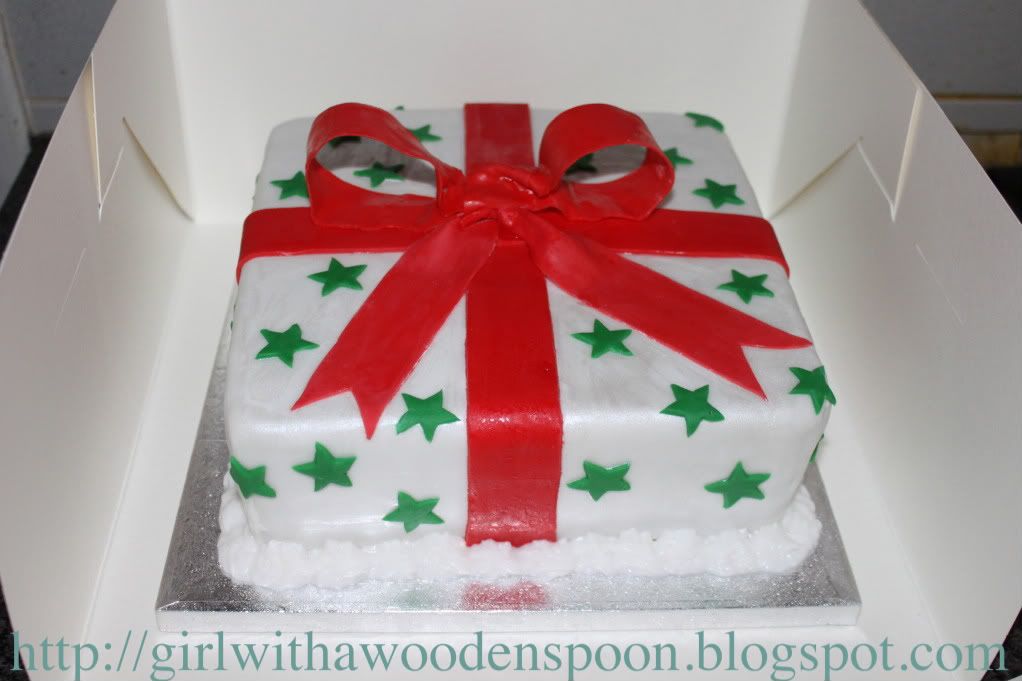
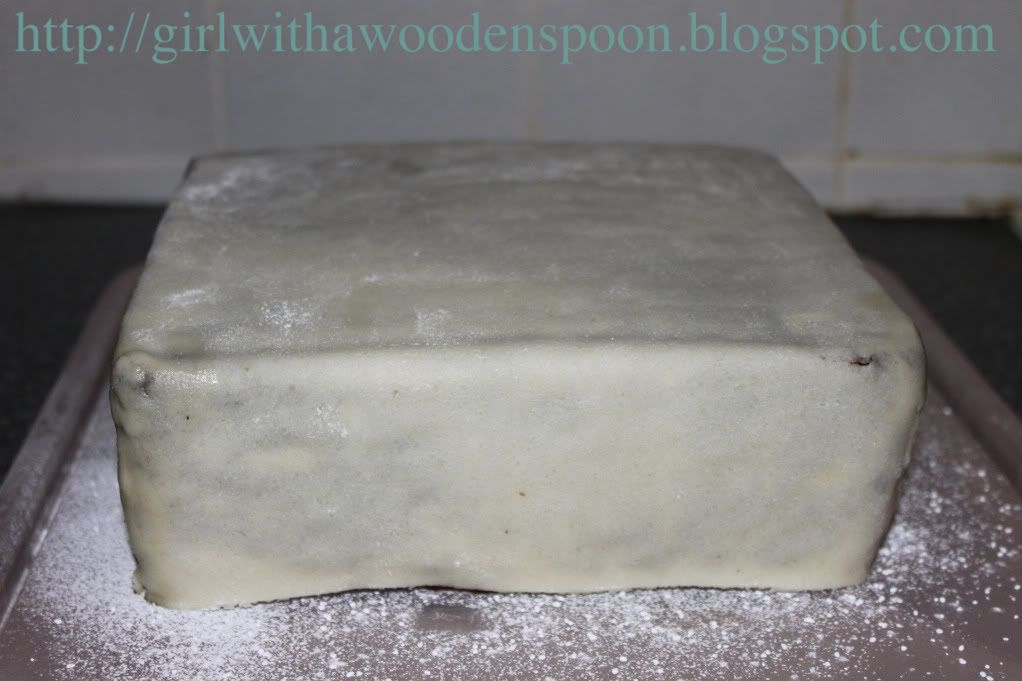
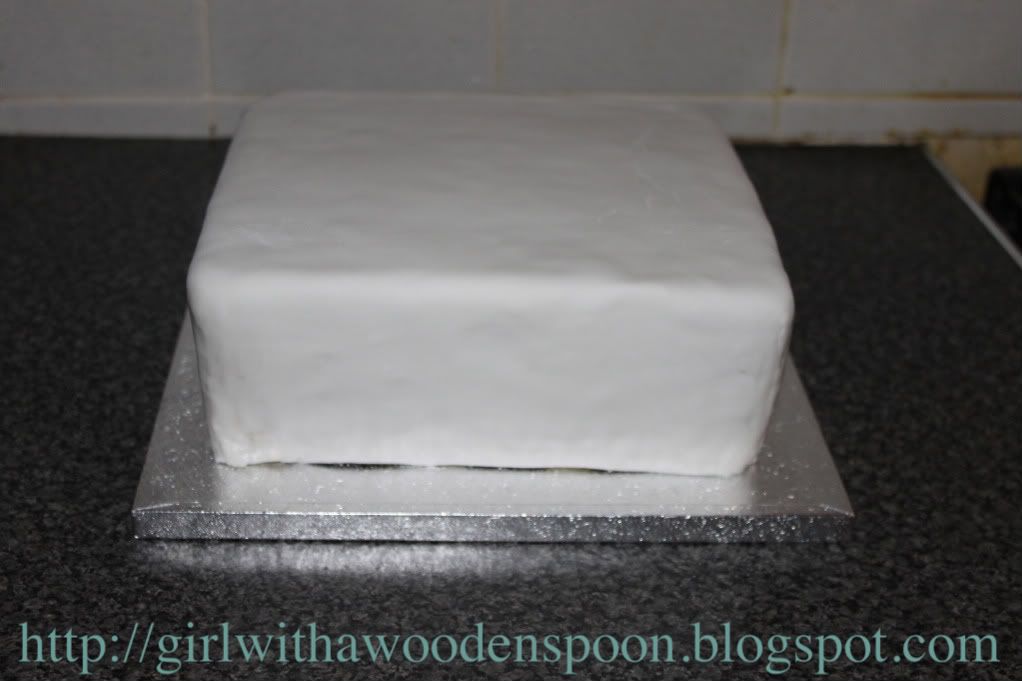
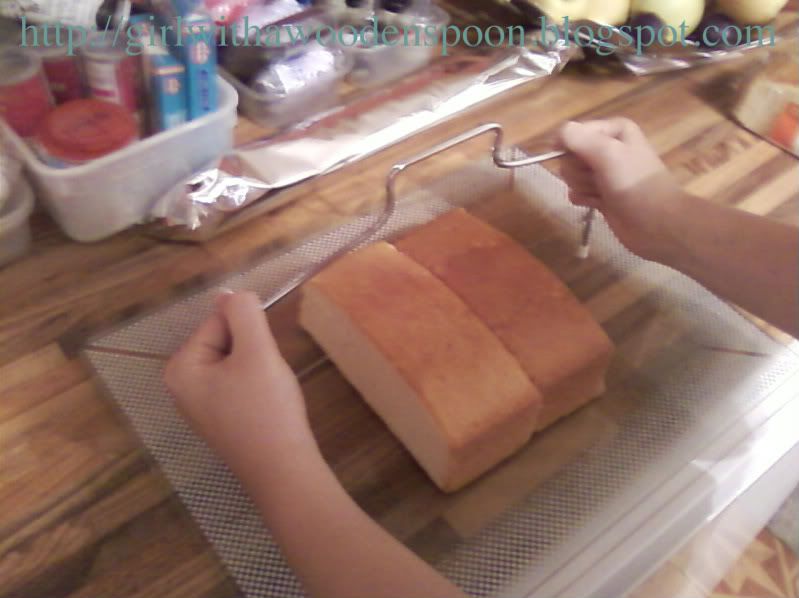
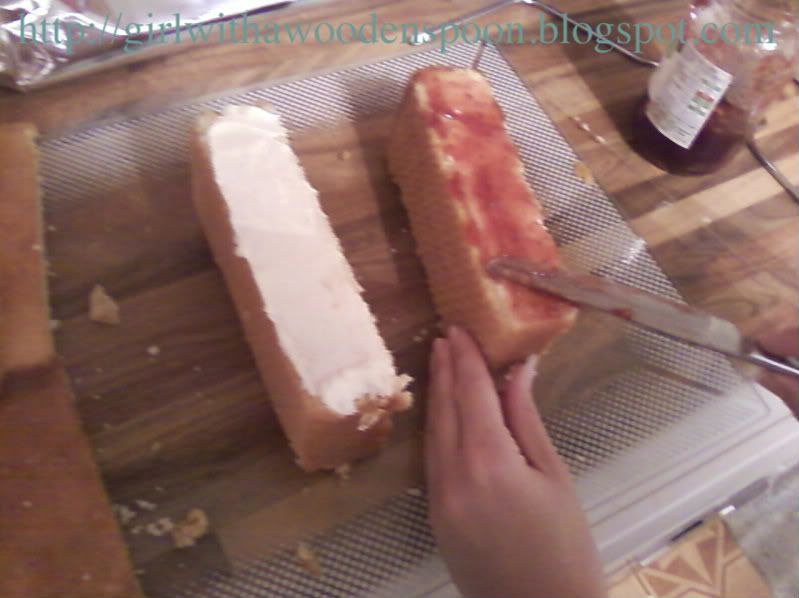
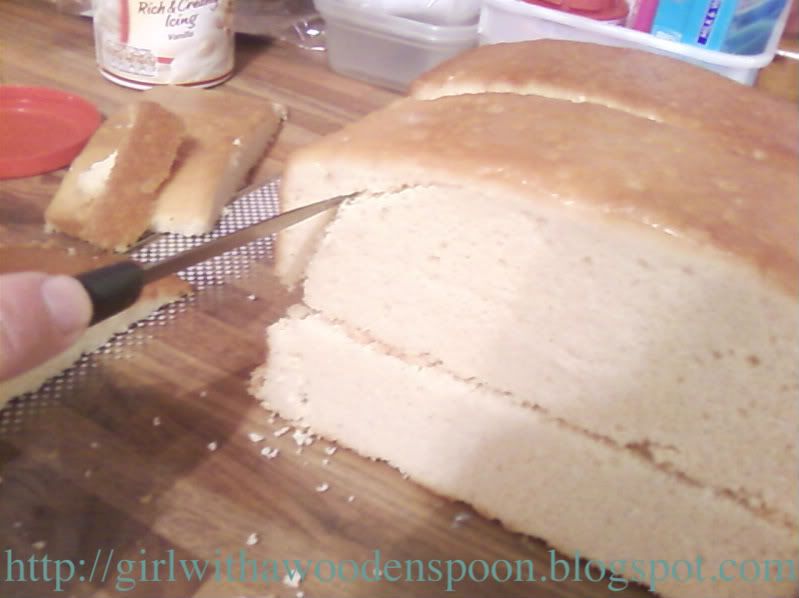
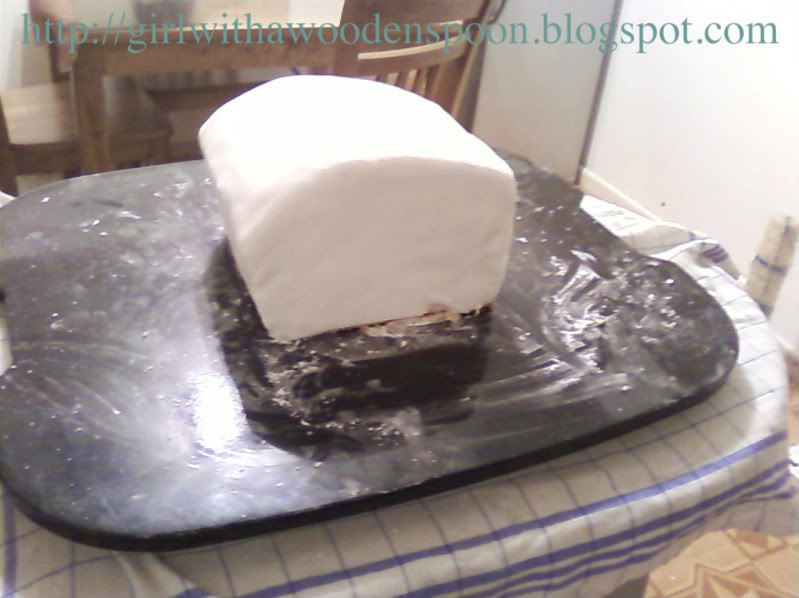
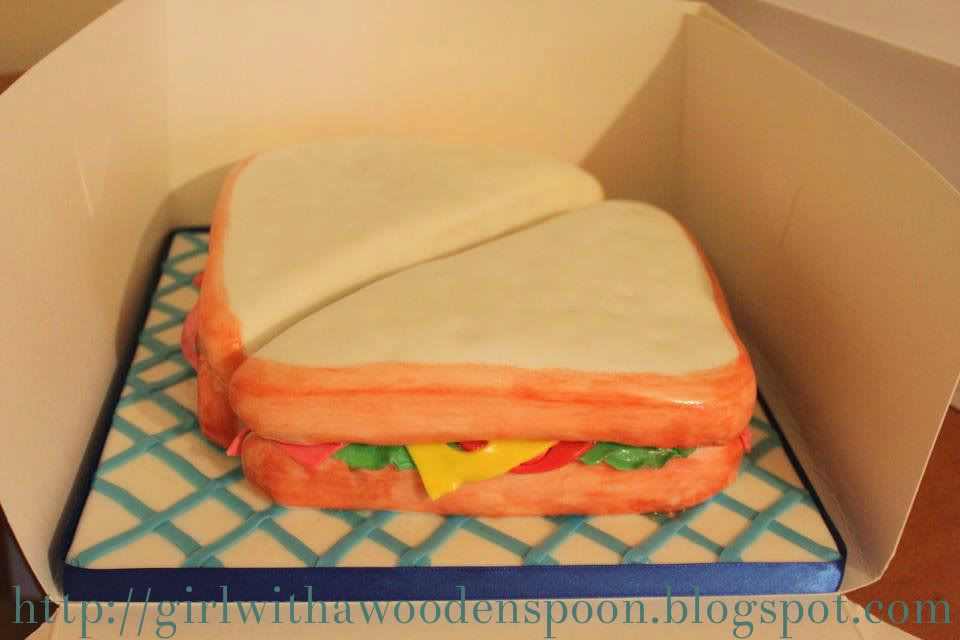
I love the sandwich cake, it was so fun creating all the fillings and it genuinely looks so edible! Hehe! I just baked two 8" square vanilla sponges and halved each of them, then covered them in white icing. I made cheese slices and poked holes through to make it look like cartoon cheese (seriously, can you actually buy cheese with holes in?), cut out round circles for tomatoes (not too much detail on the slices as I knew these would be well hidden underneath the "bread") and then streaked different shades of pink and green icing to make bacon and lettuce, respectively. I painted on bread "crusts" with brown food colouring, and dented the top of the "bread" with my knuckles to make it look loafy.

Icing on the Top:
  • I was later told that the winner of the sandwich was thrilled with her prize, which makes me happy :)
  • The loafy effect of the bread was an accident. I dented the top of the cake when I was painting on the crust by leaning my hand on the cake (not the first time I've done this, oops!) but actually it was like a happy accident, much like discovering penicillin, or my brother! Haha.
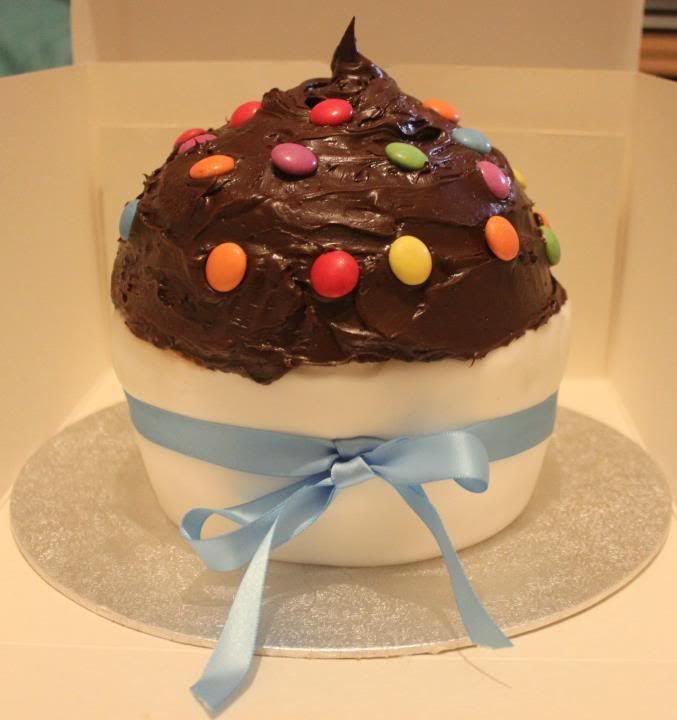
  • I had so much fun decorating the cupcakes with a range of sweets - Smarties, Magic Stars, marshmallows, sparkly sprinkles, Malteasers, etc...
  • I bought a new HUUUUUGE icing bag to decorate the cupcakes with - allowing me to ice around 25 cupcakes without stopping to refil my bag with buttercream. £8 well spent!
  • I thought the picnic-blanket effect for the cake board was very effective :) And whaddyaknow, I used my sugarcraft gun to create the long strips of blue icing!
Burnt Bits:
  • I made the cupcakes the night before they were due to go out, and the next morning found that the colouring from a lot of the Smarties had ran into the buttercream due to the moisture :(
  • The "crust" I painted on the cake ran slightly onto the cake board design. I tried my best to clear it up with vodka, but I risked ruining the check blanket effect the harder I tried. Sucky.
Needless to say, my friend's mum was super-pleased with the results, and agreed that if she ever needed me again she would be sure to call. And two weeks later she did! My first cheque from the CITY COUNCIL arrived soon after this order as it was technically a school expense. WAHOOOOO!!!

And so began my short-lived journey to official self-employment.

Happy Baking x

27 May, 2012

Cup for 'Cap


For some absurd reason, Photobucket has decided it does not want to watermark my photo.  I'm not about to go about galavanting trying to work out how to use a new photo editing programme, so I've just uploaded it as it is. If you wanna steal it, go ahead. Make my day.

This was the first time I got to use my silicone giant cupcake mould. And I did not like it. I hate the feel of silicone. For this reason, I will never get fake boobies. Aside from that, it never feels clean - always greasy. And this particular mould had many nooks and crannys that were just ridiculous to grease beforehand, so I used Dr Oetker Cake Release Spray. I do tend to use this from time to time, if I'm in a lazy mood and don't want to line a tin. It works wonders on mini cake pans, too. More on that later, though. Also, lining a tin helps give your sponge some protection from the heat, so it's always good to use greaseproof paper in your tins. But like I say, it really wasn't feasable in this cake. So good old me, I pour in my vanilla sponge mix to about 2cm below the top of the mould. This allowed for the cake to rise as necessary, but still be able to level it off to a standard worthy of cupcake proportions. I covered the moulds (incase you haven't seen them, they come in two halves - the 'case' and the 'swirl.') in tin foil and baked until a skewer came out clean. I think this was about 45 minutes - 1 hour. Bear in mind that these moulds are DEEP so you want to ensure your sponge is THOROGHLY cooked through.

I haven't even told you this cake's history yet. I used to work in a retail concession within a food store (weird, I know. I think we were the only one in the country.) and word was soon spreading among the supermarket staff that I could make cakes. I was approached by the duty manager one day who asked if I'd like to donate a cake that they could raffle off for Mencap, which is that store's chosen charity to raise money for each year. I always liked getting stuck into charity gigs at work, whether it's fancy dress, hula-hooping (yup) or - you guessed it - baking cupcakes. (Buns.) So, of course I obliged. Now I know everyone is super crazy about cupcakes so I chose this design, plus I wanted to use the mould that my friend Jodie had so generously given me after she attempted a diabolical version for her daughter's first birthday. Needless to say, I did her second birthday cake :)

I really didn't like how this cake turned out. Even a co-worker said it wasn't my best work. Wow, that was like a smack to the face, but I knew it was true. I haphazardly covered the 'case' half of the cake in white icing, prettied it up with a bow, then covered the topping half with store-bought (slap to the wrist) chocolate fudge buttercream. I applied it with a flat-bladed knife, as I knew that if I tried to pipe it on exactly as you would a real cupcake in a swirl, it would just look like a massive poo. Sorry to be so blunt!

Icing on the Cake:
  • For design purposes, it is aesthetically pleasing. Smarties works well for 'sprinkles,' and if I went too far with the decorations it would have looked rubbish and OTT.
  • It was for charity. I earned no money on this cake, and was told later that about a half a booklet of raffle tickets were sold from people wanting to win the cake. You know how thick those books come, so I'm pleased.
  • The guy that won it was on a diet, he just wanted to donate some money somehow so bought a ticket. The entire supermarket staff got to devour the cake in the staff canteen later. Win!
Burnt Bits:
  • It wasn't my best work, and I'll put my hands up to that. I can see a little dent underneath the "swirl" and I have no idea how it got there.
  • I was in such a rush that I smeared chocolate buttercream on the 'case' slightly. You can't see it, but I know it's there. I just wiped it off with kitchen roll, but if I took my time I know I could have gone to work on it with a clean piece and some vodka, bringing the white icing back to it's brilliance again.
  • The silicone mould is horrible. I DO NOT recommend it. The edges of the cake felt slightly crispy from where the sponge pretty much "fried" against the cake release spray. I'm not really sure how that ended up tasting but I did smother the thing in buttercream before covering in icing so I'm hoping that it wasn't too bad. I hope :(
  • Again, if I took my time over it, I could have really gone to town on the 'case.' I saw a technique on Ace of Cakes once, where they made an oyster cake. To get the ridges of the shell, they covered the sponge in the first layer of icing, like normal, then used a sugarcraft gun (godsend) to pipe long tubes of icing at intervals across the shell. They then covered it in the second layer of icing, and lo and behold - there were the little ridges across the shell! I could have SO done this on the cupcake wrapper to give that ridge effect. Maybe next time :(
At the end of the day, I know this cake wasn't my best work. I'm not saying it was my worst, either. You've seen my worst. But it was for charity, so it ultimately has a happy ending :)

Happy Baking x

20 December, 2010

Have Yourself a Very Grumpy Christmas!

My christmas cake is finally finished! I say finally, because I started making it back in November. That's the beauty of fruit cakes. I'm sure you already know this, but, like wine, they keep better the longer you have them. That's why the top tier of a wedding cake is traditionally fruit so the newlyweds can keep it and re-ice it for their first child's christening.
Anyway, I'm rather skint this festive period. So what better present than a home-made christmas cake?! The lucky recipient is my boyfriend's Grandad, who they lovingly call "Grumpy." He was supposed to visit relatives in Ipswich this christmas, but due to all the snow and whatnot, he's staying in Plymouth. Shame really, seeing as he could've shared the cake with everyone up there!

Would you like to know how to make it? Okay, you'll need:
- 12oz Self-Raising Flour
- 1/2 tsp Salt
- 1 dsp (dessert spoon) mixed spice (I used Christmas Spice, available from all supermarkets)
- 1 tsp cinnamon
- 1 tsp nutmeg
- A lot of fruit. I didn't measure my quantities. I'm quite bad for that. But the recipe I followed recommends 1lb per fruit i.e. ground almonds, currants, glace cherries, mixed peel (lemon and orange), raisins and sultanas.
- Rind and juice of 1 lemon
- 12oz Butter
- 10oz Dark Brown Sugar
- 8 Eggs
- 8 tbsp Brandy

1) Butter a deep cake pan. I used a square 10in pan. Line with greaseproof paper. Brush the paper with melted butter.
2) Tie a double layer of brown wrapping paper around the OUTSIDE of the cake tin, and make sure it's high enough to protrude above the rim. I don't know how, but it prevents the fruit cake from burning.
3) Sift all dry ingredients together. Stir in your fruits.
4) In a separate bowl, cream the butter, sugar and lemon rind.
5) Beat in the eggs, one at a time.
5) Stir in the flour and the lemon juice, and 4 tbsps of brandy to this mixture.
6) Add this to the dry mixture and stir thoroghly. Transfer to cake tin and level out.
7) Bake on 150'C for an hour and a half.
8) Reduce the heat to 130'C and bake for a further 3-3 and a half hours. Cover the cake with brown paper and fasten with string in the last few hours to prevent burning.
9) Remove from the oven and cool on a wire rack. Turn the cake upsidedown and skewer holes in the cake. Pour in the remaining brandy and seal in an air-tight container until needed for icing.

To Decorate:

- Marzipan
- White Sugarpaste
- Green Sugarpaste
- Red Sugarpaste
- Neutral-coloured Flower Paste
- White Shimmer Powder (Only available from cake decorating stockists i.e. Lawson Shop.
- Trex vegetable fat
- Marmalade
Okay, Trex is AMAZING for cake decoration. If you haven't already discovered it, it's a great, greasy alternative to a tonne of icing sugar when rolling icing and marzipan. It doesn't dry them out, and it's so malleable. All you have to do is rub a bit between your (washed) hands, on your rolling pin and the work surface. Roll away! (I know, I discovered it once I had actually got as far as the green stars, div.)
1) Melt a few tablespoons of marmalade in a pan with some boiled water until you have a runny consistency.
2) Paint this over your cake using a cook's brush. Cover the cake with rolled marzipan.
3) Use cool, boiled water to paint onto your marzipan before transferring your icing onto the cake. Leave to set for a day or two.
4) Mix red icing and flower paste together to create your bow. Flower paste helps icing harden, so it's ideal for decoration. Roll very thinly, and cut strips long enough to cover the lengths of your cake. Create a cross for the ribbon on your cake.
5) Take a strip of icing/paste mix the same width as your "ribbon." Pinch in the centre, and fold both ends together. Take another short strip of "ribbon" icing and wrap around the centre of the bow to hide the folds.
6) I used two plastic cylinders to keep the shape of the bow overnight, then gently remove them once you know they're hard.
7) Affix to your cake using vodka.
8) Paint your cake in a mixture of a tsp of vodka and a touch of white edible shimmer powder. This creates a nice pearly effect, and also a glue for your stars.
9) Cut lots of green star shapes using a small cutter and stick to the cake straight away.
10) Finish with royal icing piped around the edges.

Happy Baking and Happy Christmas! x

27 July, 2010

Caravan Cake

So my auntie heard about my new business venture into the world of cake-making, and asked me to make a caravan shaped cake for a work colleague who was leaving. Ironically, he hates caravans so the joke was on him, poor soul. But apparantly the cake went down a storm in the office and I thought I'd share with you how I made it :) Also, the cat in the basket was made my mum and auntie, who thought it would be funny to add on to the design - hence the shoddy workmanship of the basket and lack of scale towards the caravan. The cat is a figurine by the way, not modelled. Silly women!
(I do apologise for the quality of the photos - my SLR is at my in-law's house, and my battery ran out on my compact digi cam, so it was up to the ol' mobile phone snapper to help me document this post.)
Firstly, I made four madeira cakes in loaf tins. I'll post the recipe for this type of cake soon, as I've also made another recently. After they set, I  used my brand new Lawson's cake leveller so get rid of the lumpy bumpy bit on top of two of the cakes, giving a nice smooth top surface. I kept the other two loaves the same as when they came out of the oven, to give the curved feature of the caravan's roof.
Next, I used Betty Crocker's Vanilla Buttercream and Sainsbury's Strawberry seedless jam to create a filling and also a glue to stick the pieces together. I arranged the cakes so that they resembled a cuboid shape, and continued to fill it.
Then, I used a sharp knife to cut down one side of the cake to give the curved edging of a caravan, however I only grooved into the cake as a guideline, I used my cake leveller, and brought it down the side of the cake to give an even finish.
After this, I finished the cake off with one thin layer of buttercream, ready to stick the rolled icing onto. *Tip* When covering cakes, use either marzipan then icing, or two layers of icing if you don't like marzipan. I don't, so I used the two layers of icing, albeit very thin - it would be too sickly. To stick the two layers together, I used a cooking brush and boiled water. Boiled apricot glaze also works, or even a clear alcohol like vodka for all you alcys :P When covering a square shaped cake, pinch the corners together and cut them off, then use a sharp knife to get rid of the excess edges at the bottom of the cake. Remember to keep your hands well dusted with icing sugar whilst handling icing.
I let the cake set for about 3 days before decorating, so that the icing could dry out and make it easier to assemble objects on to. The little blob of icing on the side of the cake is the towing bar you see on caravans - I used an edible silver spray to get the metallic look on the hook, and inserted into the tow with a small bit of a cocktail stick, so it stayed upright.
Use your imagination when it comes to modelling, use paint brushes, cutlery items, modelling tools - anything you can get your hands on to give different effects. For example, if you were making a sugarpaste person, put a blob of sugarpaste through a garlic press to make their hair! The numberplate is also writen in a liquorice edible writing pen, and also happens to be the guy's own numberplate for his car. Add personality to your projects!
Anyways, that's all on the caravan cake stuff. Sorry it's been so long (again), I've been in Barcelona for a week and such like :D But on the plus side, I got my results back for my 2nd year of uni, and am happy to report that the highest marks I got were for my blog (yes this actually did start out as a uni project!). A lovely 2:1 overall for the year, and only one more to go!

Happy baking munchkins.
Kirsten x