Showing posts with label Pyrex. Show all posts

09 June, 2012

For an Old Wrench


So you saw in my last post that I was under a bit of pressure as I had that cake PLUS this one to do all in a day - my head was a bit fried by the end of the weekend as I ended up going to both parties, too!

I love this cake, it was such a talking point at the party! I delivered it to Jim's mum before we headed out to an engagement party, but the cake box was sellotaped down so I could give the cake the big reveal to her when we came out later in the evening.

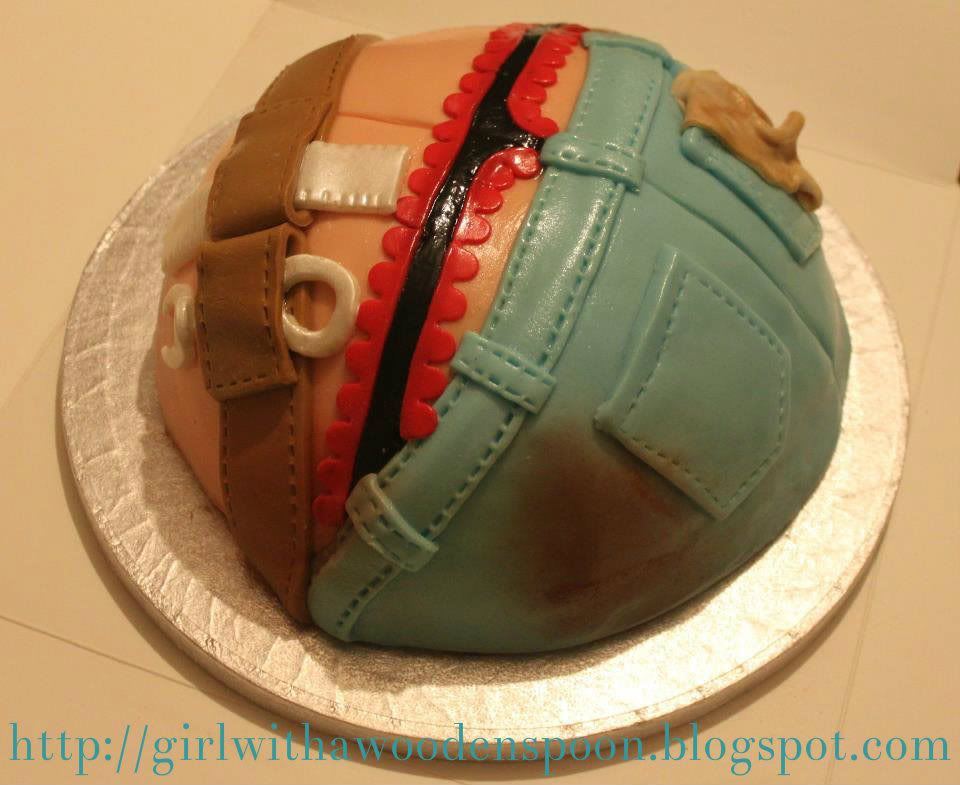
For christmas my darling bestie, Abby, gave me a rude cake book. One of the cakes is a builder's bum, and I showed the book to Jim's mum later - she loved the builder's bum and made a joke about having a plumber's bum cake for her birthday and then left it. Of course, I took note on what she said and when it came to her birthday I made sure I was the one to be making her cake as I had a suprise for her. You see, she's training to be a plumber, and she's bloody brilliant at it!

So I made the necessary changes to this cake to make sure everyone knew it was a female bum by adding in the frilly thong and sparkly (although you can't see it) plumber's tools. I used my ribbon cutter tool with the serrated edge to give the stitching effect on the jeans and plumber's belt, and dabbed edible lustre dust in Terracotta on the bum to give the "dirty" effect. I marbled brown and white icing to give the effect of a dirty rag and tucked it into the jeans pocket, too.

Icing on the Top:
  •  Jim's mum, Tanya, was over the moon with her cake, and couldn't stop showing her guests. Always a good point :)
  • I'm really pleased with how much detail I gave the bum. Having a rather nice one myself, I pride myself on the detail in that area. Haha!
  • Another successful Pyrex bowl cake!
Burnt Bits:
  • I made this chocolate cake about a week in advance because I knew how busy I'd be with the engagement cake, too. I then froze the cake, which I've read a lot about. It didn't taste bad - it was nice - but fresher is always better.
Still to this day, Tanya raves about her cake :)

Happy Baking x


06 June, 2012

Cake Baby


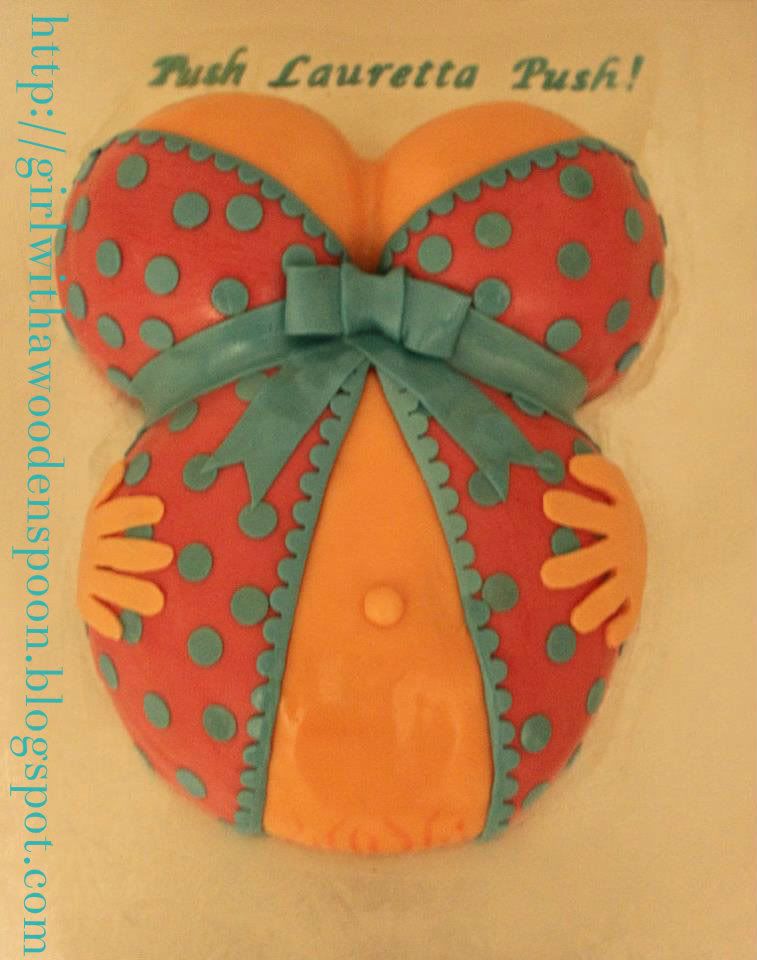
I had a lot of fun on this baby! (Haha, pun intended!)

Now my dear friend, Jodie, had a most unusual request for this cake. It was for her best friend's baby shower, and she wanted something... A little unusual. She had seen pictures of "funny" baby shower cakes, and wanted one like that as you always see the same baby pink/baby blue teddy-bear infested pile of vom. However, these weren't "funny" cakes - they were downright horrid! (Picture this cake, with a hand sticking out of the belly holding a sign saying "Nearly there!" Um, no. Just no.)

I managed to convince her to go a little more conservative, and at most I allowed the inclusion of painted-on stretch marks at the bottom of her tummy. I did add some on her boobs, too - but they just looked like stink marks you put on a cartoon. So I promptly removed them with the aid of vodka and a cotton bud :)

Icing on the Cake:
  • The shape of the cake was created by baking the boobs and tummy separately in glass Pyrex bowls. I know you can get dome-shaped cake tins, but when I went to hire them from my usual place, someone already had them. It was the cake shop owner's idea to bake the cakes in bowls - and when I asked if that was safe to do she reminded me that we bake everyday in glass (casseroles, lasagnes etc. Duh!). I greased the bowls first in Cake Release Spray and filled each bowl to about 2cm below the rim to allow for the cakes to rise. I always bake any cake for 15 minutes uncovered first, to get a lovely golden glow across the top. Then I cover the cakes in tin foil and I baked for another 40ish minutes (depending on the size of your bowl this will vary cooking times. Remember your bowls are DEEP and you want them cooked right through!!!
  • I got loads of compliments just on the basis of the babydoll design. Obviously a hit! I love creating sugarpaste bows so I had to include one on there somewhere!
  • This was lemon drizzle cake. 'Nuff said. Mmmmmm.
Burnt Bits:
  • As previously stated, the bowls I baked these in are very deep, which is annoying as you don't want to keep removing the cakes from the oven too many times to check if they're done. Always check them with a skewer. When you come to half the cakes to spread a filling inside you'll soon find out if you took them out too early (which I've done!).
  • I don't like the quality of the picture. I used the PME Clear Finishing Spray again on this one but it just looks wet.
  • This cake was huge. I used a 14" x 16" cake board just to give you an idea of the size. It was only meant to feed about 20 ladies so I'm assuming there was lots left over. No biggie though - better to be bigger than too small.
  • The hands. Jodie wanted them on there. I don't like them. That's all.
On a final note, I want to give a special mention to Jodie's adorable 2 year-old, Fliss. Upon Jodie turning her back on the cake, Fliss proceeded to push her toy box up against the table the cake was on, climb up on said box and promptly POKED the cake in curiosity. Needless to say I had frantic messages from Jodie asking what to do to salvage the cake, but by the time I realised what had happened she had managed to sort it out! Her daughter really is adorable though, so I'll let her off :P

Happy Baking x

08 June, 2011

Can You Make a Corset? 'Course I can!

I'm heading ever-nearer to the June cake overload I have in 2 weeks, and I'm petrified!

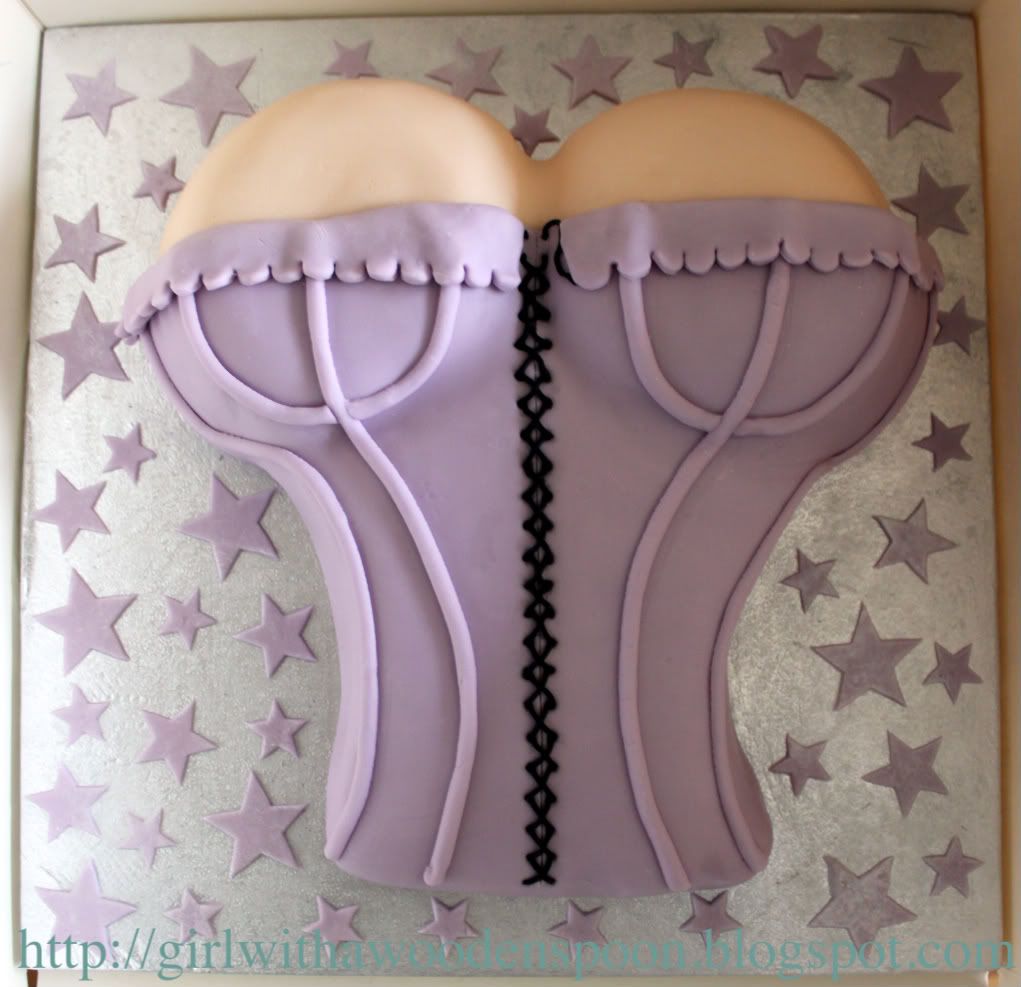
So I had an easy one last week - the boyfriend's 22nd birthday! Jim didn't know what he was getting, and a few months ago all he suggested was "boobs." Hey ho, let's go! I've got the design to this cake in a book I got for christmas, and I thought it was a saucy (and err.. Classy?) version of the general tongue-in-cheek kind of naughty cakes you get.
I had a really big problem though - the boobs. How in the world do I make a boob out of cake? I know you can carve cakes to the shape, but I'm not very good at that. If I bugger up, that's it - back to square one. In the book all it said was to use "bowl-shaped cakes." Hmm. My local cake shop actually stock spherical tins (a ball of cake, what what?!?) so I thought yeah I could use them and just half the ball, but they were out for hire at the time I needed them. Crap! So I suggested to the shop owner that I had a (very) small Pyrex glass bowl - would that work? "Yes! It's oven-proof, just like when you make a casserole in a glass dish and bake it," she said. Duhhhh, what an idiot :P

So I painted the inside of the bowl in butter using a pastry brush, and added in the mixture. Baked for about half an hour, as of course the bowl is a lot deeper than a general sandwich tin. When the skewer came out clean, I carefully used a knife to ease the edges of the cake from the bowl, and it turned out a peferct boob shape!

The chest is just a usual 10in square cake, double-layered. I made a boob of it (de-dum-dum!) though, as when I had adjusted the shelves in my oven to let the cakes rise nicely, I accidently re-inserted them at an angle, and I couldn't understand why when I took the square cakes out, they had only risen on one side, and then gently sloped down the other. Oh god! What a blessing in disguise this was!! The instructions in the book had suggested that to make the chest of the corset, to carve it down to her waist, so it was higher near her boobs. Because of my error, no carving was necessary - the cakes sloped naturally down - hahaha!

I covered the cakes in the usual way, just separating the colours as I did so: the flesh icing covered the boobs, the lilac on the chest. I scored a line down the centre of the corset for the join, and then used the end of a thin paintbrush (one I only use for baking!) to make small holes either side of the line. Using my sugarcraft gun, I used a tiny circle stencil in the end of it to push out lengths of thin black sugarpaste, which were then cut to size and attached to the holes with edible glue in a criss-cross pattern. Using a slightly thicker circle stencil, I pushed out lengths of lilac sugarpaste for the corset bones. For the frilly edge at the top, I used a garrett frill stencil (it's like a circular cutter, with a frilly edge) to cut out a length of frill.

Jim was very happy with his boobs :)

Remember: Cakes by Kirsten can be found on Facebook!

Happy Baking! x