
I've recently posted on my Facebook a mass call out to anyone who wants a cake doing, and suprisingly, I've already got another wedding cake to do this year! Ahh!! What's more, it's my friend Jodie's cake - she's a complete chocoholic and so she wants an EXTREMELY chocolatey cake. There is a little shop on our seafront that specialises in chocolate celebration cakes, but to be honest they are totally overpriced and frankly quite rude in there, too. No wonder Jodie came to me!
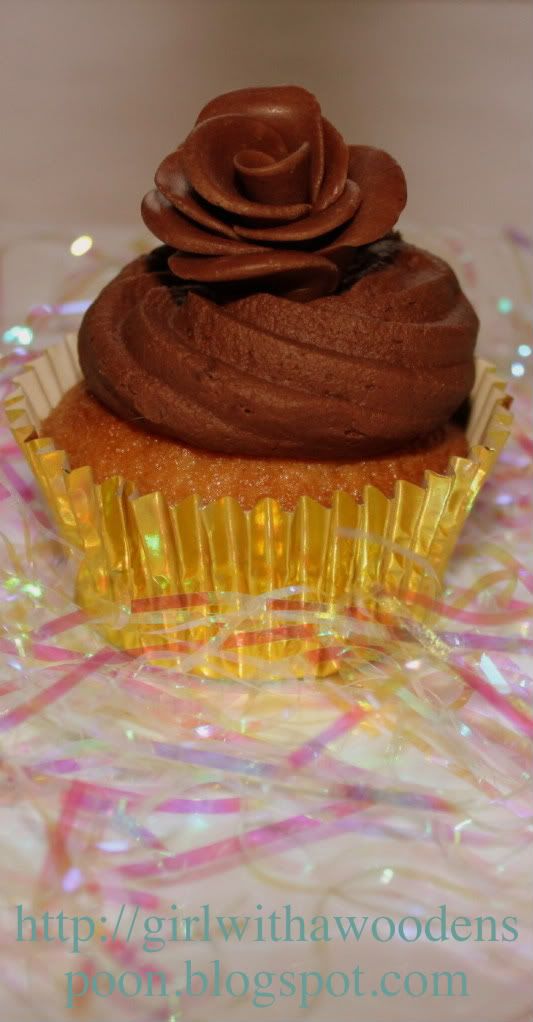
With this in mind, I had to get a riddle on with getting to grips with cocoform. She doesn't know exactly what she wants, but I best be prepared for whatever she asks for. I dabbled in cocoform for my mum's 50th cake, but mostly that was just rolling it over a cake, with a little white chocolate bow. I need to challenge myself.. So I made chocolate roses today. I got a tiny pink mixing bowl complete with wooden spoon and sponge mix for christmas, and didn't want to waste the sponge mix. I made a few cupcakes with the mix, and decided to decorate with chocolate buttercream and chocolate roses.
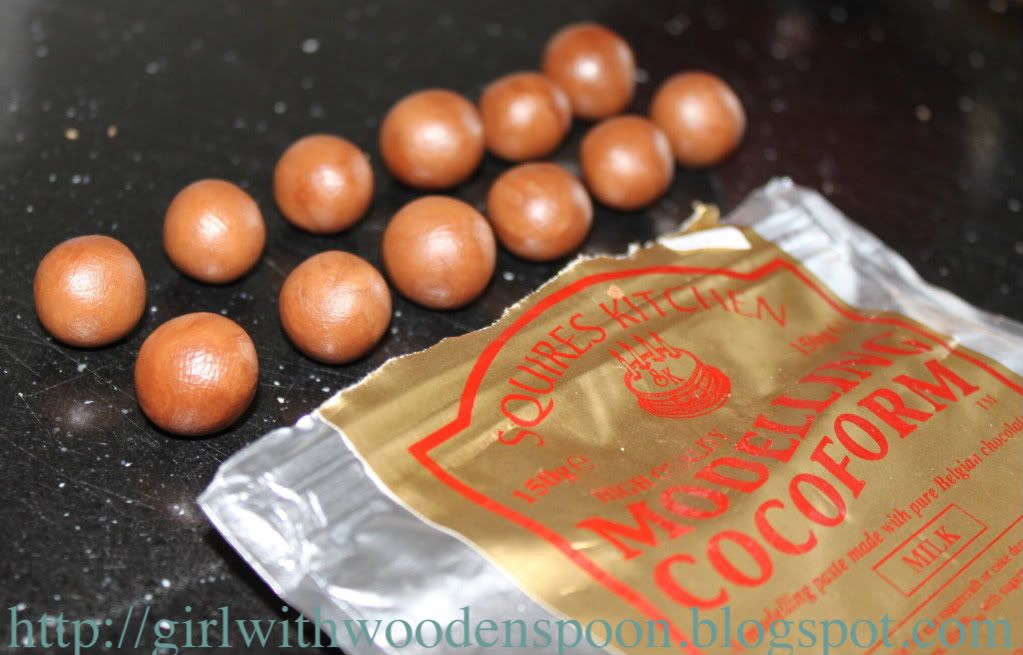
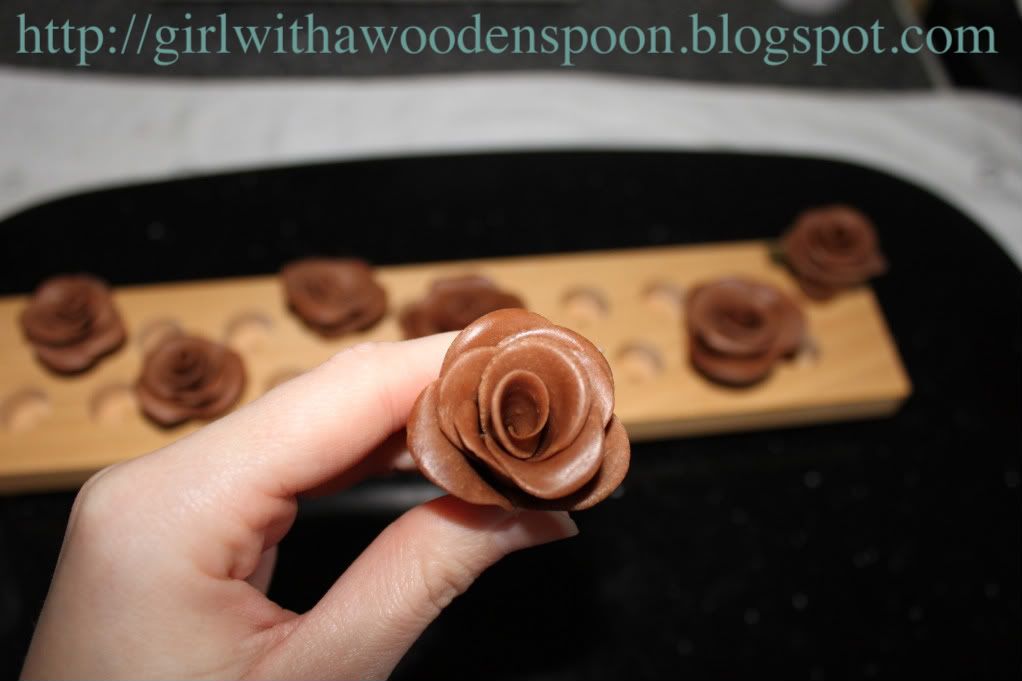
To make 7 large chocolate roses, you will need:
- 100g Milk Chocolate Squires Modelling Chocolate. This comes in at around £5 for a pack of 150g - so use wisely!
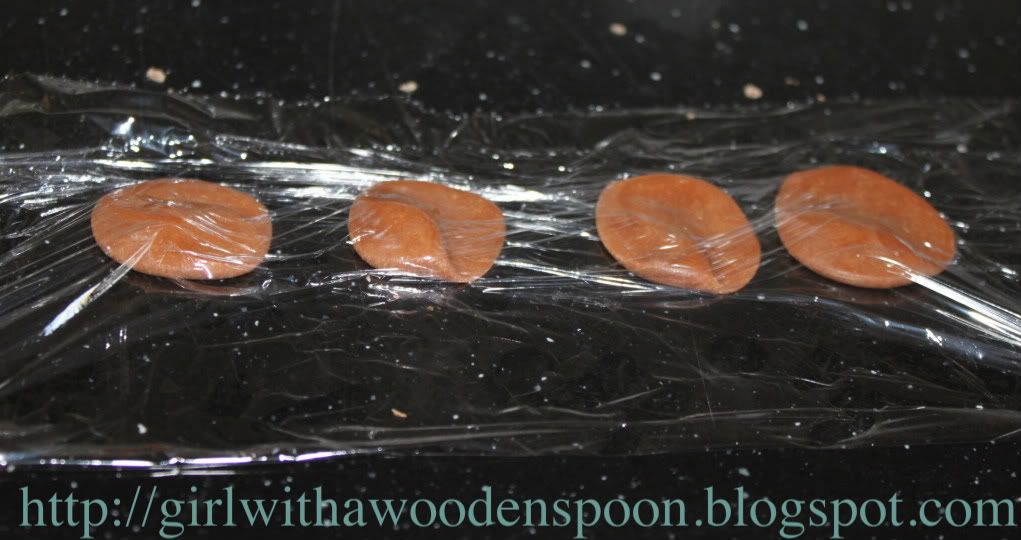
- Cling film
Method:
1) Knead the cocoform until pliable. The natural cocoa butter will lubricate the paste, so there is NO NEED for Trex or icing sugar.
2) Take off little pieces of cocoform and form into balls a little smaller than Malteasers, but all different sizes.
3) Tear off a piece of cling film, and place a few balls of cocoform onto the film. Pull over one end of the film to cover the balls.
4) Flatten each ball using the palm of your hand, then carefully smooth over two thirds of the petal pieces using the edge of your thumb. This will make it easier to mould the petals to make them look more realistic.
5) Take a small petal and curl it around itself using your thumb and forefinger. This will be the centre of the rose.

6) Gently add more petals to the centre of the rose, attaching them naturally with the cocoa butter in the cocoform. Use bigger petals towards the end of the rose, and curl the edges to make them a little wilted.
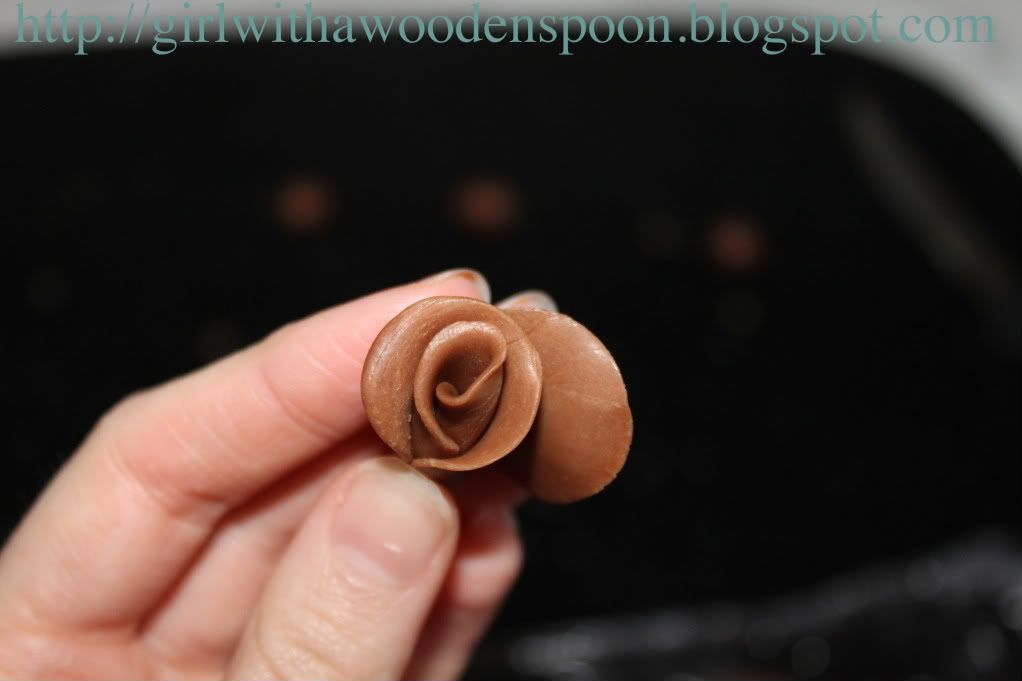
7) Cut off the bottom of the rose once finished, you will find that it gets quite fat with every layer of petals you add. I find that 8 petals is the average for every rose.
What do you think? Stick to icing flowers or do these look alright for a first-timer? :D
Happy Baking x
You're so talented! I love these little icing flowers, they look like you've been doing them for ages!
ReplyDeleteIf i lived nearer you i'd order a cake just because they look so good! x
These look so good! It honestly doesn't look like your first time making them. The cupcake looks delicious x
ReplyDeleteThanks very much girls, took me so long to only make 7 roses and I've come across recipes for cakes that ask for 100.... Hope I don't have an order like that soon! :D xxx
ReplyDeleteWow that is amazing, you are so talented! x
ReplyDeletewow. i actually missed this post.. why didn't you tell me about it? :O These look amazing! Dead impressed missus :D xx
ReplyDeletep.s i'l like a massive heart cake covered entirely in chocolate and pink roses, if you can ;) mwahaha xxly!
ReplyDeleteThanks missus! For your birthday? I can but try! :D Jim's getting a heart shaped valentine's cake with red roses, talk about stingey.... :P
ReplyDeleteThese are so pretty!!
ReplyDeleteWow!!!! Defo somethin to try with my nana!! Rebecca xx
ReplyDelete